Welcome to  -
Marg Books
-
Marg Books
Home > Marg Book > Company Details > How to Create / Modify / Delete Company in Marg Books ?
How to Create / Modify / Delete Company in Marg Books ?

Overview of Company Creation in Marg Books
Process of Company Creation in Marg Books
Process of Company Alteration in Marg Books
Process of Company Deletion in Marg Books
OVERVIEW OF COMPANY CREATION IN MARG BOOKS
- The main purpose to create a company is to start working in software and to maintain the basic or relevant details of the company during creation i.e. company name, address, GSTIN, business type etc. which allows it to automatically carry out the transactions as per defined information.
- With the help of creating a new company in Marg Books, the user can easily keep/store all the relevant information at one place.
PROCESS OF COMPANY CREATION IN MARG BOOKS
- Login to Marg Books with ‘E-mail/Mobile No.’ and ‘Password’.
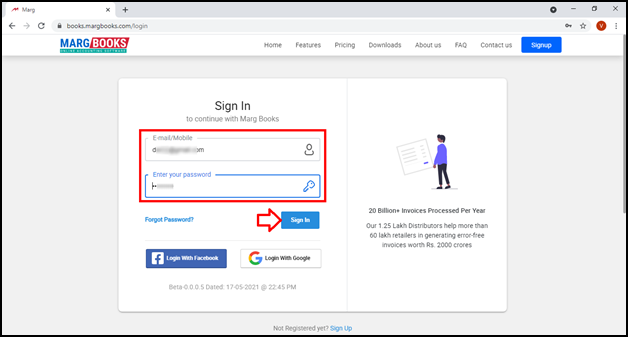
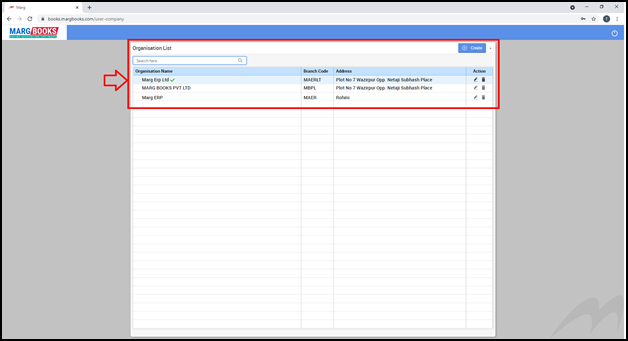
- A window of ‘Organization List’ will appear.
- The user will click on ‘Create’ tab in to create new company.
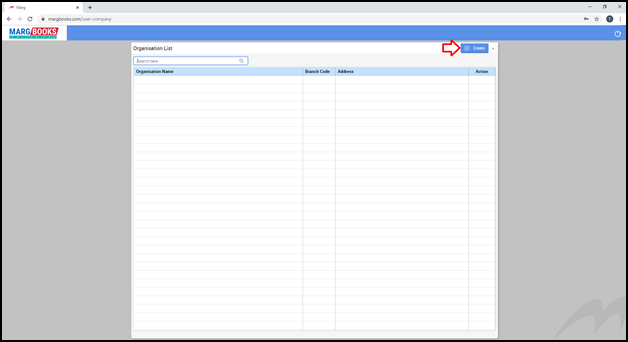
- A window of ‘Create Company’ will appear with different fields.
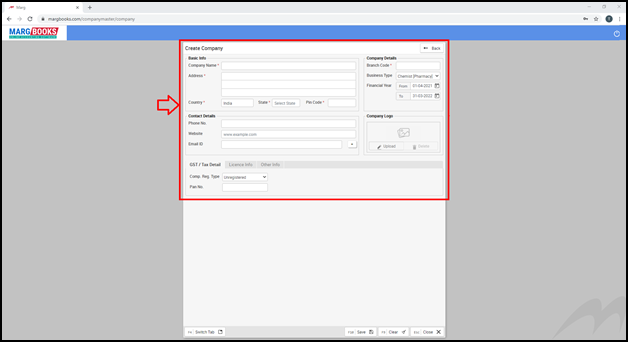
The fields with an asterisk (*) sign are mandatory to be filled.
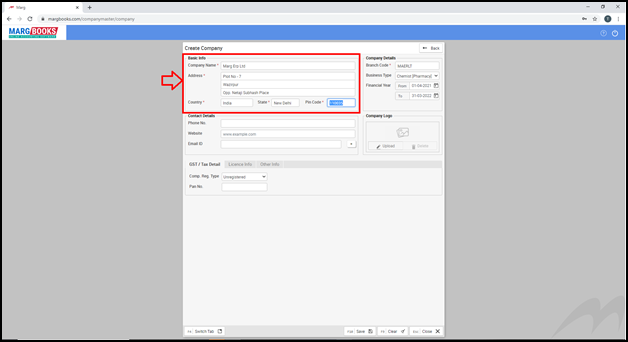
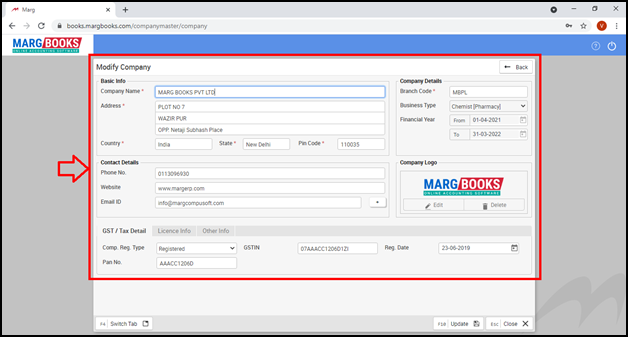
A. Basic Information
- Company Name: Mention the name of the company that the user wants to create. Suppose mention Marg ERP Ltd.
- Address: Mention the address of the company. Suppose enter Plot no. 7 Wazirpur, Opp. Netaji Subhash Place.
- Country: The country name will be set as India by default. If the user belongs to out of India then by pressing ‘Spacebar’ key, the user can change it as per the requirement from the dropdown of ‘Country’ field.
- State: The user will press ‘Spacebar’ key and will select the state from the dropdown of ‘State’ field as per the requirement. Suppose select ‘New Delhi’.
- Pin Code: Mention the Pin Code of that particular area in which the Company is located. Suppose mention 110035.
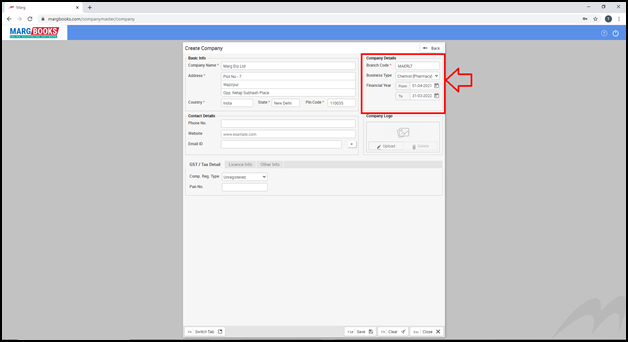
B. Company Details
- Branch Code: The software will auto pick the Branch Code on the basis of the Company Name.
- The user can also change & mention the Branch Code as per the requirement. Suppose ‘MAERLT’.
- Business Type: The user would define business type as per the nature/trade of the business. Suppose select Chemist [Pharmacy].
- Financial Year: By default, the Financial Year will be set according to the current financial year.
- The user can change the financial year with the help of Calendar icon according to the accounting financial year.
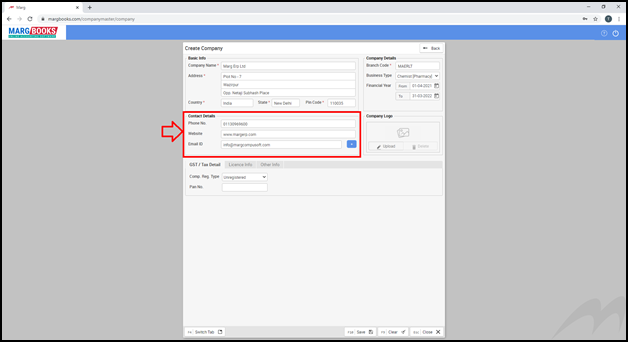
C. Contact Details
- Phone No.: Mention the contact details of the company.
- Suppose enter 01130969600.
- Website: Mention the name of the company’s website.
- Suppose enter www.margerp.com.
Email ID: Mention the email id of the company.
- Suppose enter info@margcompusoft.com.
- The user can also add multiple E-mail id’s by clicking on the ‘+’ sign.
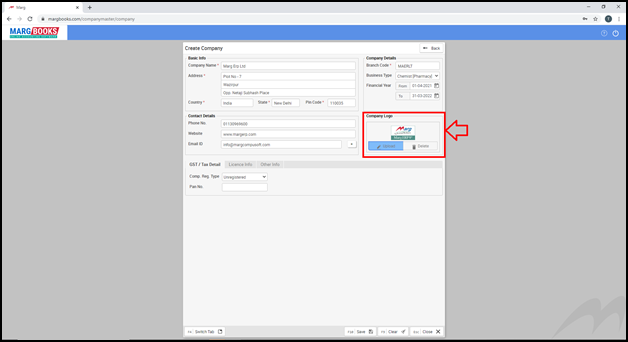
D. Company Logo
- Company Logo: The user can upload the company logo as per the requirement by clicking on ‘Upload’ button.
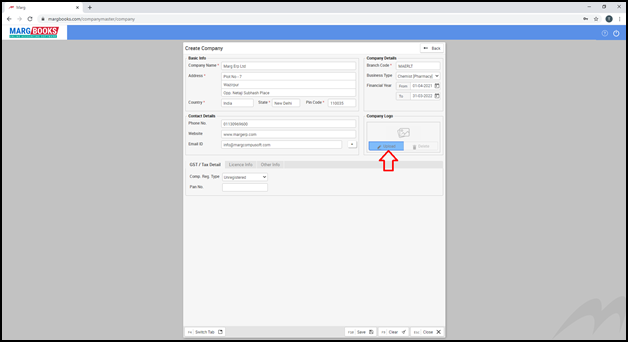
- Then browse the location & select the logo where it is saved and click on ‘Open’.
E. GST/TAX Detail
- Comp. Reg. Type: 3 options appear under Company Registration Type i.e. Registered, Composition and Un-registered. Select the option/category as per the requirement.
- Suppose select ‘Registered’.
- Press ‘Enter’ and the GSTIN & Reg. Date fields will get added.
- GSTIN: The user will fill the GSTIN number here.
- Reg. Date: Mention that date at which the GSTIN number has been issued.
- PAN No.: Mention the PAN No. as per the requirement.
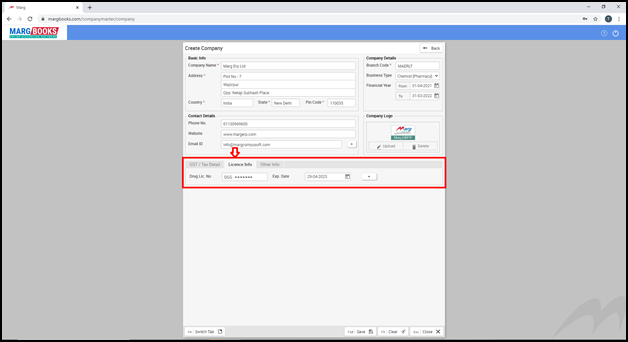
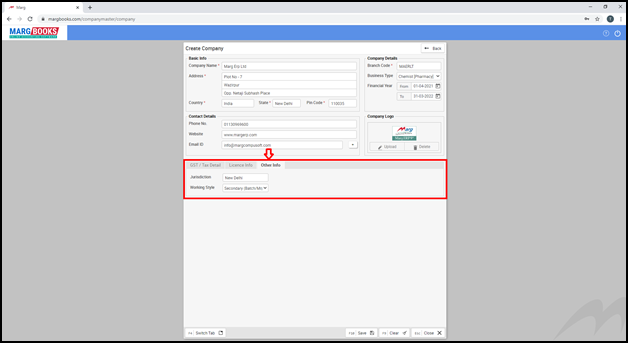
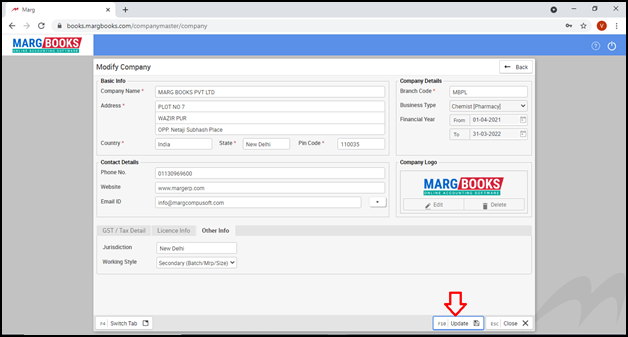
F. Other Info
- Jurisdiction: Mention the city from which the company belongs. This field is auto picked on the basis of the City.
- Suppose enter New Delhi.
- Working Style: Working style is used where batch wise inventory is maintained and secondary stock is used.
- If the use needs to maintain inventory without identification of lot no., then select ‘Normal without Secondary’ option and if the user needs to record inventory lot wise and with the identification of Batch no., MRP, Size, etc. then select ‘Secondary (Batch/MRP/Size)’.
- Suppose select ‘Secondary (Batch/MRP/Size)’ option.
- After completion of all necessary options, the user will click on ‘Save’ tab to save the changes.

- Now a pop message of ‘Record Save Successfully’ will appear.
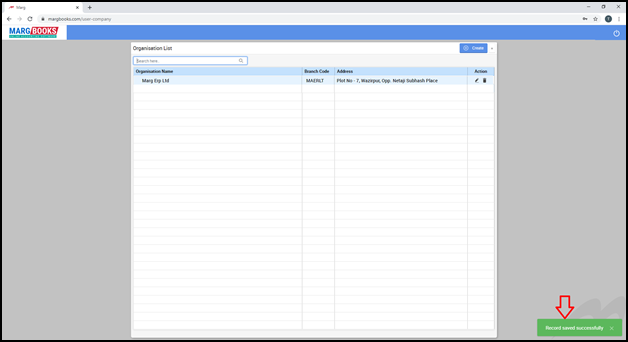
- Similarly the user can create multiple companies in Marg Books.
PROCESS OF COMPANY ALTERATION IN MARG BOOKS
In case the user has missed any information or wrongly put any information while creating company then can easily modify the company details.
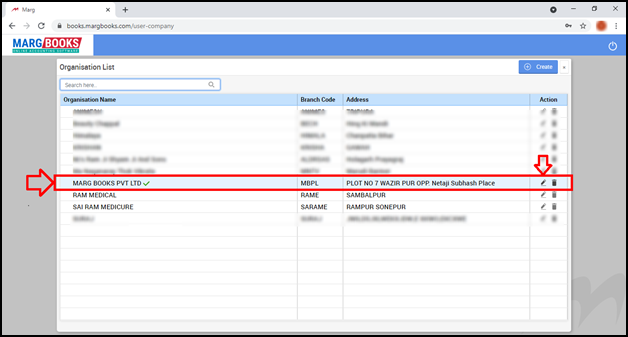
- Select company from ‘Organisation list’ window.
- Press ‘Edit’ icon or ‘F3’ function key.
- A Modify Company’ window will appear. The user will do the modifications as per the requirement.
- Once the changes are done, click on ‘Update’ tab to update the changes.
- Now a pop message of ‘Record Updated Successfully’ will appear.

PROCESS OF COMPANY DELETION IN MARG BOOKS
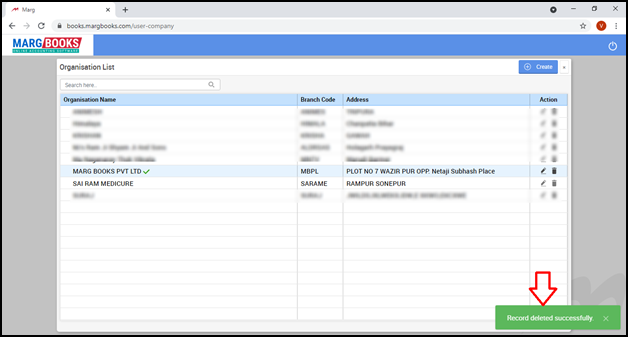
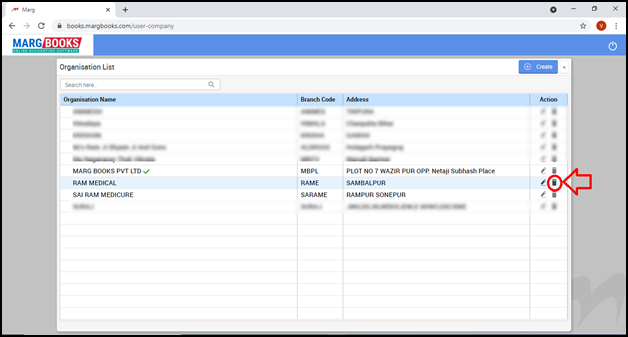
- Select company from ‘Organisation list’ window. Press ‘Delete’ icon or ‘Delete’ key.
- Suppose enter on ‘Ram Medical’.
- A ‘Confirmation’ window will appear i.e. ‘Are you sure you want to delete the selected record?’.
- Click on ‘Yes’ to deleted the selected company.
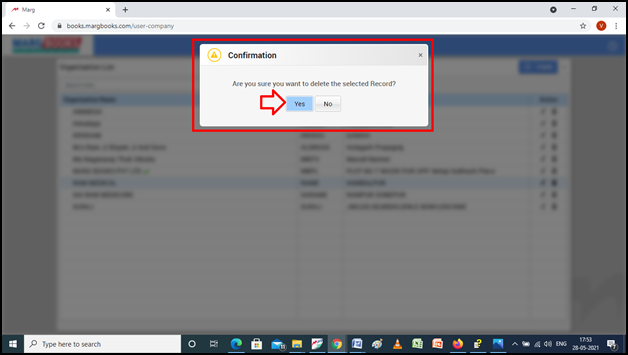
- Now a pop message of ‘Record Deleted Successfully’ will appear.