Welcome to  -
Marg Books
-
Marg Books
Home > Marg Books > Accounts Report > How to view All Ledger Transaction Report in Marg Books ?
How to view All Ledger Transaction Report in Marg Books ?

Overview of All Ledgers in Marg Books
Process to View All Ledgers Report in Marg Books
OVERVIEW OF ALL LEDGERS IN MARG BOOKS
- Ledgers Option in Marg Books facilitates the user to easily view the ledger accounts and balances of the all the ledgers i.e. debtors, creditors, etc.
- The user can modify, export and print the ledgers as per their requirement. Apart from it, the user can also share the details of a particular ledger to their respective party via WhatsApp, Email & Google Drive as per the requirement.
PROCESS TO VIEW ALL LEDGERS REPORT IN MARG BOOKS
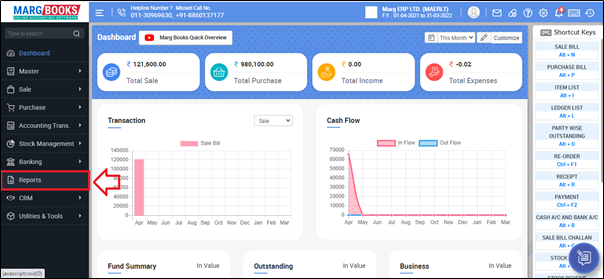
- Firstly click on the 'Reports'.
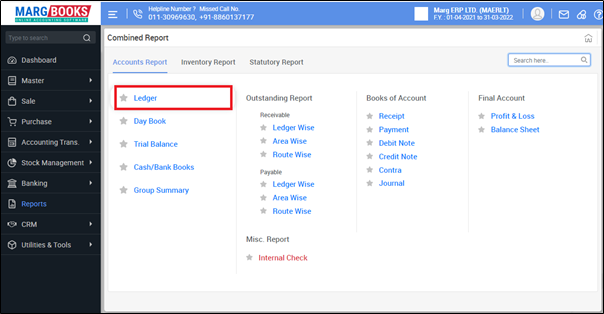
- A 'Combined Report' window will appear.
- Select ‘Ledger' option under ‘Account Report’ tab.
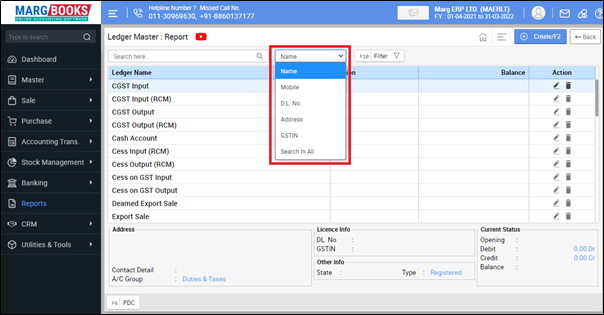
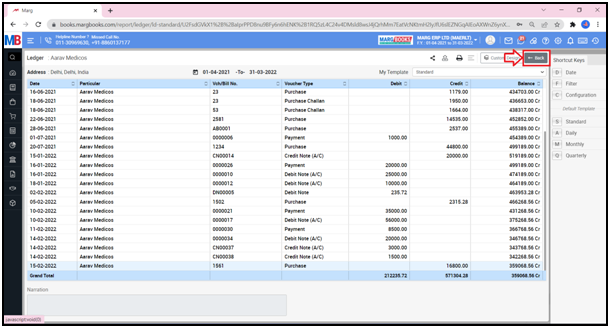
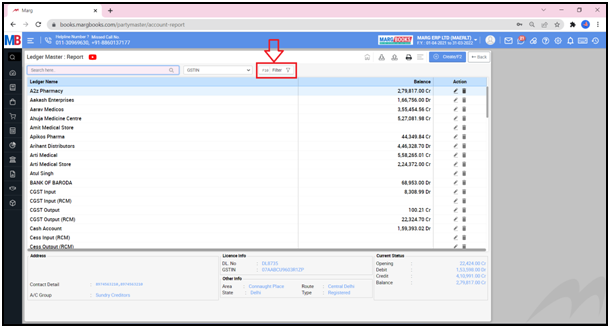
A 'Ledger Master Report' window will appear with some defined and predefined ledgers along with some fields:
1. Search bar: With the help of this option, user can search the ledger/party on different basis i.e. Name, Mobile, Address, GSTIN, etc. as per the requirement.
Suppose select 'Name'.
- Then the user will search the name of the Customer/Party.
- Suppose search 'Rahul'.
- As the user will search the name of the customer/party then that name will get displayed on the top of the Ledger Master: Report.
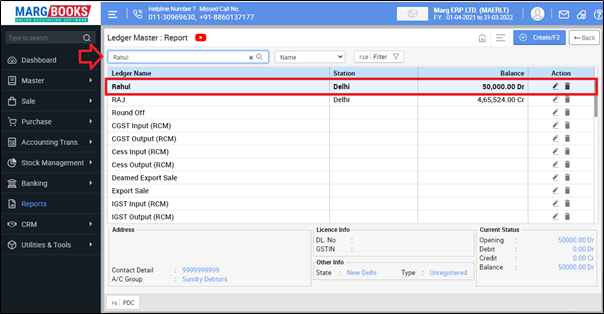
- Then the user will click on the name of that particular ledger.
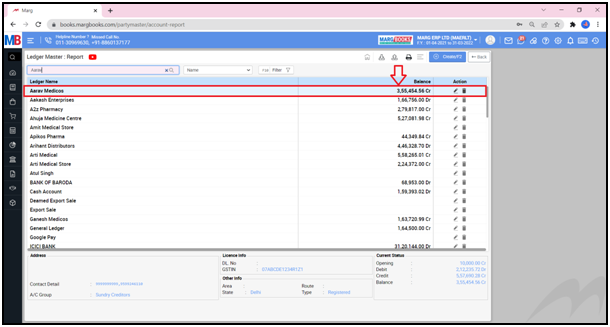
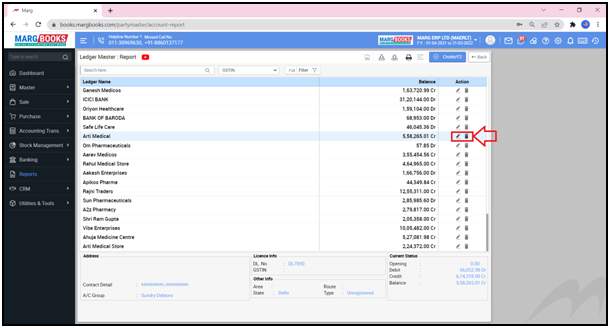
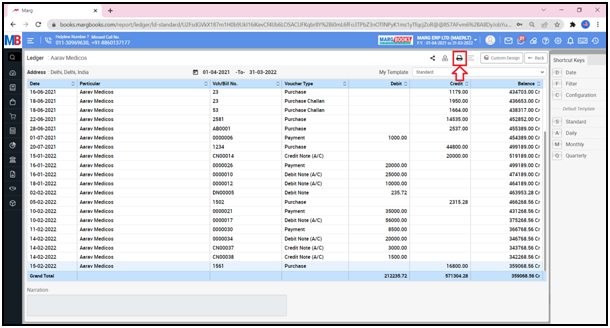
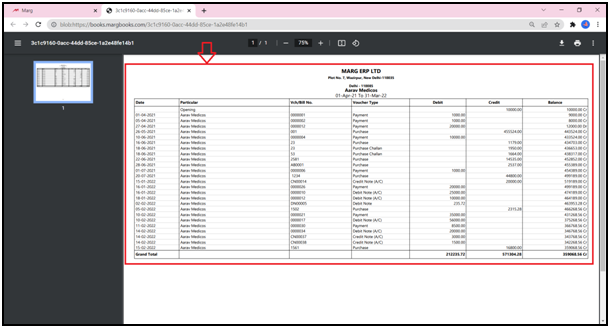
- Now the user can view details of the selected ledger i.e. Party/Customer name, Address, Debit & Credit transactions, Voucher type and Balance, etc.
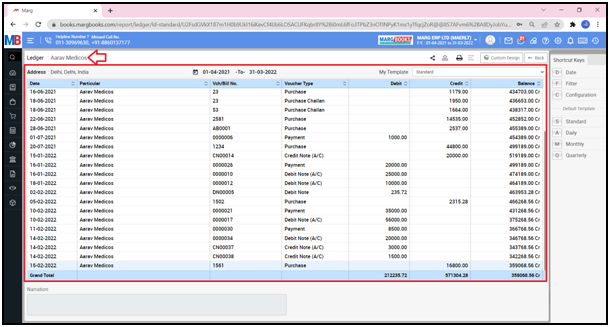
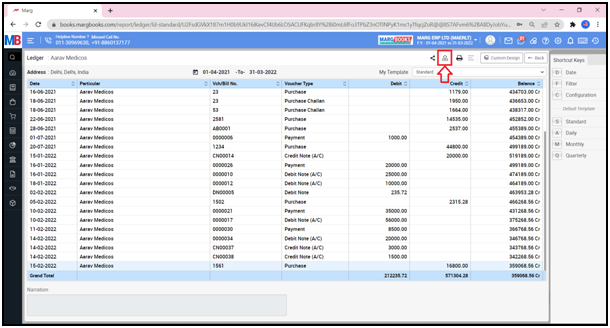
- In order to share the Ledger Report with the particular customer/party, the user will click on the 'Share' icon.

Now the user will select the share options as per the requirement.
- WhatsApp: Select this option if the user wants to share the Ledger Report through WhatsApp.
- Email: Select this option if the user wants to share the Ledger Report through E-mail.
- Drive: Select this option if the user wants to share the Ledger Report through Google Drive.

In order to Export and Print a Ledger report, click on the ‘Export’ and ‘Print’ icon as per the requirement.
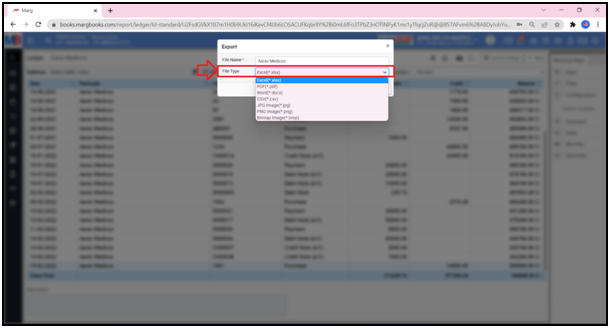
a. Export: With the help of this option, the user can Export the Ledger details of any particular customer/party in any format (Excel, PDF, Word, CSV, etc.)
- An ‘Export’ window will appear.
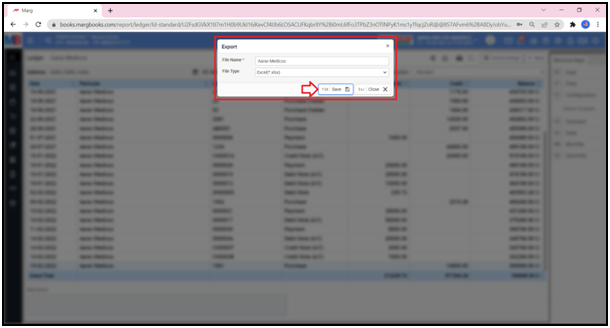
- Suppose select ‘Excel’.
- Then click on ‘Save’.
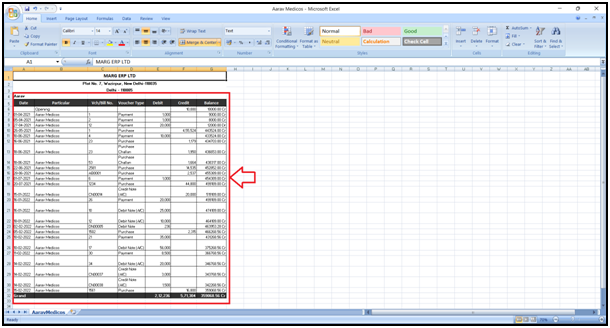
- The user can view that the ledger Report of the selected customer/party has been generated in an excel format.
b. Print: With the help of this option, the user can take the print out of the Ledger Report of any customer/party.
- The user can view that the ledger Report of the selected customer/party will get printed.
- Now click on ‘Back’ tab.
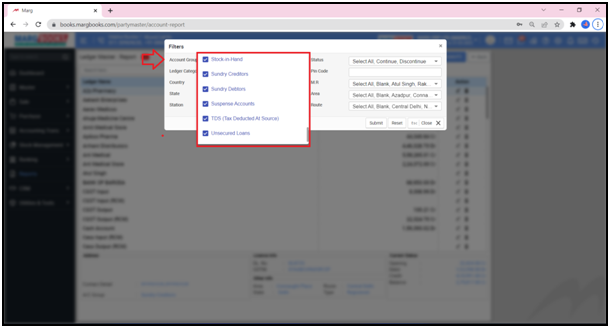
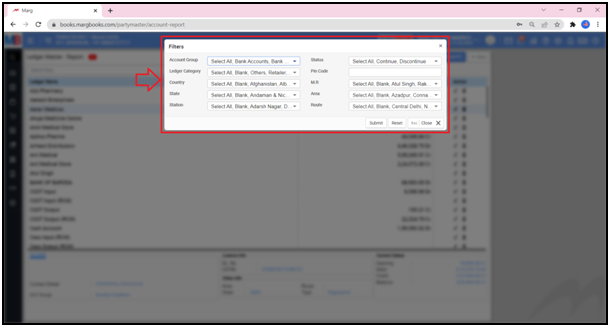
2. F10- Filter: With the help of this option, the user can filter the ledger report on different basis which are mentioned below:
i. Account Group: In this option, the user can select the Group i.e. for which group the report needs to be generated i.e. Stock in Hand, Sundry creditors, Sundry debtors, Capital Account, Cash, etc.
ii. Ledger Category: In this option, the user can select the category of the ledger i.e. for which category the report needs to be generated i.e. Retailer, Stockist, Distributors, etc.
iii. Country: In this option, the user can select the Country i.e. for which Country the report needs to be generated.
iv. Station: In this option, the user can select the Station i.e. for which Station the report needs to be generated.
v. State: In this option, the user can select the state i.e. for which state the report needs to be generated.
vi. Status: In this option, the user can select the status i.e. Continue party or Discontinue party for which the report needs to be generated.
vii. Pin Code: In this option, the user can mention the Pin Code of that party i.e. the report can be generated on the basis of Pin Code.
viii. M.R.: In this option, the user can select the M.R. (Salesman) i.e. for which M.R. the report needs to be generated.
ix. Area: In this option the user can select the Area i.e. for which Area the user needs to generate the report.
x. Route: In this option, the user can select the Route i.e. for which Route the report needs to be generated.
- Now in order to download any template, the user will click on ‘Download Template’ from the 3 horizontal lines.
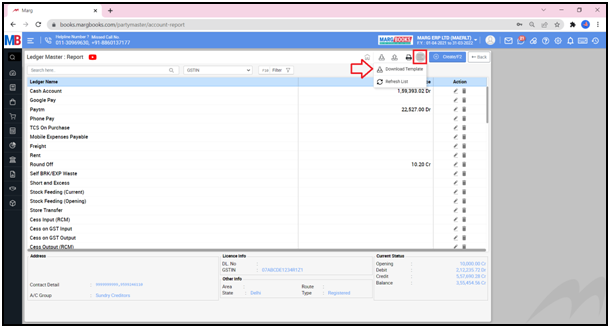
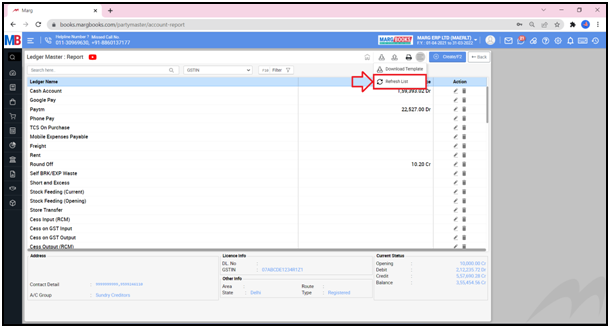
- In order to Refresh the list of all the ledgers, the user will click on ‘Refresh’ icon from the 3 horizontal lines.
- Apart from it, the user can Modify or Delete the ledger of any customer/party with the help of ‘Modify’ & ‘Delete’ icon given against that particular ledger.