Welcome to  -
Marg Books
-
Marg Books
Home > Marg Books > Accounts Master > What is the process of Ledger creation, Modification and Deletion in Marg Books?
What is the process of Ledger creation, Modification and Deletion in Marg Books?

Overview & Need to Create Ledger in Marg Books
Process to Create New Ledger in Marg Books
Process to Modify Ledger in Marg Books
OVERVIEW & NEED TO CREATE LEDGER IN MARG BOOKS
- A ledger can be stated as an authenticated account record that can categorize a transaction.
- The basic purpose of creation of Ledgers in Marg Books is to maintain records of any type of transactions concerning Sale/Purchase/Cash received, etc.
- Ledgers can be made as and when it is required or at the time when the transactions are being occurred.
- With the help of ledgers, it becomes easier to view any transaction that has taken place with the specified date.
PROCESS TO CREATE NEW LEDGER IN MARG BOOKS
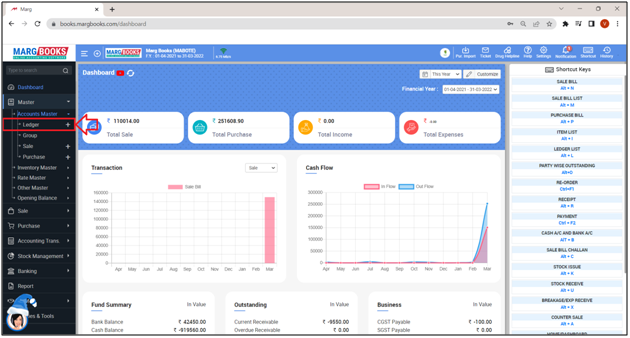
The user can switch to Ledger window in 2 ways:
- Press ‘ALT + L’ key on dashboard.
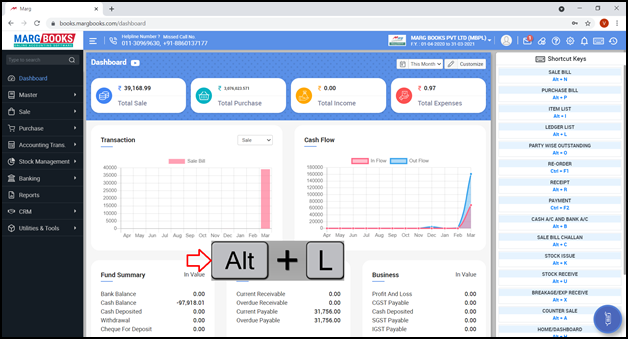
OR
- Go to Master >> Accounts Master >> Ledger(+).

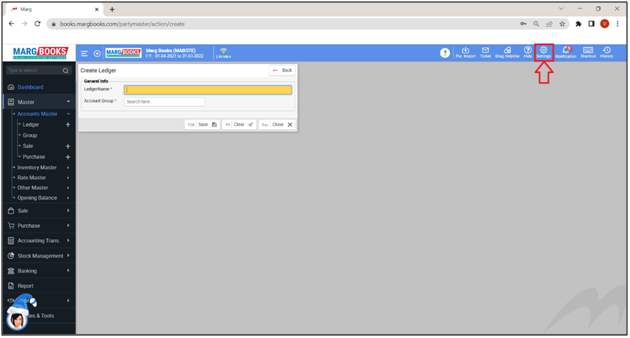
- A ‘Create Ledger’ window will appear with different fields:
Note: Before creating a ledger, the user will do the ledger settings as per the requirement by clicking on the ‘Settings’ icon from the right side.
Here, some fields will be shown i.e.:
a. Code Required: A ledger code basically consists of alpha-numeric characters which are used for easy & quick identification of the ledgers. So, the user will select the option that whether the ledger code is required or not as per the requirement i.e. ‘No’, ‘Only Transactions’, ‘Report & Transaction’.
b. Station Required: Station is a required field while creating any ledger of the customer or the supplier i.e. from where that particular customer belongs to. With the help of this option, the user can enable or disable the station field in Party's ledger as per the requirement.
c. Ledger Name Duplicate allowed: The user will select that whether a duplicate ledger name must be allowed or not as per the requirement.
d. M.R.: The user will select that whether the M.R. is required or not as per the requirement.
e. Route/Area: The user will select that whether the Route/Area is required or not as per the requirement.
Similarly, the user will select the other options i.e. eBusiness Setup Required?, Narco Required?, D.L. No. Required?, GST Headings, etc. as per the requirement.
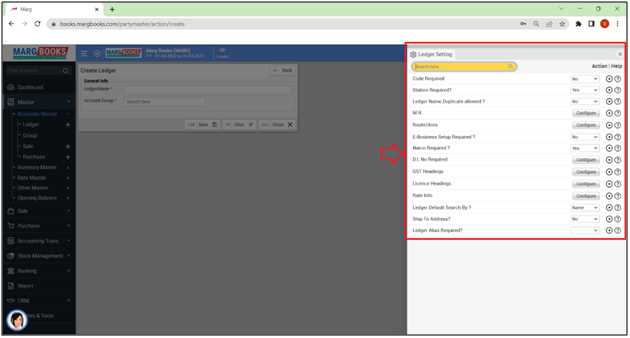
- Then press ‘Escape’ key.
- Now, let’s create a Ledger.
Note: Before creating a ledger, the user will do the ledger settings as per the requirement by clicking on the ‘Settings’ icon from the right side.
A. General Info.
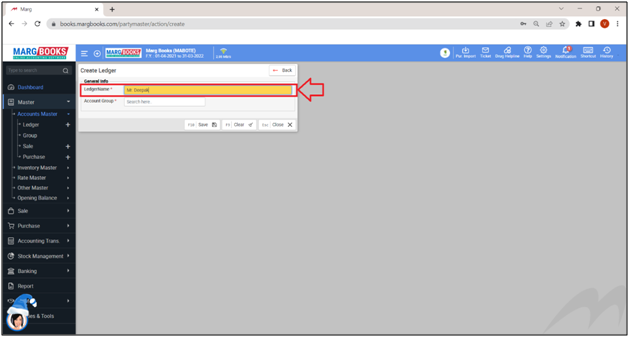
1. Ledger Name: The user will mention the name of the Party/Customer.
Suppose mention ‘Mar. Deepak’.
2. Account Group: The user will press ‘Spacebar’ key & select the account group from the dropdown under which the ledger needs to be created.
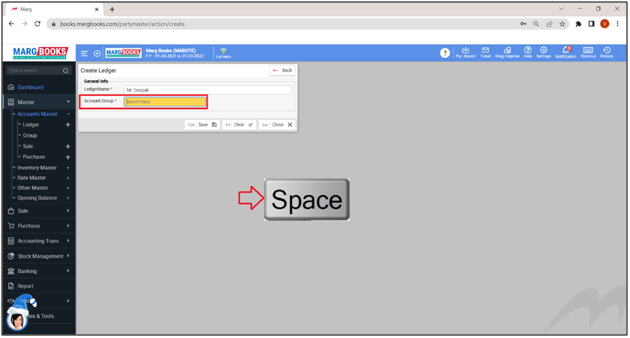
Note: Please note that the software will show only the mandatory fields in the Ledger Master window as required according to the selection of the Account Group.
Like for Customers select Sundry Debtors, for Party/Supplier select Sundry Creditors, etc.
- Suppose select ‘Sundry Debtors’.
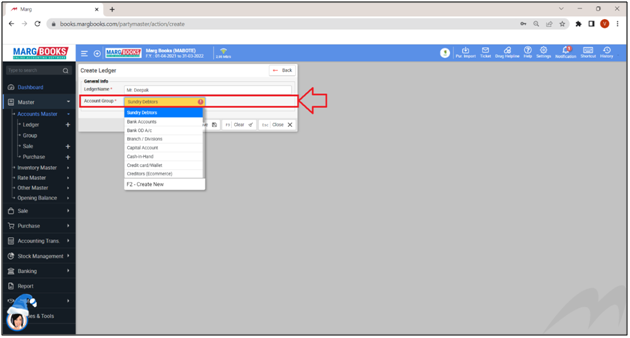
- As the user will select the Account Group, more fields will appear.
Note: The fields marked with an Asterisk ‘*’ sign are mandatory to be filled.
3. Station: The user will press ‘Spacebar’ key & mention the name of the place from where the customer belongs i.e. the Location.
- Suppose mention ‘New Delhi’.

4. Mail To: The user can view that the software has automatically picked the ledger name that user has entered in the Ledger Name and can change it as per the requirement.
As whenever the user will print any bill/invoice, then software will print the same name on the top of the bill as mentioned in Mail to.
This field is basically for Ledger Identification.

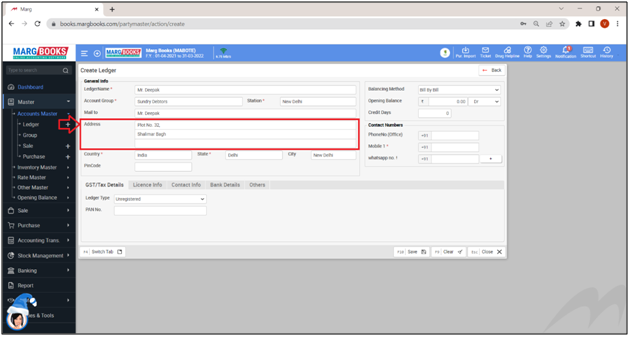
5. Address: The user will mention the address of the customer.
- Suppose mention ‘Plot No. 32 Shalimar Bagh’.
6. Country: By default, the selected country is ‘India’.
- The user can change it from the dropdown if the customer belongs from out of India.

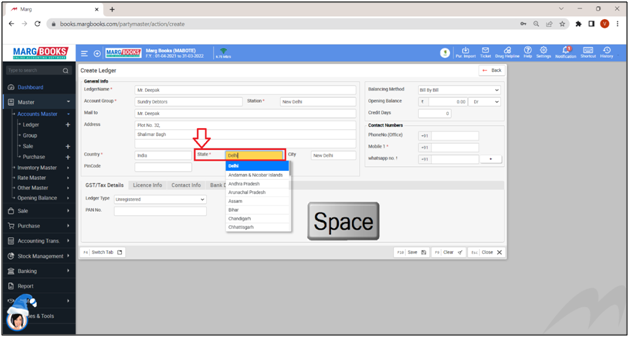
7. State: The user will press ‘Spacebar’ key to select the state from where the customer belongs.
- Suppose select ‘Delhi’.
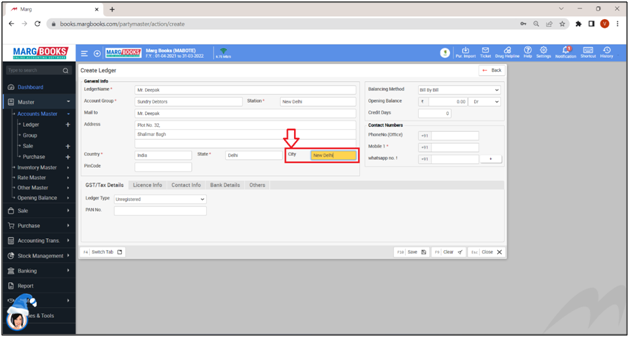
8. City: The user will mention the city from where the customer belongs.
- Suppose select ‘New Delhi’.
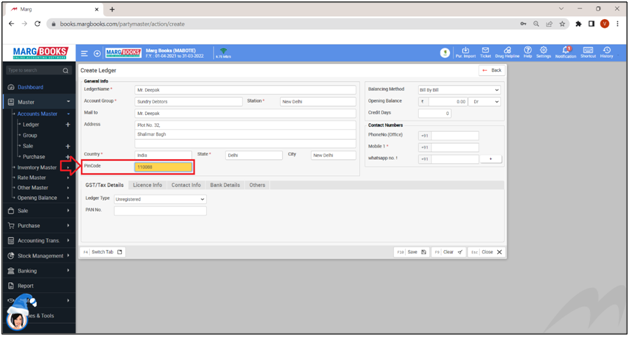
9. Pin Code: The user will mention the pin code of the place/area where the customer belongs.
- Suppose mention ‘110088’.
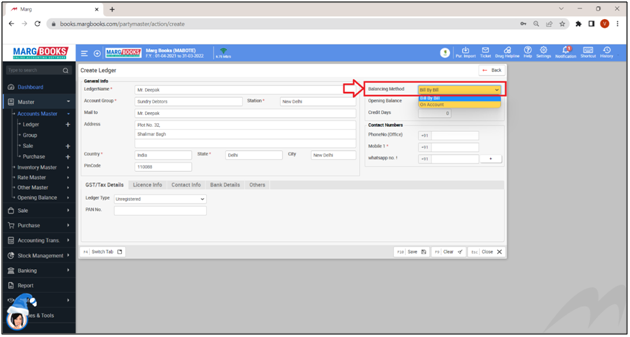
10. Balancing Method: In balancing method, the user can view 2 options in the dropdown i.e. ‘Bill by bill’ & ‘On Account’.
a. Bill by Bill: It means that the creation of outstanding of the party will be done through Bill by Bill.
So whenever the user will receive the payment from this customer then against which bill the payment has been received, that window will get displayed there and it will also maintain the outstanding bill by bill.
b. On Account: It does not maintain the outstanding of the party and whenever the user will receive the payment from the party then it will not display that against which bill the user has received the payment. The user has to view in the ledger of the party only that how much amount is required to be taken from that party.
Suppose select ‘Bill by Bill’.
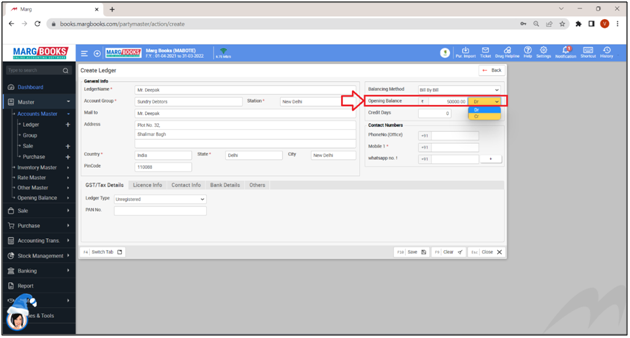
11. Opening Balance: If the user needs to take any amount from the customer is pending then can mention that amount in the Opening Balance.
Also, select whether the amount is in Debit or Credit. For Customer, select Debit & for Supplier, select ‘Credit’.
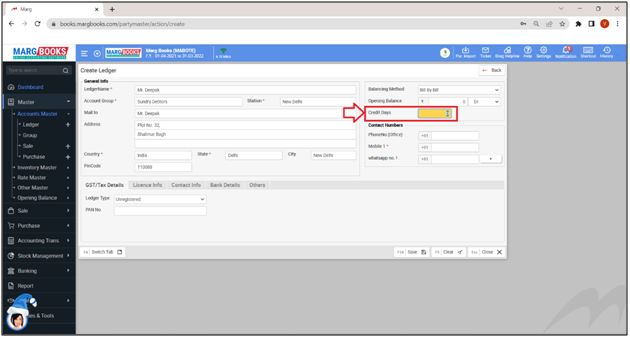
12. Credit Days: The user will set the credit days for this particular customer as per the requirement.
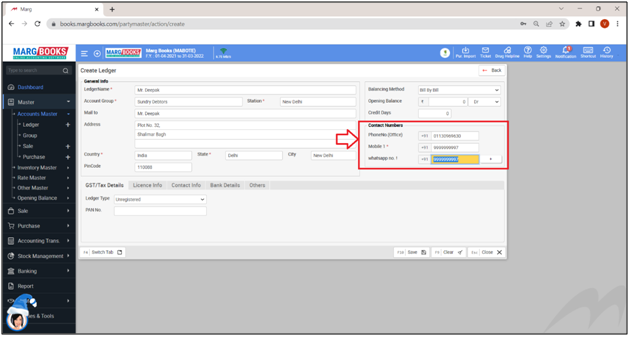
B. Contact Numbers
13. Phone No. (Ofc.): The user will mention the office number of the customer.
Suppose mention ‘01130969630’.
14. Mobile No. 1: The user will mention the mobile number of the customer.
Suppose mention ‘999XXXXXXX’.
15. WhatsApp No.: The user will mention the WhatsApp number of the customer.
Suppose mention ‘999XXXXXXX’.
Note: We recommend that the user must mention the WhatsApp No. of the Supplier, Customer, etc. at the time of Ledger Creation with which dealing is done.
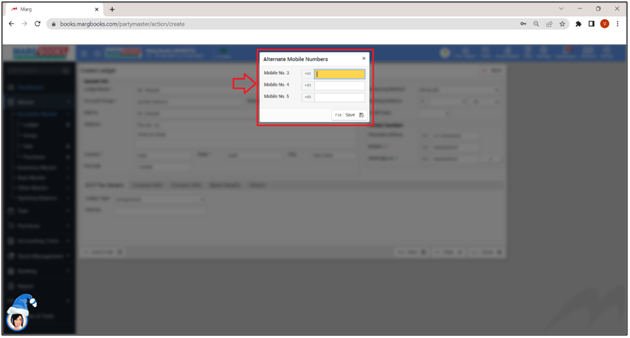
The user can also add more contact numbers by clicking on ‘+’ sign as per the requirement.
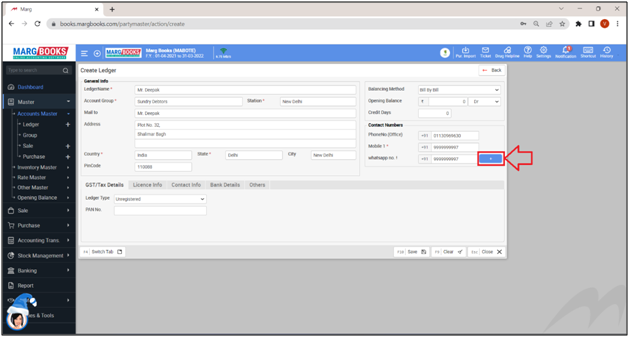
Fig: Process to Add Additional Contact Number in Ledger Details in Marg Books
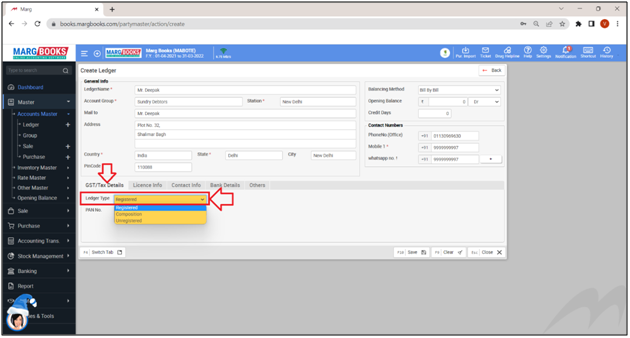
C. GST/Tax Details
16. Ledger Type: The user will select the ledger type from the dropdown as per the requirement i.e. Unregistered, Registered or Composition.
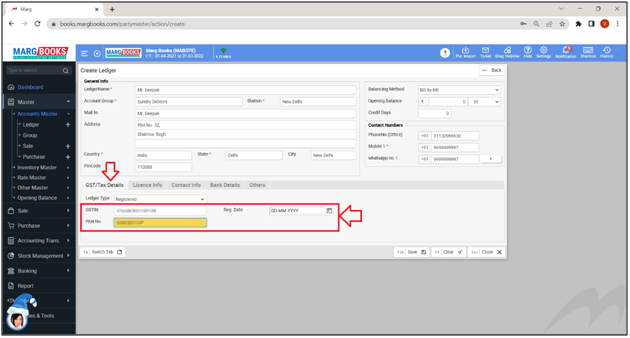
17. GSTIN No.: The user will mention the GSTIN number of the party which is issued through the government.
18. Reg. Date: Mention the registration date from when the GSTIN number is applicable.
19. PAN No.: Mention the PAN No. of the party.
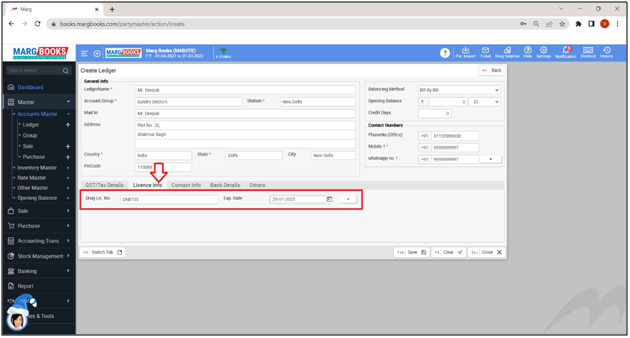
D. Licence Info.
20. D.L. No.: The user will mention the Drug license number of the customer/party.
21. Exp. Date: The user will mention the expiry date of the D.L. number.
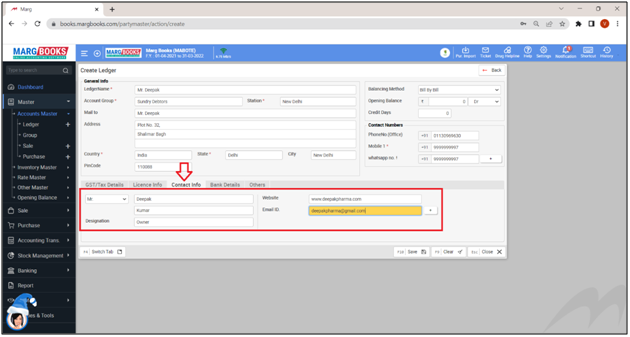
E. Contact Info.
22. Contact Person: The user will mention the first name and the last name of the customer.
Suppose mention ‘Mr. Om Singh’.
23. Designation: The user will mention the designation of the contact person.
Suppose mention ‘Owner’.
24. Website: The user will mention the address/website of the party.
25. E-mail ID: The user will mention the E-mail address of the party.
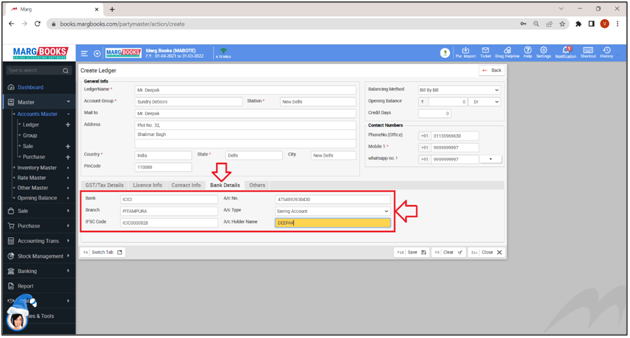
F. Bank Details
26. Bank: The user will mention the name of the customer’s bank account.
27. Branch: The user will mention the branch where that bank is located.
28. IFSC Code: The user will mention the IFSC Code of the bank.
29. A/C No.: Mention the Account number of the customer.
30. A/C Type: Select the Account type i.e. Savings or Current Account.
31. A/C Holder Name: Mention the name of the account holder.
G. Other Details
32. Discounts: The user can add the discount i.e. Item Discounts & Brk/Exp Discounts as per the requirement.
33. Billing Rate: The user can set the billing rate as per the requirement.
34. Credit Limit: The user can set the credit limit as per the requirement.
35. Copy Dealings: The user can add the details in Copy Dealings as per the requirement.
36. Birthday & Anniversary: The user can add the details of the customer’s birthday and anniversary.
37. Others: The user can fill the other information like Freeze Upto, Amount Calculation, Ledger Category, Invoice format, etc. as per the requirement.
38. Geolocation: The user can mention the Latitude and Longitude as per the requirement.
39. M.R.: The user can mention the name of the MR as per the requirement.

- After filling all the details, click on ‘Save’ tab to save the ledger of the party/customer.
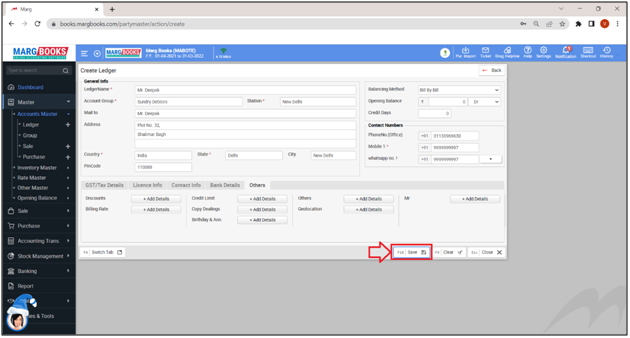
- ‘A ‘Record Saved Successfully’ message will appear.

PROCESS TO MODIFY LEDGER IN MARG BOOKS
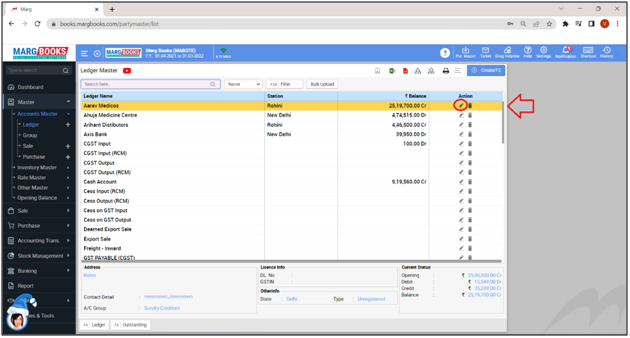
- In order to modify the Party’s Ledger, the user will go to Master >> Accounts Master >> Ledger.
- A ‘Ledger Master’ window will appear with the list of all the ledgers.
- The user will click on ‘Edit icon’ against that particular ledger which needs to be modified.
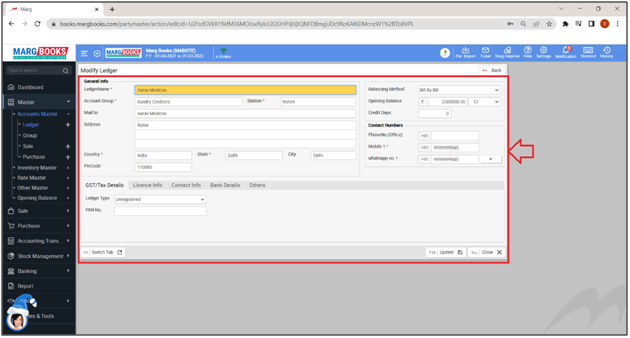
- A ‘Modify Ledger’ window will appear in which the user will make necessary changes in the ledger.
- Then click on ‘Update’ to save the changes.
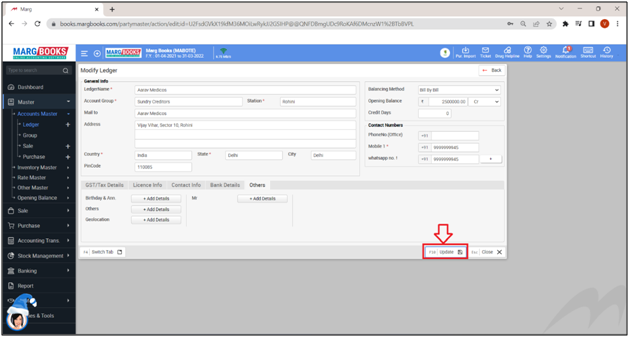
- A ‘Record Updated Successfully’ message will appear.

PROCESS TO DELETE LEDGER IN MARG BOOKS
The user cannot delete the ledger whose transactions are been created in the software. However, if the user wants to delete the ledger from the ledger list then firstly delete the transactions of that party, then only desired ledger can be deleted.
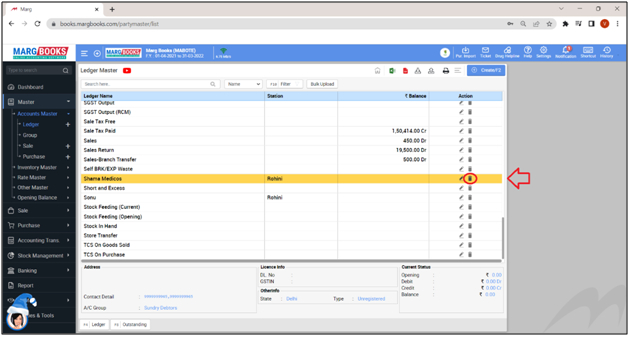
- In order to delete the Party’s Ledger, the user will go to Master >> Accounts Master >> Ledger.

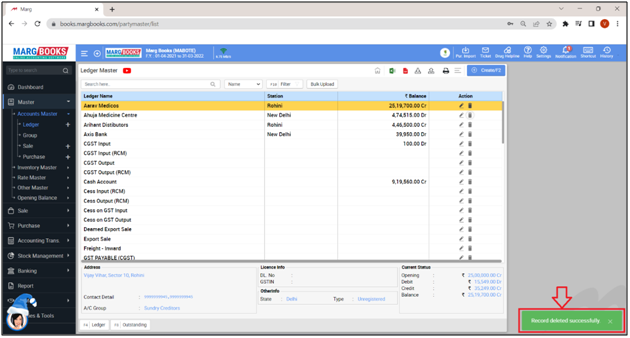
- A ‘Ledger Master’ window will appear with the list of all the ledgers.
- The user will click on ‘delete’ icon against that particular ledger which needs to be deleted.
- A ‘Confirmation’ window will appear i.e. ‘Are you sure you want to delete the selected Record?’
- Click on ‘Yes’.
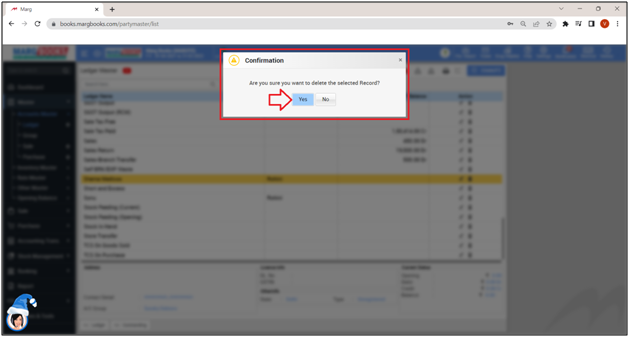
- Then the selected ledger will get deleted from the list.