Welcome to  -
Marg Books
-
Marg Books
Home > Marg Books > Bill > How to view Sale Bill List in Marg Books ?
How to view Sale Bill List in Marg Books ?

Overview of Sale Bill List in Marg Books
Process to View Sale Bill List in Marg Books
OVERVIEW OF SALE BILL LIST IN MARG BOOKS
- A Sale Bill is a record that means proof that which goods are been sold on which date and at how much amount.
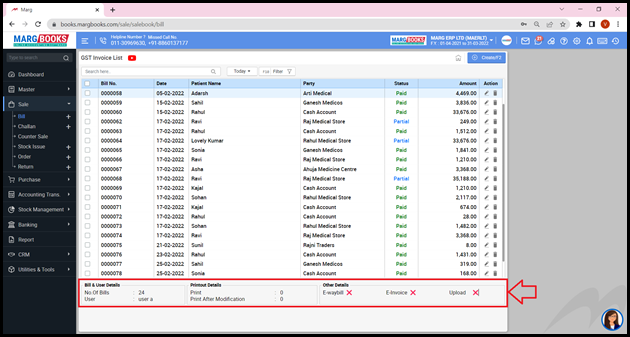
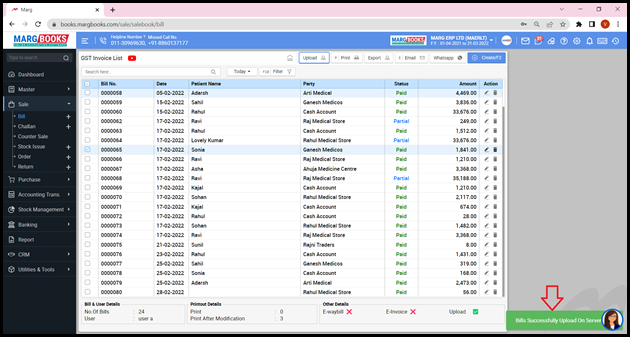
- With the help of Marg Books, the user can easily view the list of all the created GST Invoices along with the details (Bill No., Date on which the Sale Bill is created, Patient Name, Party Name, Payment Status, and Amount).
- The user can easily modify, delete, print, export, e-mail, WhatsApp, and upload the GST Invoice/Sale Bill on the server as per the requirement.
- Apart from it, the user can search the GST Invoice/Sale Bill based on the Invoice No. and can also apply a filter as per the requirement.
PROCESS TO VIEW SALE BILL LIST IN MARG BOOKS
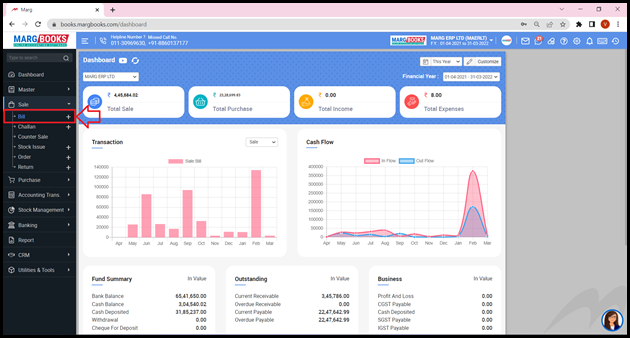
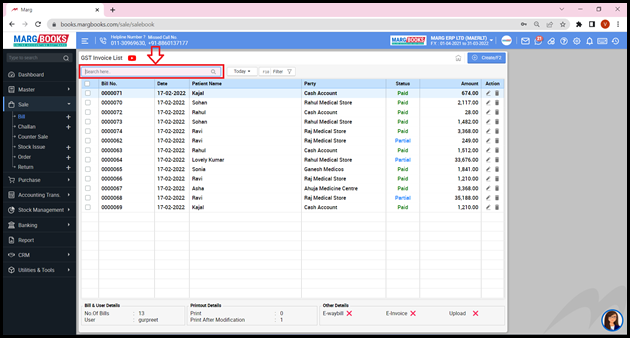
- Go to Sale >> Bill.
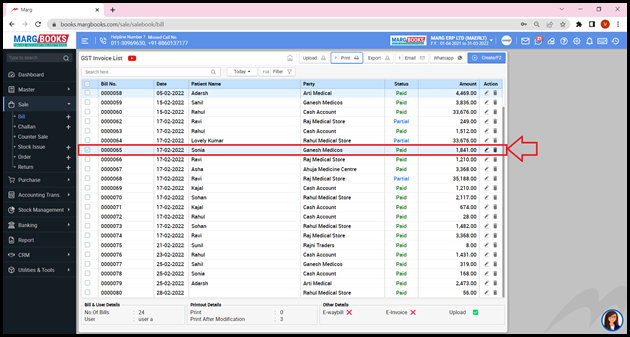
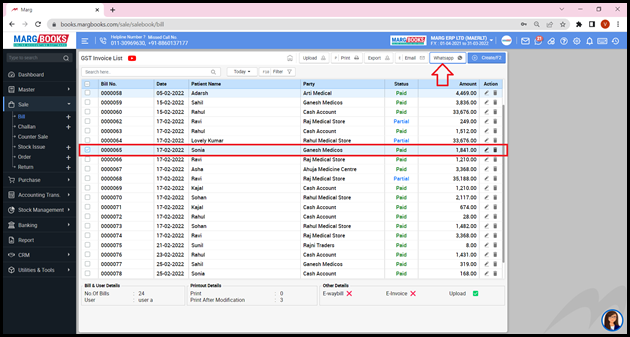
- A ‘GST Invoice List’ will appear.
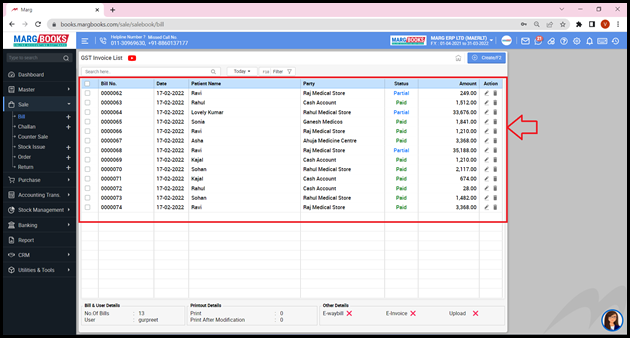
- The user can easily view that the list of all the created GST Invoices along with the details i.e. Bill No., Date on which the Sale Bill is created, Patient Name, Party Name, Payment Status (Partial/Paid), and Amount will get displayed.
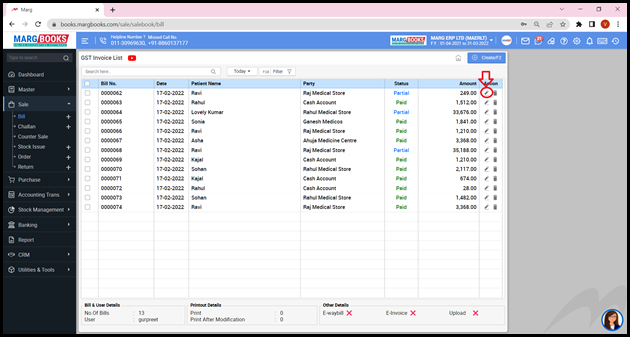
- The user can also modify and delete any Sale Bill as per the requirement.

- In order to modify any Sale Bill, click on the ‘Modify’ icon given corresponding to that Sale Bill.
- A ‘GST Invoice’ window will appear.
- Click on the ‘Modify’ tab and modify the Sale Bill as per the requirement.
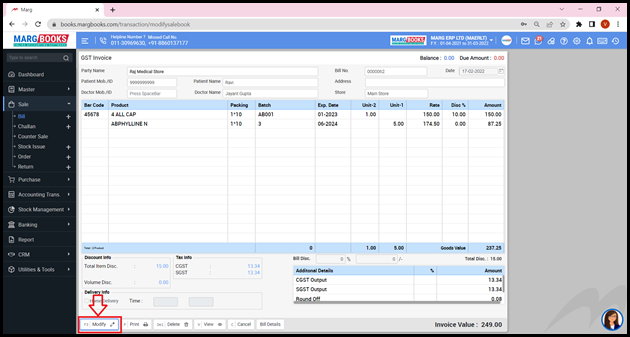
- Press ‘ESC’ key and come back to the ‘GST Invoice List’ window.

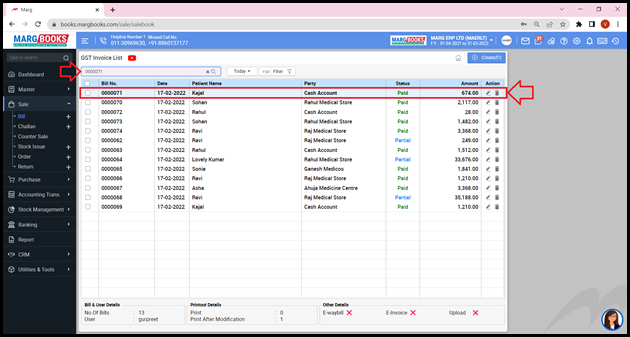
- In order to search any Invoice on the basis of the Invoice No., type that particular Invoice No. in the ‘Search’ box.
- The user can view that the invoice which is been searched will appear at the top of the GST Invoice list.
- The user can apply filter i.e. whether the user needs to view the Invoices of Today, Week or Last 7 Days, etc. as per the requirement.
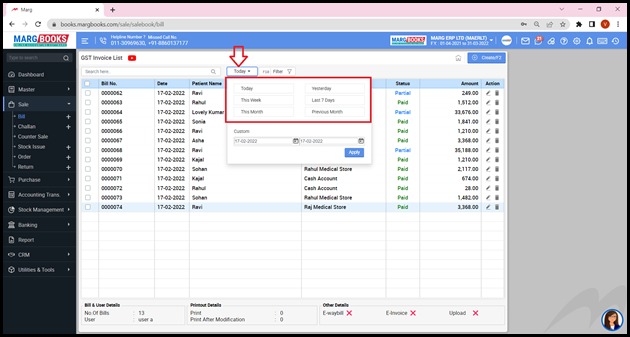
- Apart from it, the user can mention the dates i.e. from which till which date the invoices needs to be viewed.
- Suppose mention ’10-02-2022 till 16-02-2022’.
- Then click on ‘Apply’.
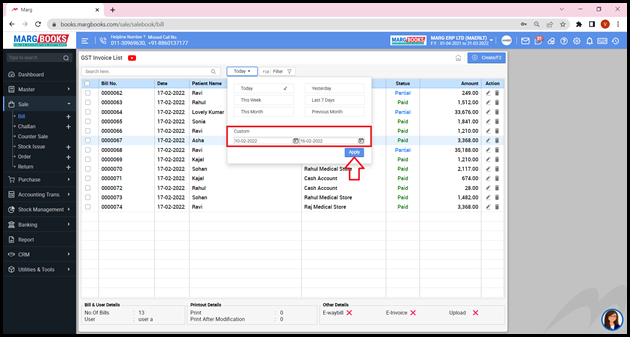
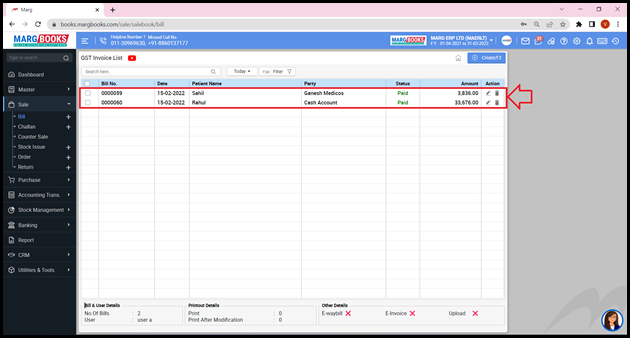
- The user can view that the invoices of the selected dates will appear.
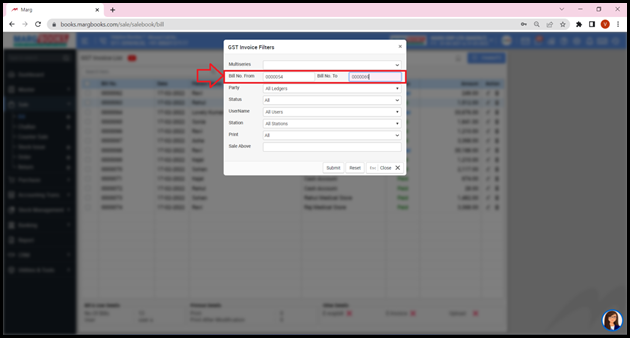
- Now click on ‘Filter’ button.

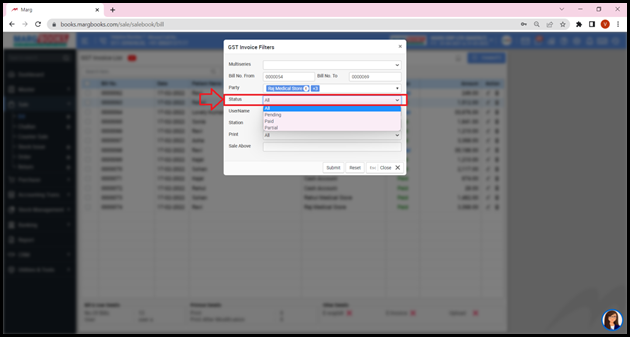
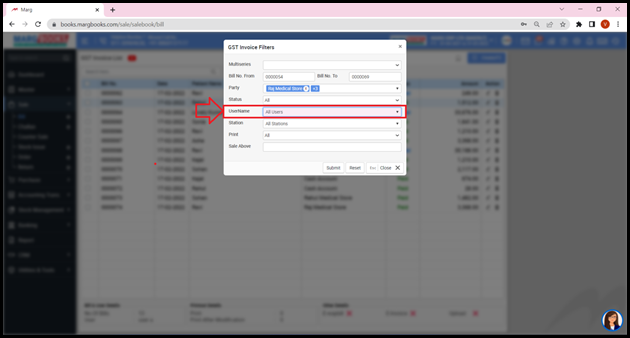
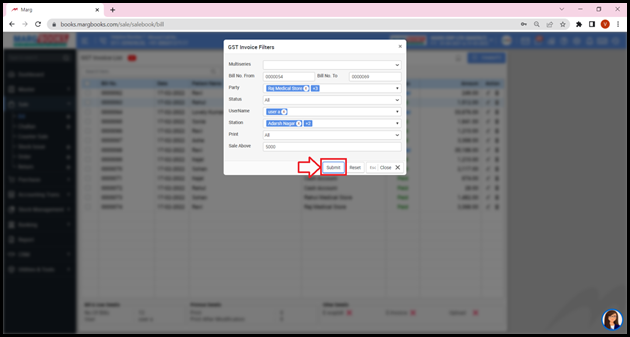
- A ‘GST Invoice Filters’ window will appear with different fields:
- Bill No. From & Bill No. To: Mention the Bill No. i.e. from which Bill No. till which Bill No. the user needs to be viewed.
- Suppose mention ‘0000054 to 0000069’.
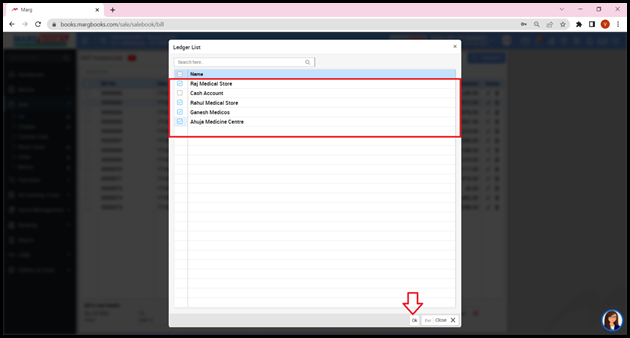
- Party: Select the party of whose Sale Bill needs to be viewed or can select all the parties.

- Then click on ‘Ok’.
- Status: Select the Status i.e. Pending, Paid or Partial as per the requirement.
- Suppose select ‘All’.
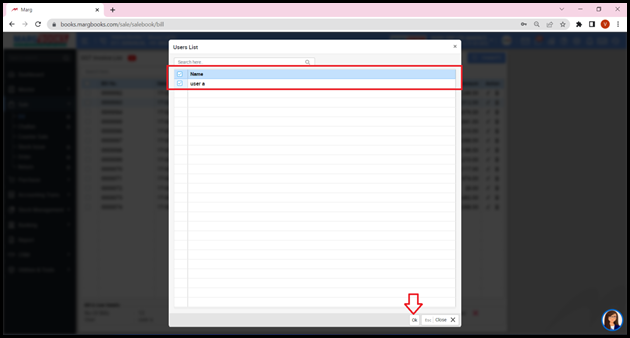
- User Name: Select the user of whose bill needs to be viewed as per the requirement.
- Suppose select ‘User A’.
- Then click on ‘Ok’.
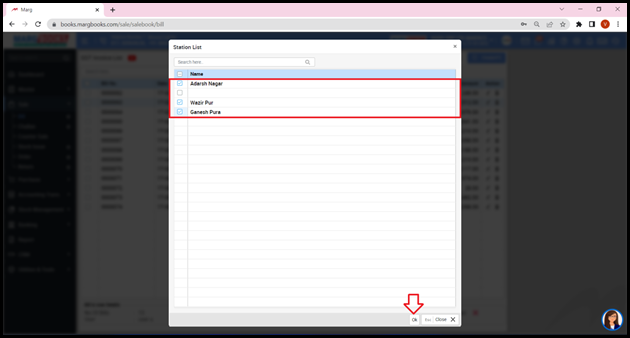
- Station: Select the Station as per the requirement.
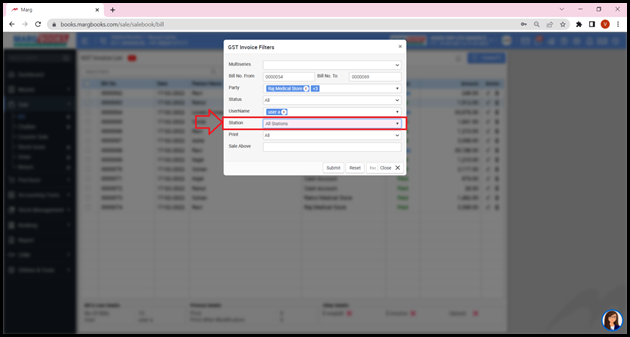
- Then click on ‘Ok’.
- Print: Select the bills i.e. All (Print & Unprint print), Print Bills (Bills created & Printed), Unprint Bills (Bills created but not printed) as per the requirement.
- Suppose select ‘All’.

- Sales Above: It means that whether the user needs to view the Sale Bills for the amount above Rs. 5000.

- Then click on ‘Submit’ tab.
- The user can view that the GST Invoice list has been displayed according to the set filter.
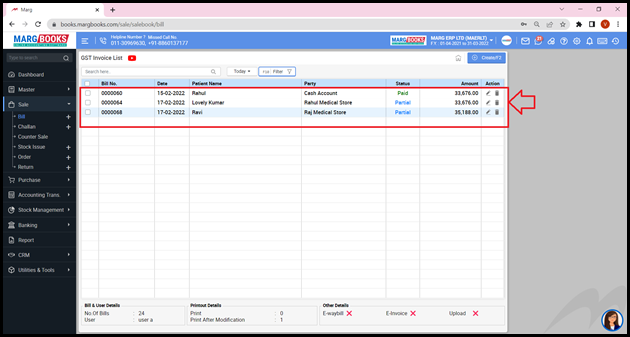
- In order to Upload the Sale Bill on the server, tick on the check box on that particular bill and then click on ‘Upload’ button.
- In order to Print the Sale Bill, tick on the check box on that particular bill and then click on ‘Print’ button.
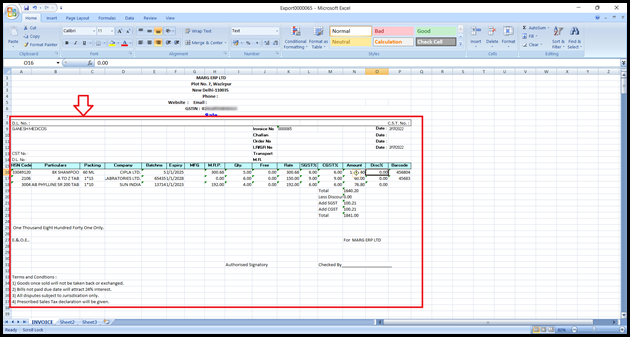
- In order to Export the bills an excel format, select the bills as per the requirement and then click on ‘Export’ button.
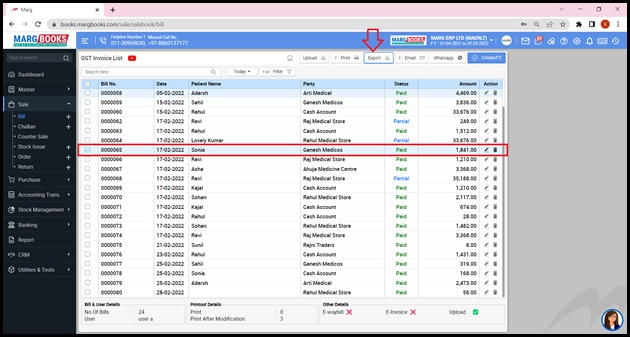
- So in this way the Sale Bill will get exported in an Excel format.
- Similarly, the user can also Export the bills in the PDF format.
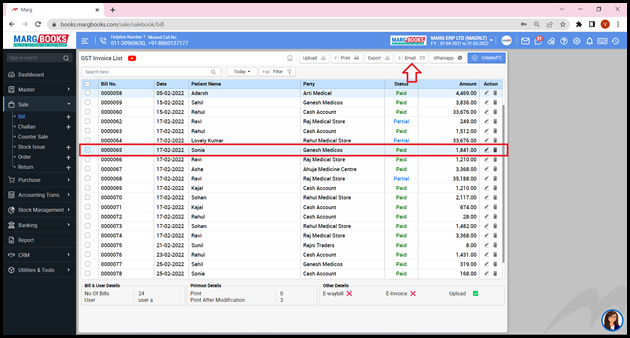
- In order to Email any bill, tick on the check box on that particular bill and then click on ‘Email’ button.
- In order to share any bill to the customer/party via WhatsApp, tick on the check box on that particular bill and then click on ‘WhatsApp’ button.
- Apart from it, the user can also view the Bill details from below.