Welcome to  -
Marg Books
-
Marg Books
Home > Marg Books > Invoice Design > How to print QR Code on Bill in Marg Books ?
How to print QR Code on Bill in Marg Books ?

Overview of Print QR Code on Bill in Marg Books
Process to View Print QR Code on Bill in Marg Books
OVERVIEW OF PRINT QR CODE ON BILL IN MARG BOOKS
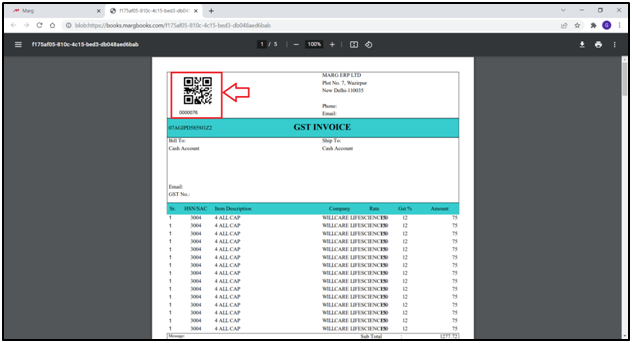
- Marg Books has provided a very beneficial provision in the software through which the user can easily print the QR Code on the Sale bill as per the requirement.
PROCESS TO VIEW PRINT QR CODE ON BILL IN MARG BOOKS
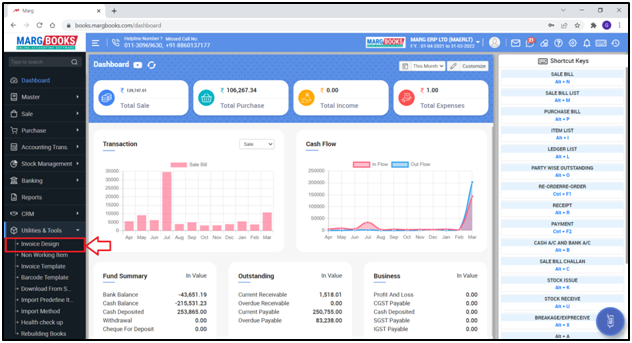
- From the Dashboard, Go to ‘Utilities & Tools’>> ‘Invoice Design’.
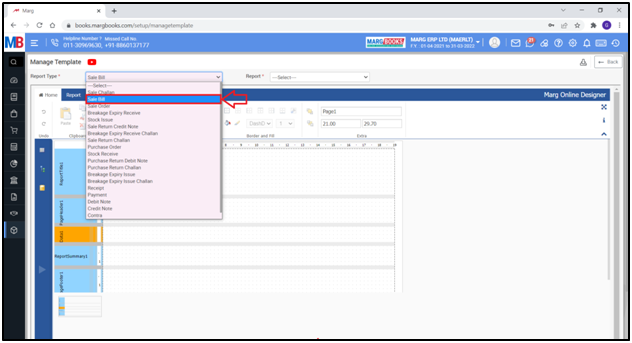
- A ‘Manage Template’ window will appear.
- From ‘Report Type’ field, select the module on which the user needs to Print QR code.
- Suppose select ‘Sale Bill’.
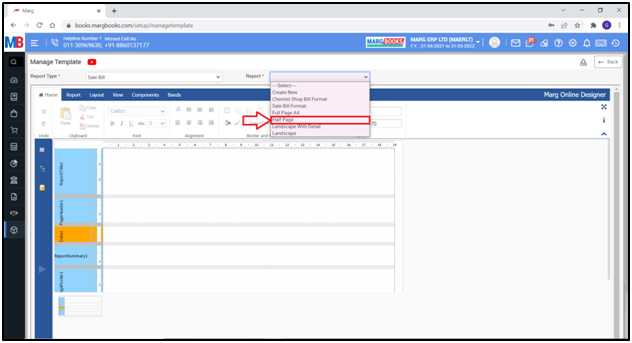
- Then from the ‘Report’ field, select the format on which the user needs to print the QR Code.
- Suppose select ‘Half Page’.
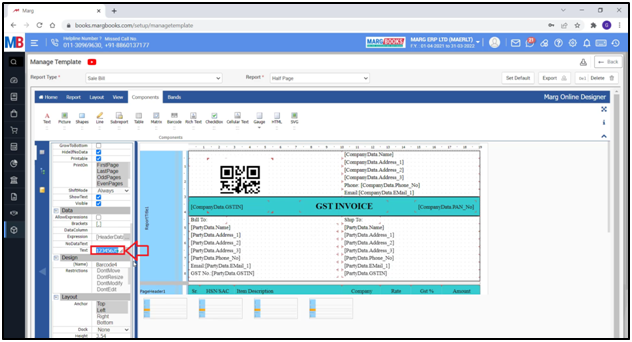
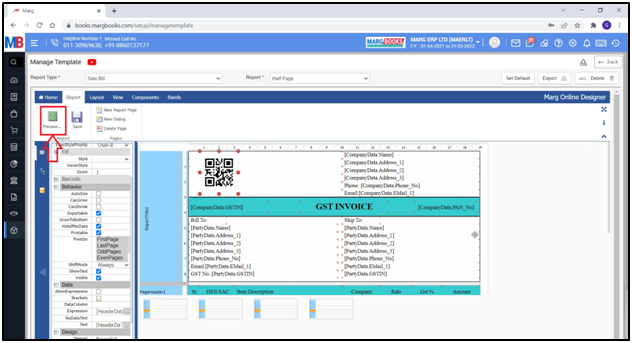
- Click on ‘Components’.
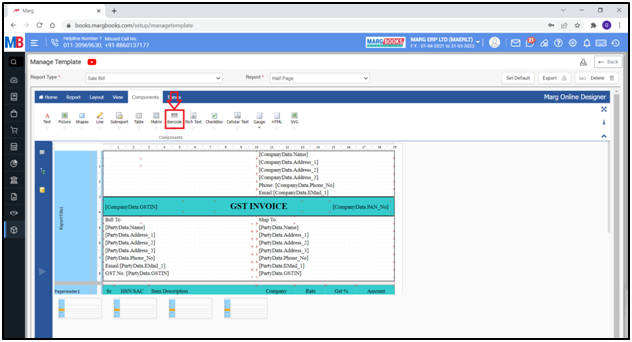
- Click & drag the ‘Barcode’ here.
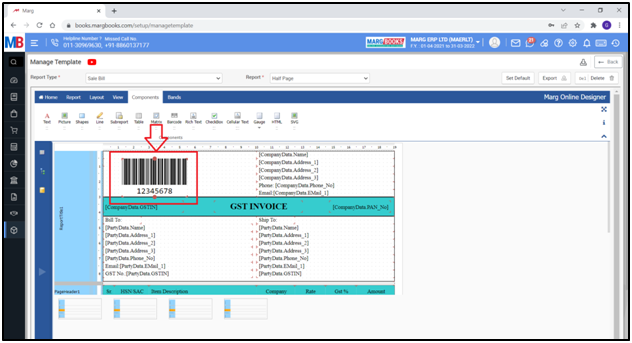
- Now the user will convert it into QR Code.
- From the left side, click on ‘Properties’ Icon.
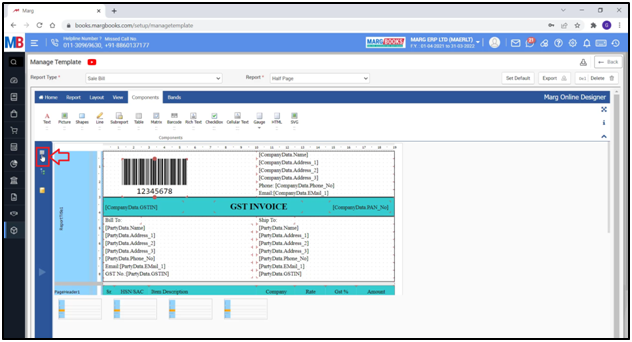
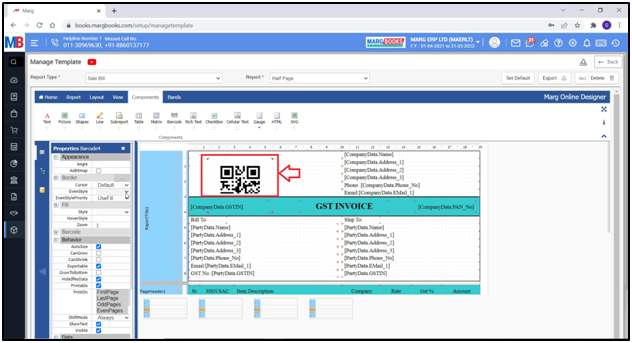
- Go to the Barcode section >> ‘Type’>> ‘QR Code’.

- This Barcode will get converted into QR Code.
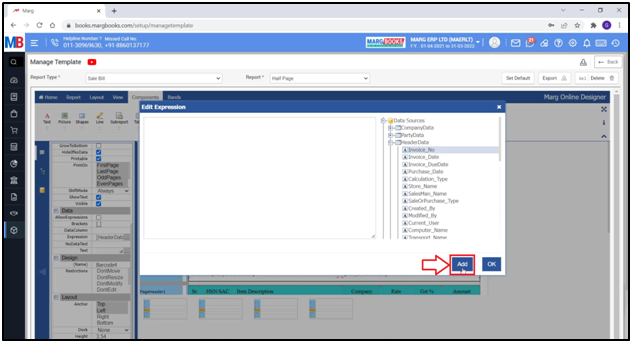
- Then from ‘Data’ section, click on the grey box given in front of the ‘Expression’.

- Select the variable of which the user needs to print QR Code.
- Suppose the user needs to print the variable of QR code.
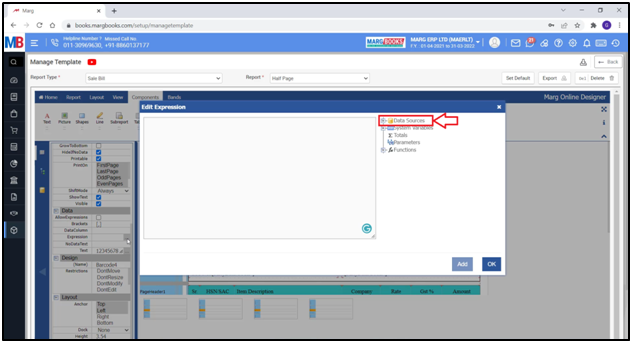
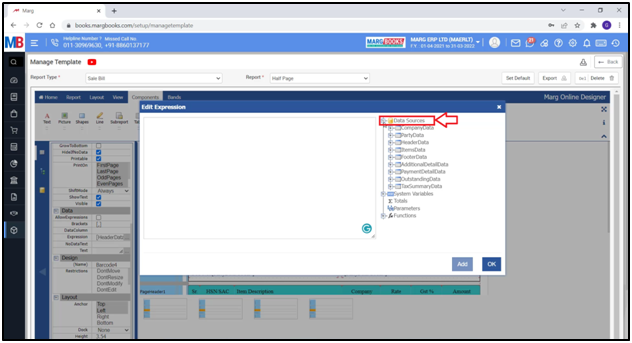
- From the ‘Data Sources’, click on plus icon.
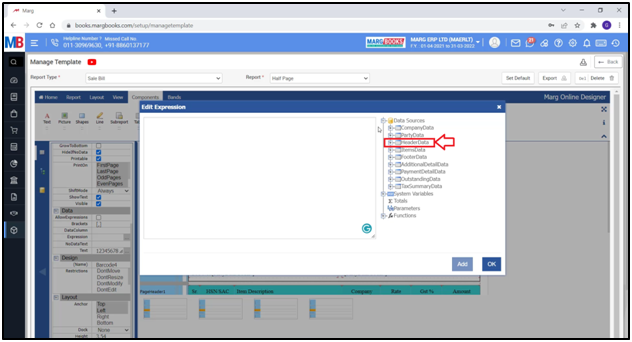
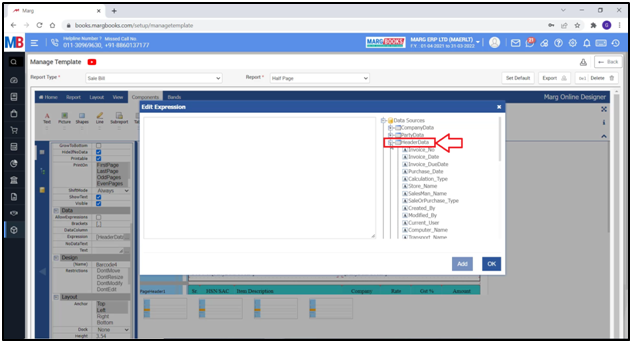
- Click on the Header Data’s plus icon.
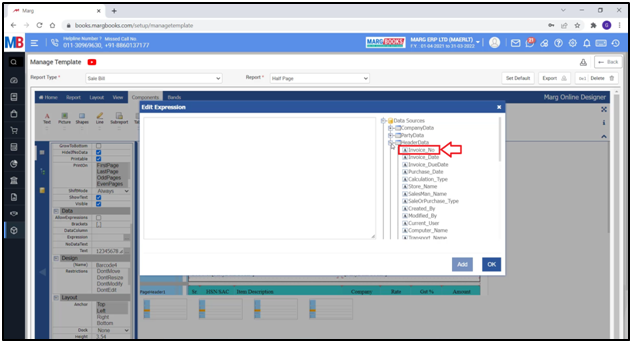
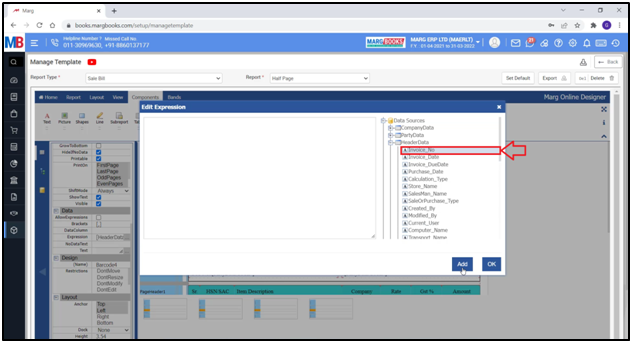
- Select ‘Invoice No.’
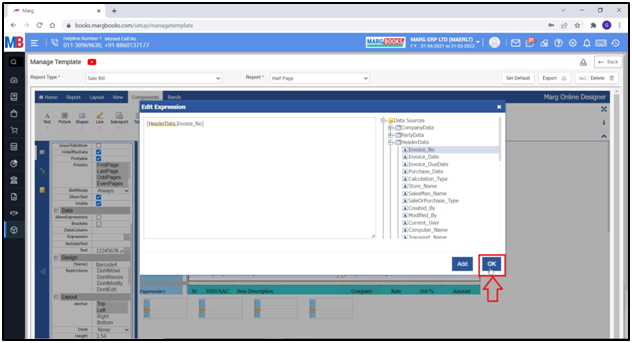
- Then click on ‘Add’.

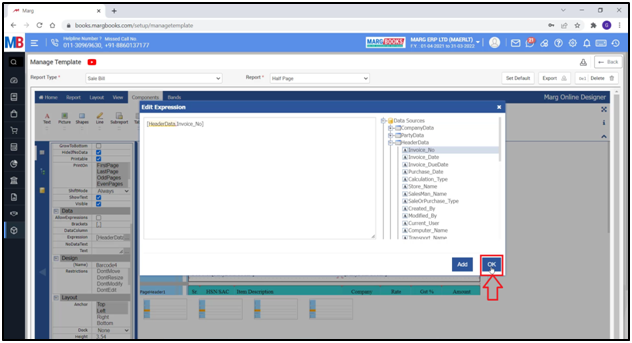
- Click on ‘Ok’.
- After that, the user will do the same process for the ‘Text’.
- Firstly, the user will remove the digits that are showing here.
- Click on the grey box.

- From the ‘Data Sources’, click on plus icon.
- Click on the Header Data’s plus icon.
- Select ‘Invoice No.’
- Then click on ‘Add’.
- Click on ‘Ok’.
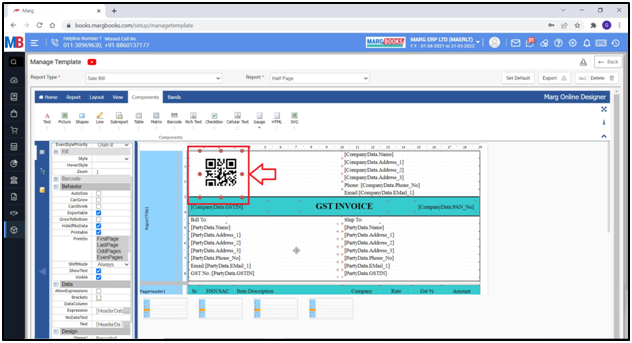
- The user can also resize the QR Code.
- Select the QR Code and come to ‘Behaviour’ section.
- Then de-select ‘AutoSize’.
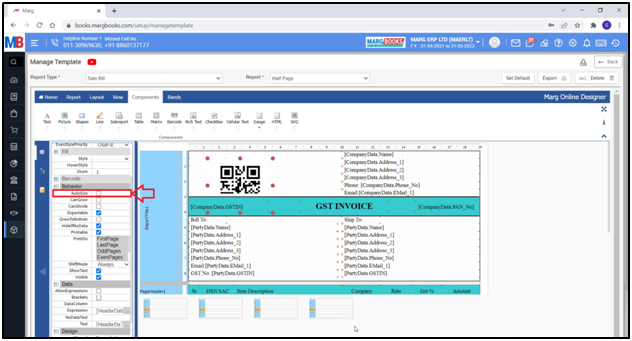
- Now the user can resize the QR code with the help of these red dots.
- The user can set the QR Code as per their requirement.
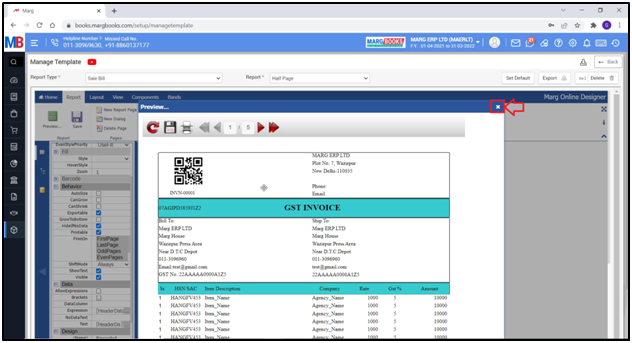
- In order to view it’s preview, Go to ‘Reports’ & click on ‘Preview’.
- The user can view its preview.
- Now close the preview window.
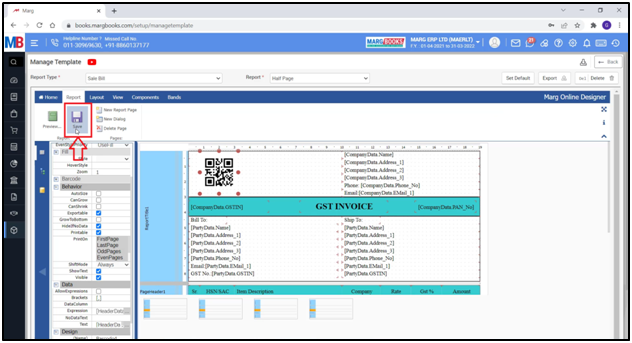
- Then 'Save' the Bill.
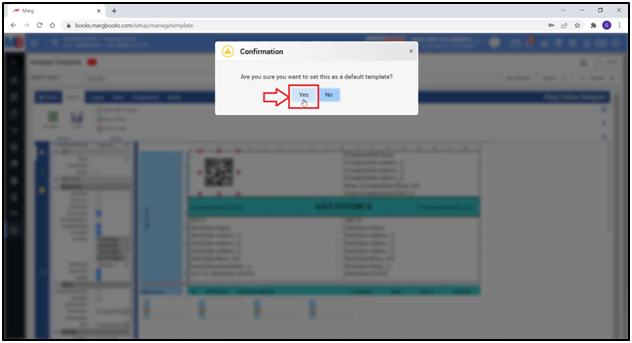
- To set the ‘Half Page’ format as default, click on ‘Set Default’.
- Whenever the user will print the QR then this Half Page format will by default get printed on the bill.
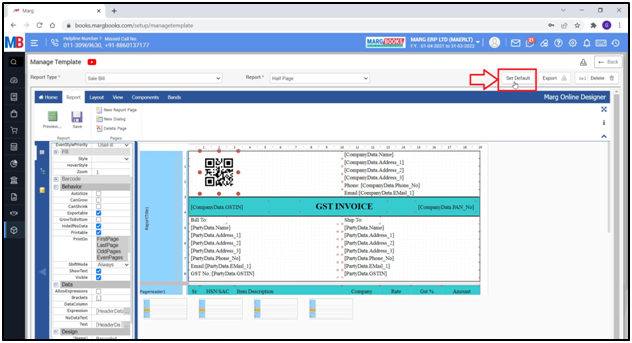
- A 'Confirmation' window will appear.
- The user will click on ‘Yes’.
- Now, the user will create a Sale Bill.
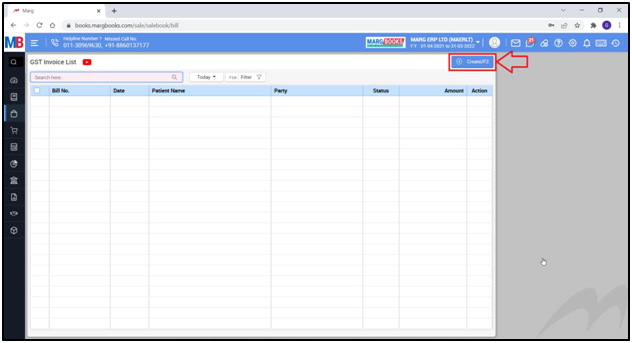
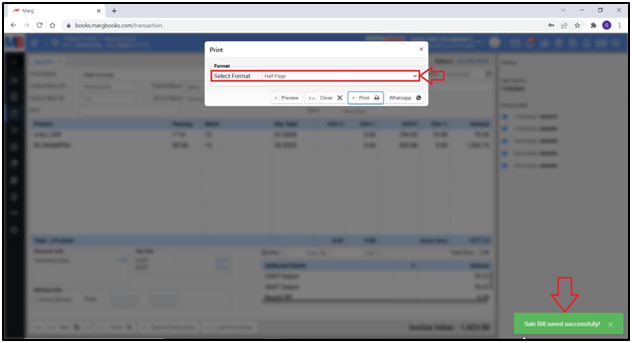
- Then save the Bill.
- The user will view that in the format it is showing Half Page by default.
- Click on ‘Preview’.
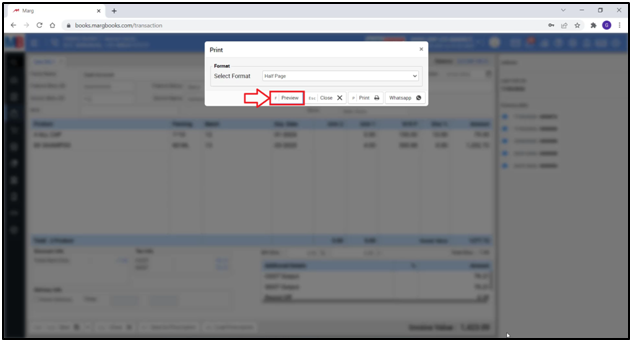
After following the above steps, the user can view the QR Code has been printed on Bill.