Welcome to  -
HRXpert
-
HRXpert
Home > Hrxpert > Cheque Printing Setup > Process to Cheque Printing Setup in HRXpert Software
Process to Cheque Printing Setup in HRXpert Software

Overview of Cheque Printing Setup Option in HRXpert Software
Process of Cheque Printing Setup in HRXpert Software
OVERVIEW OF CHEQUE PRINTING SETUP OPTION IN HRXPERT SOFTWARE
- Cheque Printing Setup provision in HRXpert Software enables the employer to create a setup for Cheque printing and print copies of the cheques directly from the software.
- The employer can easily set dimensions, font size, margins and length for printing the desired cheques from the software.
PROCESS OF CHEQUE PRINTING SETUP IN HRXPERT SOFTWARE
- Go to Masters >> Employee Master.
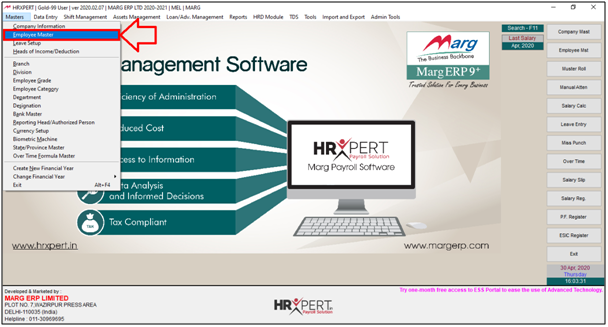
- An ‘Employee Master’ window will appear.
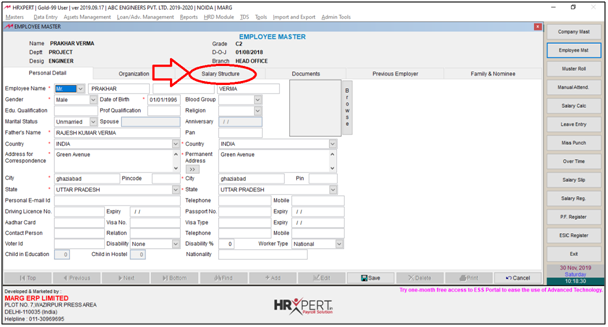
- The employer will go to the record of those employees whose salary is being paid through cheque and then click on ‘Edit’.

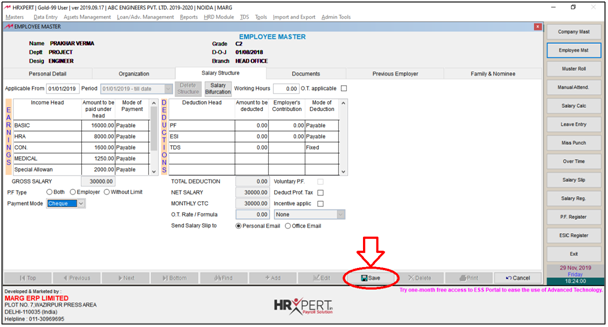
- Click on ‘Salary Structure’ Tab.
- Select the Payment Mode i.e. Cheque.

- Click on ‘Save’.
- Now, go to Admin Tools >> Cheque Printing Setup.

The employer can use Cheque Printing Setup option only when the details of Bank is been added in the Bank Master.
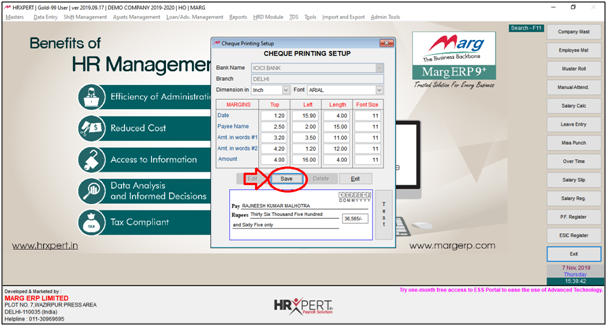
- A ‘Cheque Printing Setup’ window will appear.
- As the employer has already entered the Bill Details, then select the options from the following fields:
a. Bank Name: Select the Bank. Suppose, ICICI Bank.
Then Click on ‘Edit’.

Fig 1 View of Cheque Printing Setup Window in HRXpert Software
b. Branch: It is selected by default.
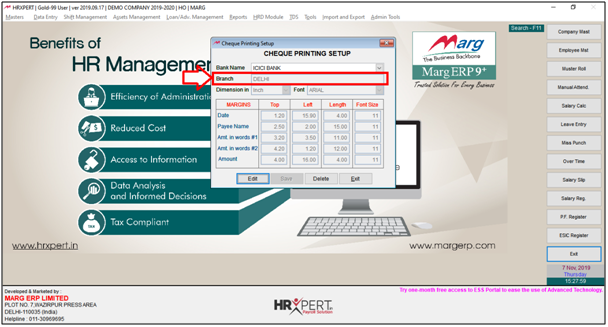
c. Dimension: Select the dimensions i.e. in which dimensions the employer needs to do the setup of Cheque Printing like Inch, Centimeter or Millimetre.
Suppose select ‘Inch’.

d. Font: Select the ‘Font’.
Suppose select ‘Arial’.

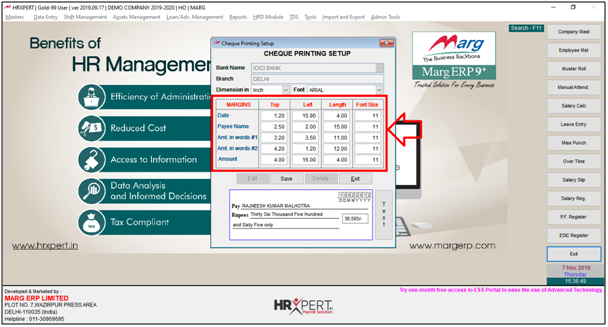
- Then, set the Margins. Like, the employer can set the margin of ‘Date’ i.e. Top & Left. Then set the length of the date and its font size.
- Similarly, the employer can set the margin of ‘Payee Name’ i.e. Top & Left. Then define the length and set its font size.
- So, the employer can set the margin as per the requirement. For now, the employer will keep these settings as default.
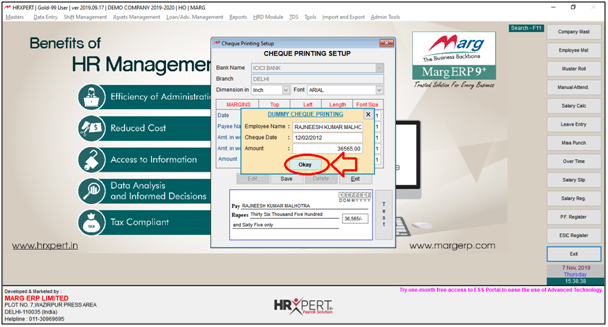
- Now, if the employer needs to view the process of printing the cheque then click on‘Test’.

- A ‘Dummy Cheque Printing’ window will appear.
- The employer can view the details of Dummy Cheque Printing.
- The employer can change the details of Dummy Cheque Printing as per the requirement.

- Click on ‘Okay’.
- Now, the employer can view the preview of printing of the cheque i.e. how the cheque will be printed.
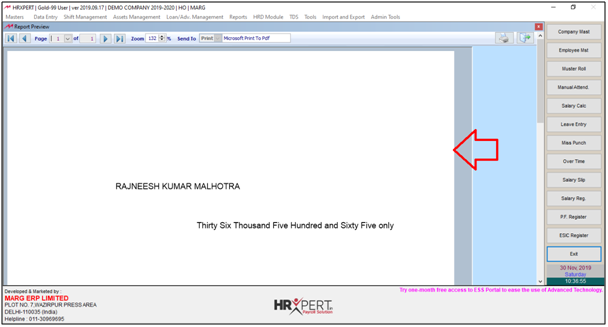
- The employer can also print the cheque by clicking on the icon of Print.
In order to print the cheque, the employer will set a blank cheque in the printer before printing any cheque.

- Press ‘Esc’ key to come out from the preview window.

- Then click on ‘Save’.