

Welcome to  -
HRXpert
-
HRXpert
Home > Hrxpert > Control Room Setup > What is the process of Salary and Attendance Separation in HRXpert Software ?
What is the process of Salary and Attendance Separation in HRXpert Software ?

Overview of Attendance and Salary Separation in HRXpert Software
Process To Enable Salary And Attendance Separate Process In HRXpert Software
Process Of Attendance Of Particular Employee In HRXpert Software
Process To Modify Attendance In HRXpert Software
Process To Delete Salary Of An Employee In HRXpert Software
OVERVIEW OF ATTENDANCE AND SALARY SEPARATION IN HRXPERT SOFTWARE
- In HRXpert Software previously when the employer generates the attendance then salary also gets default generated.
- The newly developed feature of Attendance & Salary Separation enables the employer to generate attendance & salary of the employees separately.
- When the employer generates the attendance of the employees, the salary will not be generated until the employer does not re-process the salary.
PROCESS TO ENABLE SALARY AND ATTENDANCE SEPARATE PROCESS IN HRXPERT SOFTWARE
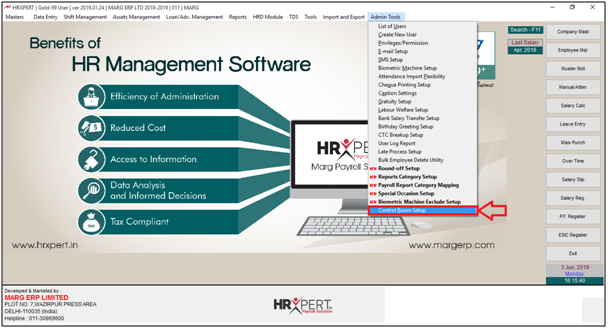
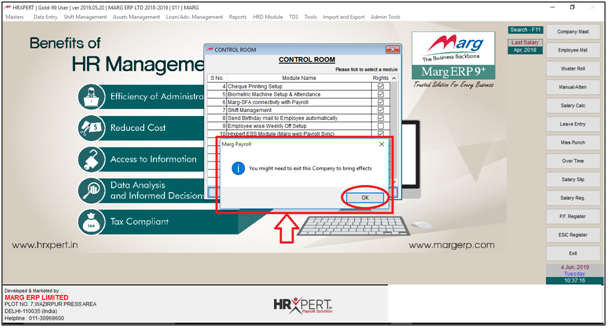
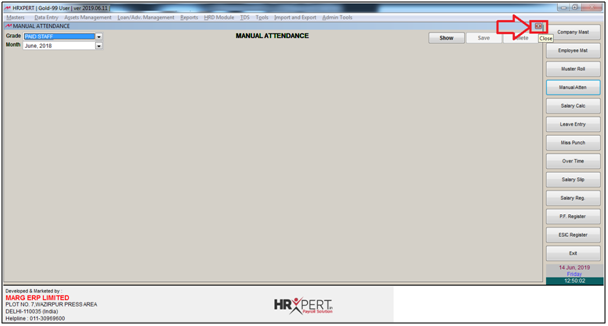
- Go to Admin Tools > Control Room Setup.
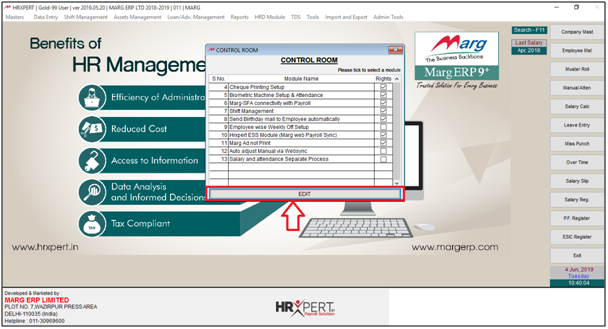
- A 'Control Room' window will appear.

- The employer will click on ‘Edit’.
- Now tick the box of ‘Salary and Attendance Separate Process’.
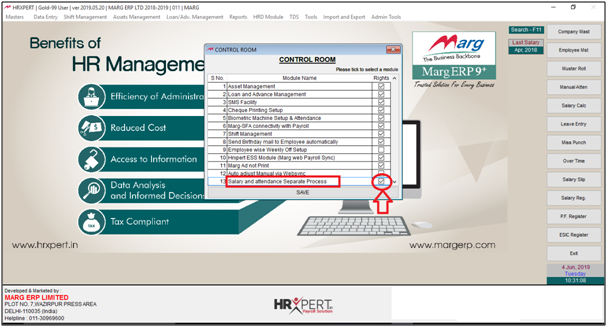
- Now click on ‘Save’.

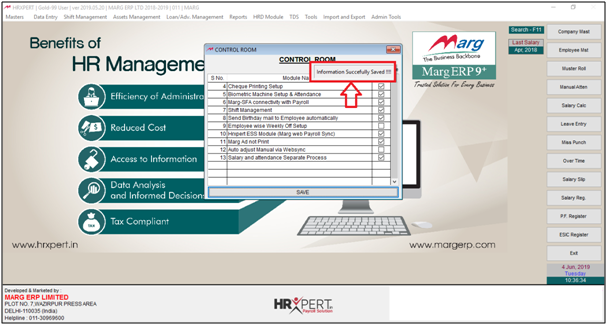
- A pop-up of ‘Information Successfully Saved!!!’ will appear.
- An alert message will appear 'You might need to exit this company to bring effects' i.e. the employer needs to exit the company to update the changes made in the Control Room.
- The employer will click on ‘Ok’.
- Now the employer will click on 'Exit'.
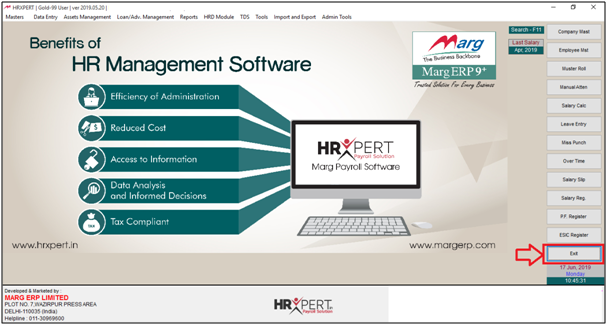
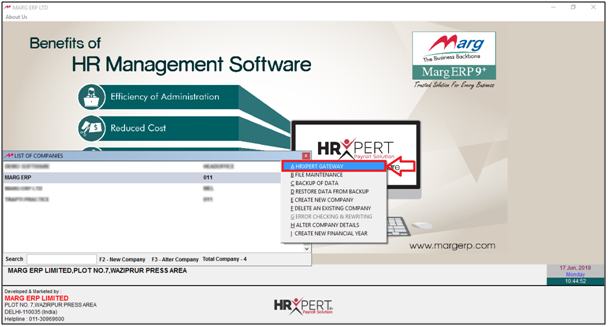
- From the 'List of Companies' window, switch to the particular company and press 'Enter' key on HRXpert Gateway.
PROCESS OF ATTENDANCE OF PARTICULAR EMPLOYEE IN HRXPERT SOFTWARE
- Go to Data Entry > Attendance Entry > Import/Modify Attendance from Machine.
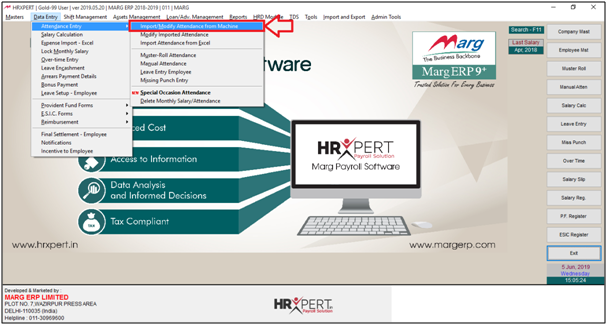
- An 'Attendance Import/Modify' window will appear.
- The employer will select the grade.
- Now mention the date i.e. from which date till which date the employer will import the attendance.
- Then select the machine.
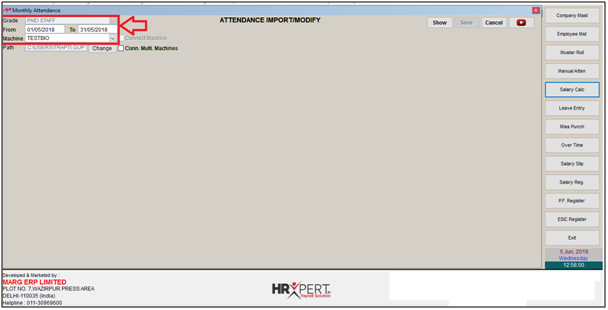
- Click on ‘Change’ tab.
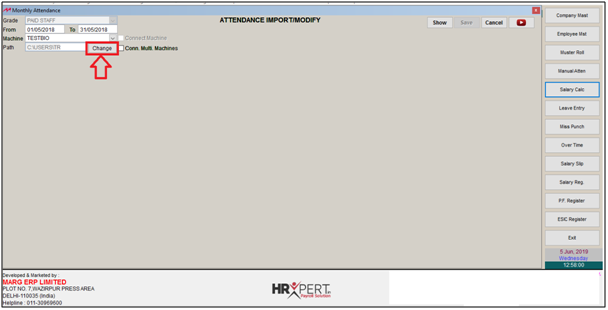
- Select the location where the Attendance file is saved.

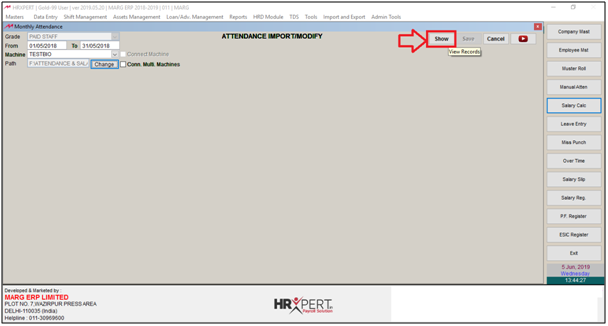
- The employer will now click on ‘Show’ to view the records.
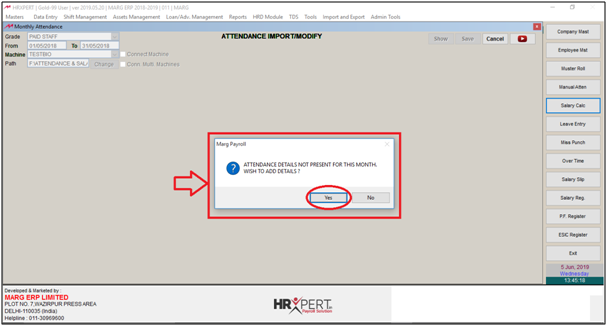
- An alert window will appear 'Attendance details not present for this month wish to add details'.
- The employer will click on ‘Yes’.
- The employer can view the attendance of all employees.
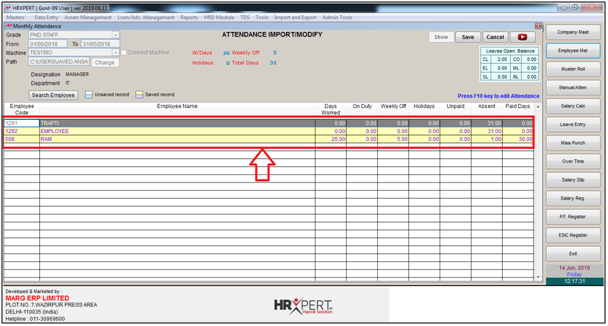
- The employer will now select the employee whose attendance is to be generated.
- Press 'F10' key.

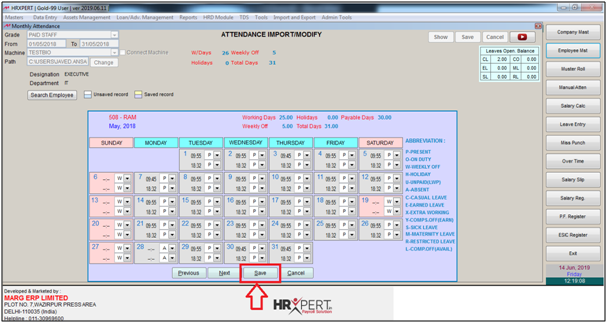
- The attendance of the employee will get generate.
- Click on ‘Save’.
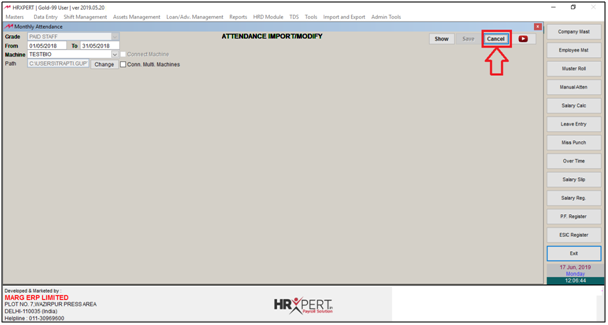
- Now to exit from this window the employer will click on ‘Cancel’.

- Click on ‘Save’ to save the changes.

- The employer will click on ‘Cancel’.
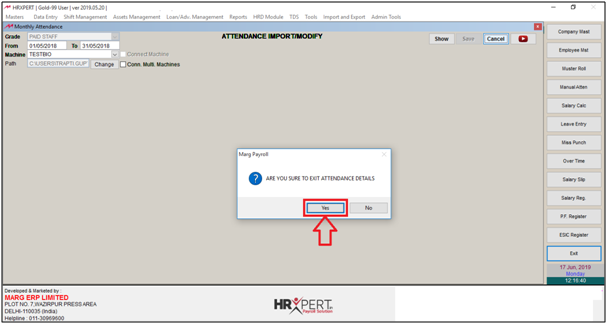
- A message 'Are you sure to exit Attendance details' will appear.
- Click on ‘Yes’ and the employer will get switched to the home screen.
- Now click on ‘Salary Slip’ to view wheather the salary has been generated or not.
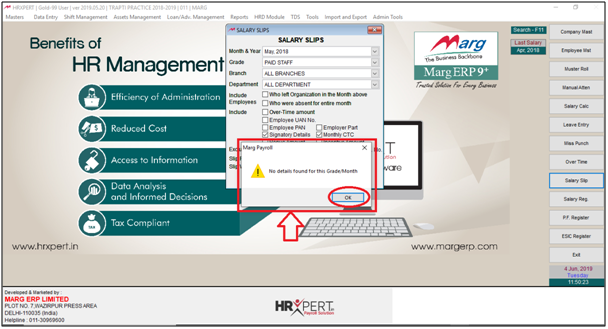
- A 'Salary Slip' window will appear.
- The employer will select the information as per the requirement. Click on ‘Show’.

- An alert message ‘No details found for this Grade Month’ will appear, i.e. salary of that employee has not been auto-generated.
- Click on ‘Ok’.
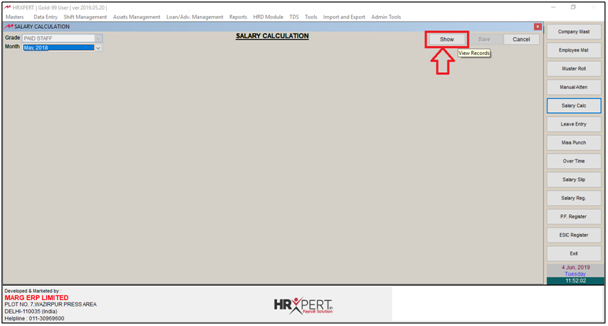
- The employer will click on ‘Salary Calculation’ to generate the salary of employee.
- A 'Salary Calculation' window will appear.
- The employer will select the grade and the month.
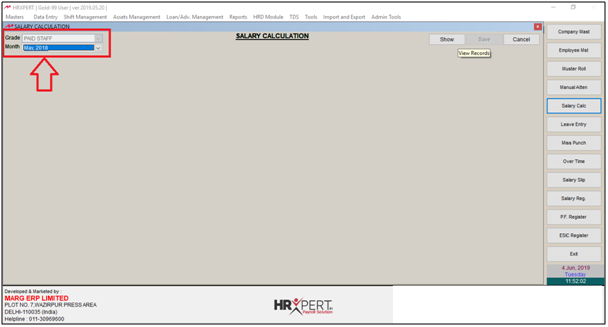
- Now click on ‘Show’.
- The employer can view that the salary of all employees is displayed ‘0’ (Zero) as the salary of employees has not been processed.

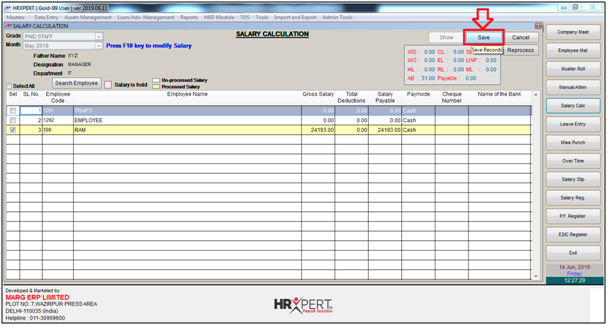
- To process the salary of the employee, the employer will check the box.

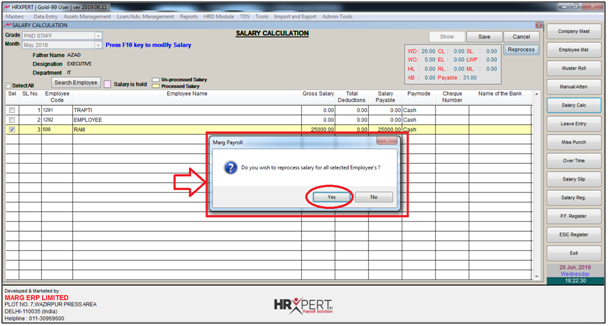
- If the employer wants to reprocess the salary of all employees then check the box of ‘Select All’.
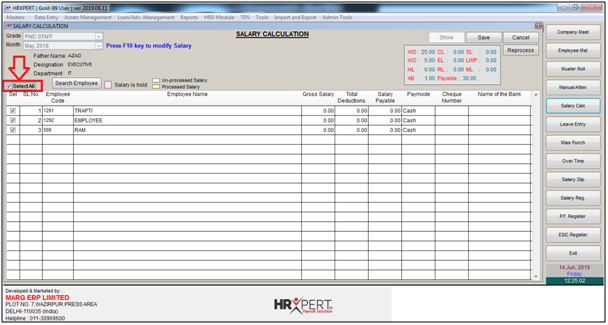
- The employer will now tick the check box of that employee whose attendance has been generated.
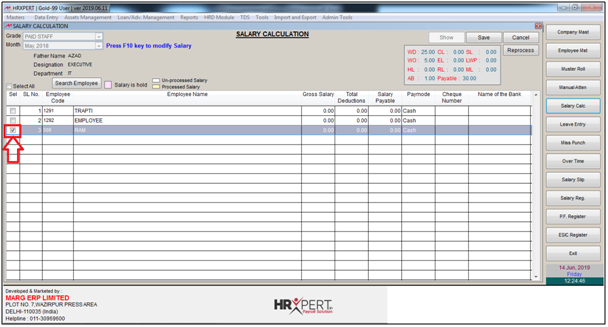
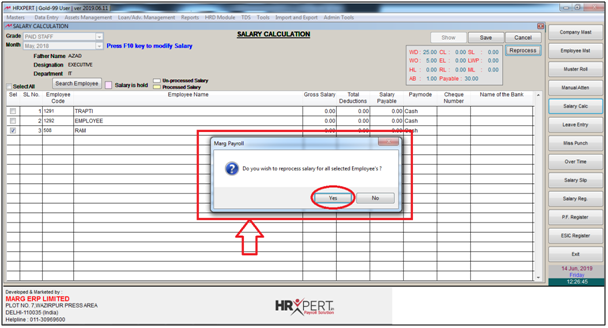
- The employer will click on ‘Reprocess’ tab.

- A message 'Do you wish to reprocess salary for all the selected employee’s' will appear.
- The employer will click on ‘Yes’.
- Again, a message will appear 'Salary reprocess successfully completed for all selected employees' i.e. salary of the selected employee has been reprocessed.
- The employer will now click on ‘Ok’.

Note: The employer must remember to always save after reprocessing the salary. If the employer does not saves then the salary will not get reprocessed.
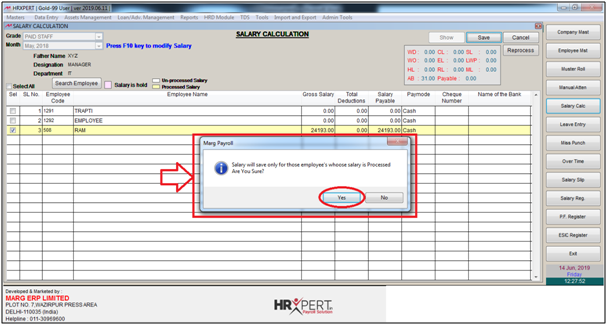
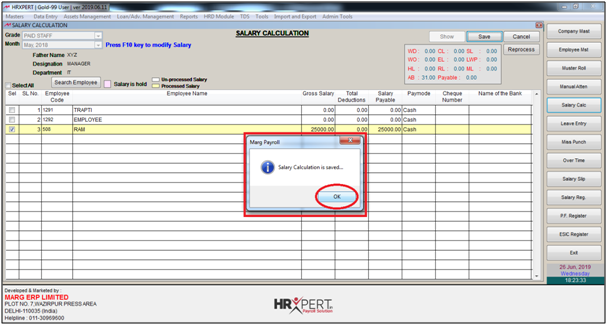
- The employer will now click on ‘Save’.
- A confirmation message 'Salary will save only for those employees whose salary is processed. Are you sure?' will appear, i.e. the salary of those employees will be saved whose salary is reprocessed.
- The employer will now click on ‘Yes’.
- A message ‘Salary calculation is saved’ will appear.
- The employer will click on ‘Ok’.

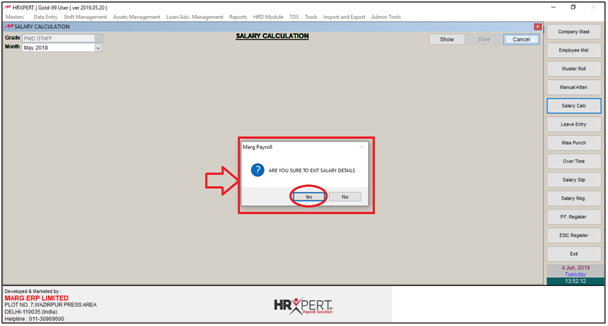
- The employer will now click on ‘Cancel’.

- A message 'Are you sure to exit Salary details' will appear.
- The employer will click on ‘Yes’ and will be switched to the home screen.
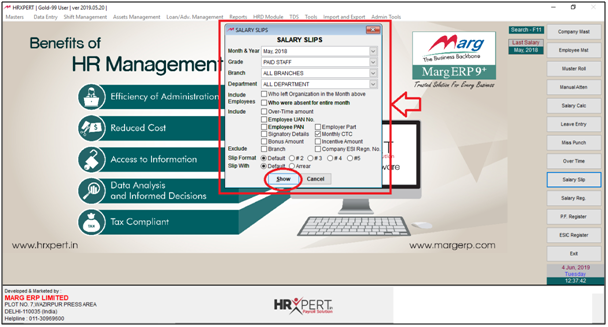
- The employer will click on ‘Salary Slip’.

- A 'Salary Slips' window will appear.
- The employer will select the information as per the requirement. Click on ‘Show’.
- The employer can view the selected employee.
- Check the box of this selected employee and click on ‘Display’.
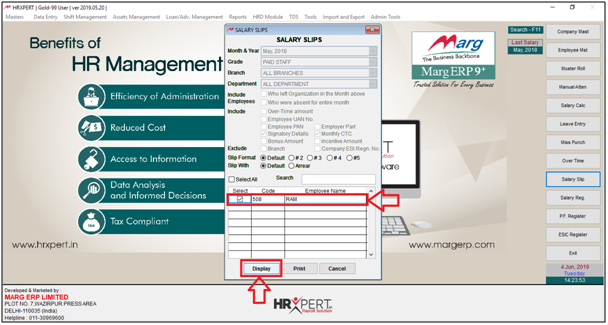
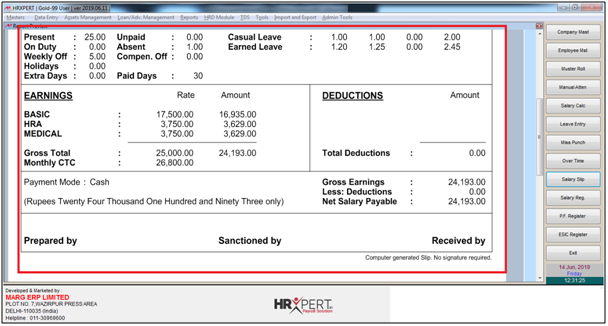
- The employer can view that the salary of the selected employee will get generate.
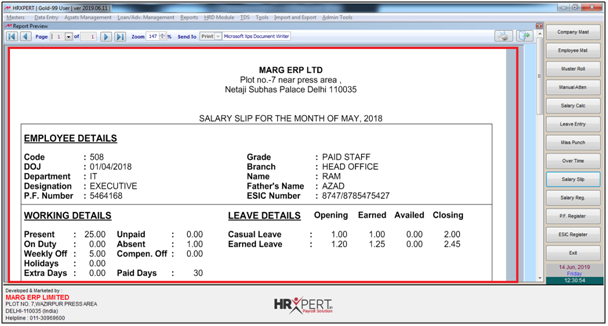
- Fig 1. View of Salary Slip in HRXpert Software
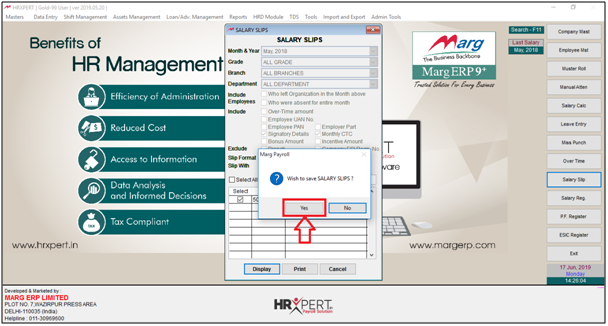
- The employer will now click on 'Yes' to save the salary slip.
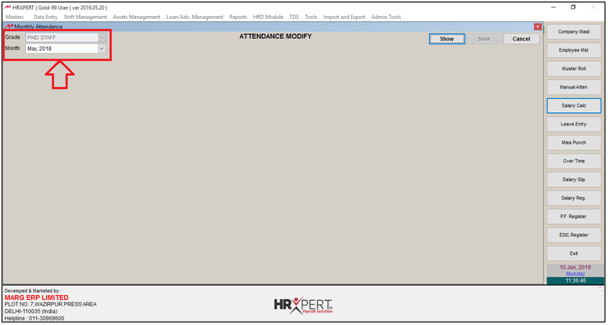
PROCESS TO MODIFY ATTENDANCE IN HRXPERT SOFTWARE
- Go to Data Entry > Attendance Entry > Modify Imported Attendance.

- An 'Attendance Modify' window will appear.
- The employer will select the month and grade.
- The employer will click on ‘Show’.
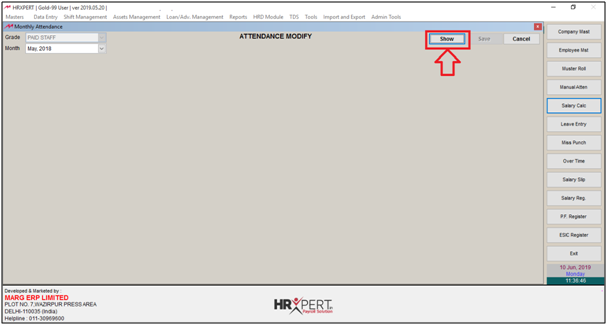
- The employer will select the employee and press 'F10' key.

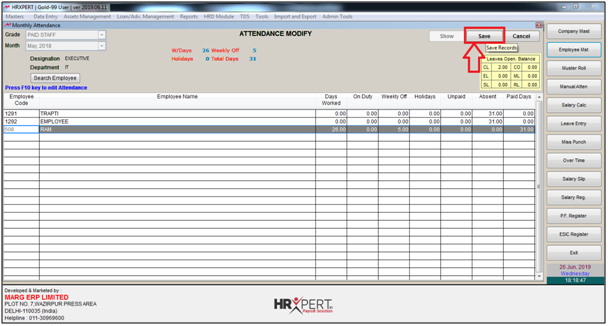
- The attendance of selected month of the particular employee will appear.
- Suppose, the employer now wants to change the attendance of a particular date from Absent to Present. Set A i.e. Absent to P i.e. Present.

- Click on ‘Save’.

- Now click on ‘Cancel’.

- The employer will now click on ‘Save’ to save the changes.
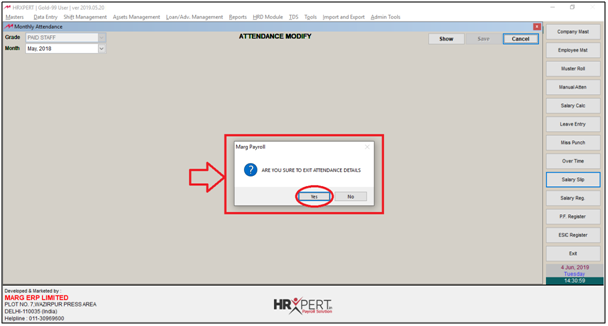
- Click on ‘Cancel’.
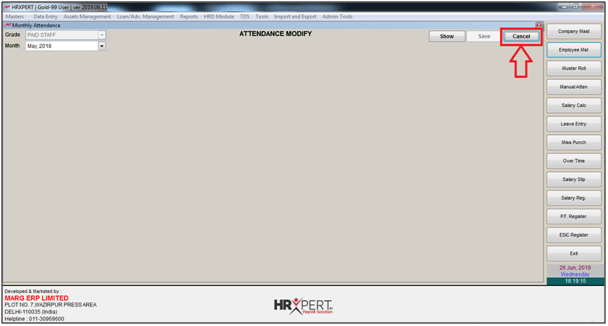
- A message will appear ‘Are you sure to exit attendance details’. Click on ‘Yes’.
- Now from the home screen click on ‘Salary Calculation’.

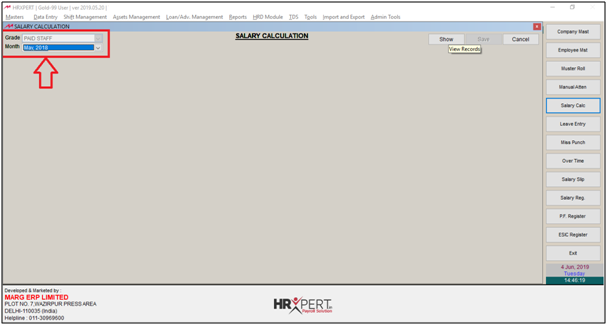
- A 'Salary Calculation' window will appear.
- The employer will now select the grade and month.
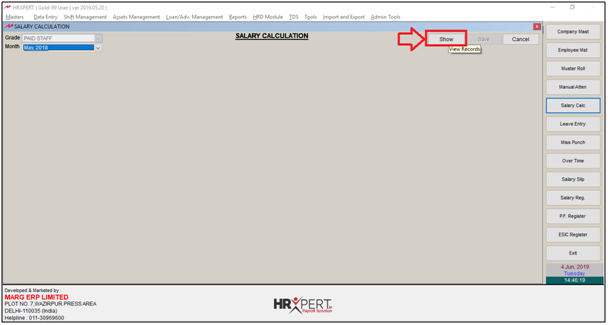
- Click on ‘Show’.
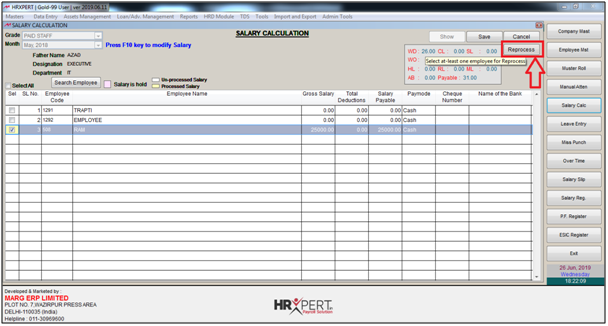
- The employer will select the employee whose attendance modification has been done.

- Click on ‘Reprocess’.
- A message ‘Do you wish to reprocess salary for all selected employees?’ will appear.
- Click on ‘Yes’.
- Again a message ‘Salary Reprocess successfully completed for all selected employee’ will appear.
- Click on ‘Ok’.

- The employer will now click on ‘Save’ to save the details.

- A confirmation message 'Salary will save only for those employees whose salary is processed. Are you sure?' will appear, i.e. the salary of those employees will be saved whose salary is reprocessed.
- The employer will now click on ‘Yes’.

- A message of 'Salary calculation is saved' will appear.
- The employer will click on ‘Ok’.
PROCESS TO DELETE SALARY OF AN EMPLOYEE IN HRXPERT SOFTWARE
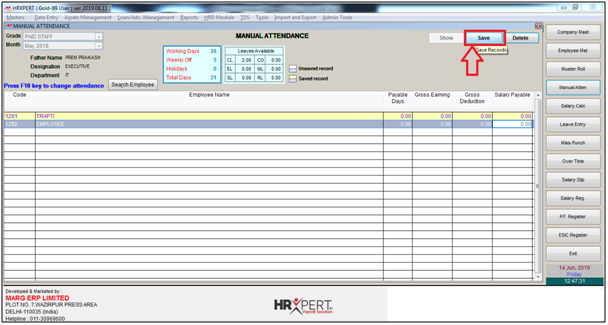
- The employer will click on ‘Manual Attendance’.
- A 'Manual Attendance' window will appear.
- The employer will now select the grade and month.

- Click on ‘Show’.

- A 'List of Employees' will appear.
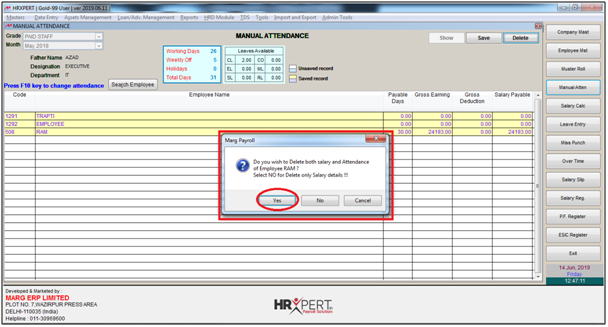
- The employer will select the employee whose salary is to be deleted.

- Click on ‘Delete’.

- A message ‘Do you wish to delete both salary and attendance of employee? Select NO for delete only salary details!!’ will appear.
- If the employer needs to only delete the salary then click on ‘No’ and if the employer needs to delete both salary and attendance then click on ‘Yes’.
- Suppose, the employer needs to delete both attendance and salary then click on ‘Yes’.
- Now the employer will click on ‘Save’.
- A message ‘Do you wish to save unsaved attendance also?’ will appear.
- The employer will click on ‘Yes’.

- Now the employer will close this window.
To Delete Month Wise Salary of all Employees of a Selected Month:
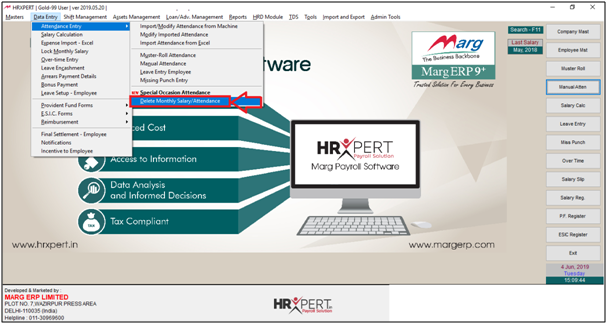
- Go to Data entry > Attendance Entry > Delete Monthly Salary/Attendance.
- A 'Delete Monthly Salary/Attendance' window will appear.
- If the employer wants to only delete the salary then select ‘Delete only Salary’.
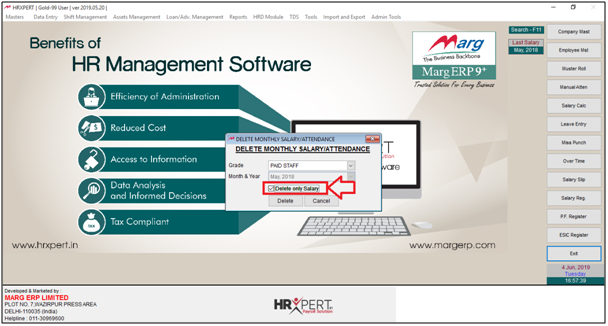
- Then the employer will click on ‘Delete’.

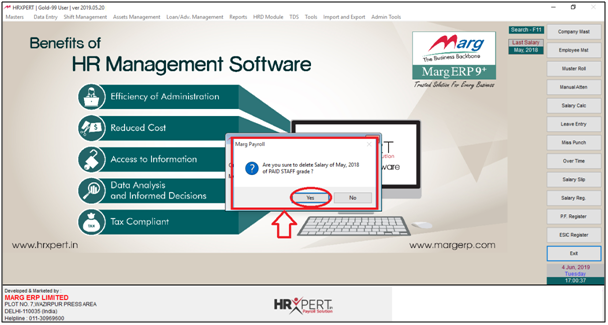
- A message ‘Are you sure to delete Salary of May, 2018 of Paid Staff grade?’ will appear.
- The employer will click on ‘Yes’.
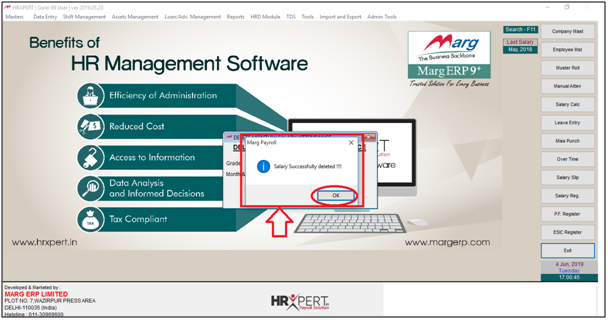
- A message ‘Salary Successfully Deleted!!’ will appear.
- Click on ‘Ok’.
In this case only salary will be deleted and the attendance would be as it is.
- If the employer needs to delete both salary and attendance then directly click on ‘Delete’.
- The salary and attendance of selected month will get delete.

