

Welcome to  -
HRXpert
-
HRXpert
Home > Hrxpert > Esic Forms > How to view ESIC Monthly Statement in HRXpert Software ?
How to view ESIC Monthly Statement in HRXpert Software ?

Overview of Monthly Statement in HRXpert Software
Process of Monthly Statement in HRXpert Software
OVERVIEW OF MONTHLY STATEMENT IN HRXPERT SOFTWARE
In HRXpert Software, with the option of Monthly Statement the employer can view the report of the monthly statement report of the ESIC amount which is deducted from the employee’s gross salary.
PROCESS OF MONTHLY STATEMENT IN HRXPERT SOFTWARE
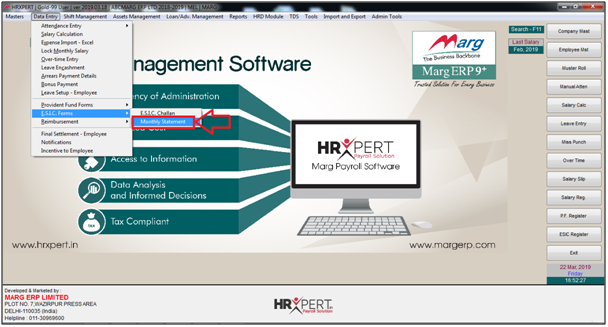
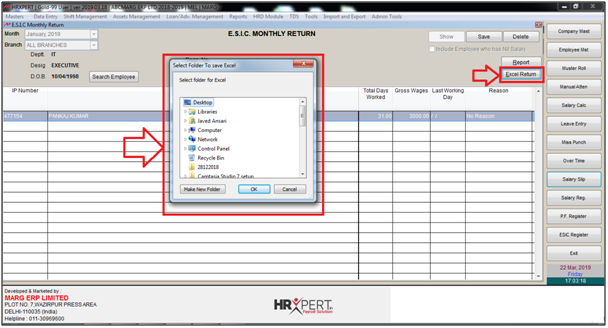
- Go to Data Entry > E.S.I.C Forms > Monthly Statement.
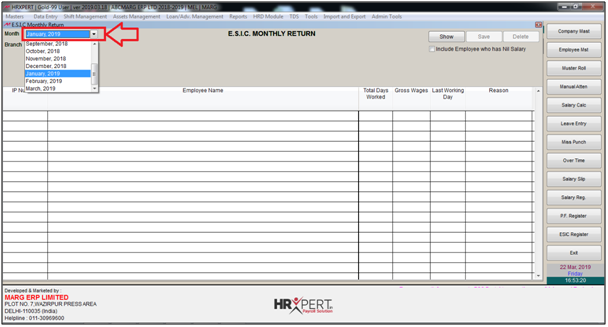
- An 'E.S.I.C Monthly Return' window will appear.
- In ‘Month’, the employer will select the month to view the monthly statement.
- Suppose select ‘January, 2019’.
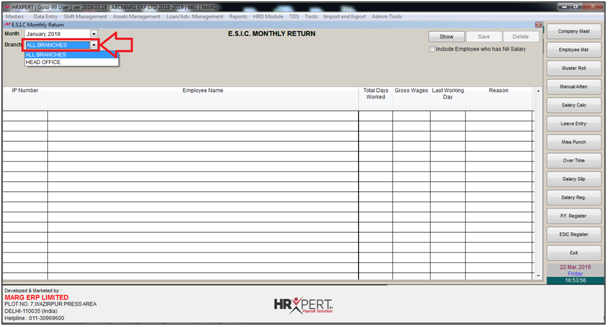
- In ‘Branch’ the employer will select the branch.
- Suppose select ‘All Branches’.
- Now the employer will click on ‘Show’ to view the records.
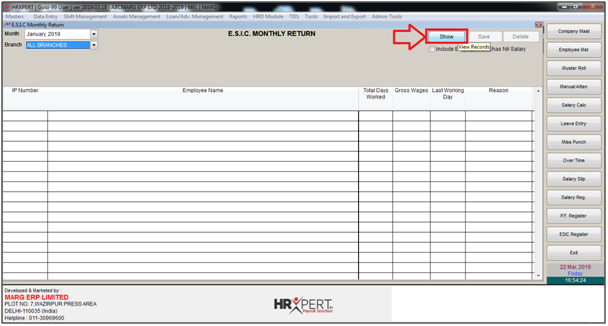
- The employer can now view the records.

- Click on ‘Excel return’ and then select the folder to export the Excel file.
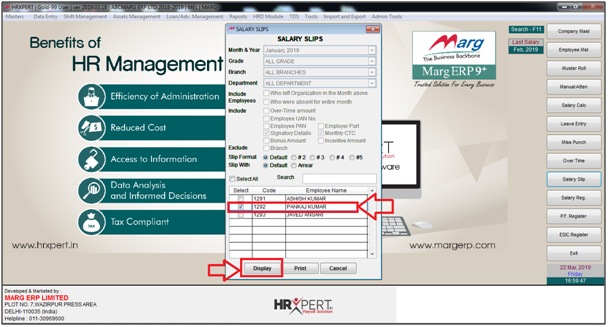
- From the main window, the employer will click on ‘Salary Slips’.
- A 'Salary Slips' window will appear.
- In ‘Month & Year’ the employer will select the month and year.
- Suppose select ‘January, 2019’.

- In ‘Grade’ the employer will select the grade of the employee.
- Suppose select ‘All Grade’.

- In ‘Branch’ the employer will select the branch of the employee.
- Suppose select ‘All Branches’.

- In ‘Department’ the employer will select the department of the employee.
- Suppose select ‘All Department’.

- Then, in 'Who left organization in the month above' if the employer requires to include that month should also be shown on the salary slip in which if any employee has left an organization then tick the box here.
- Similarly, 'Who were absent for entire month' means if the employer needs to include those employees who were absent for the whole month then tick the box here.
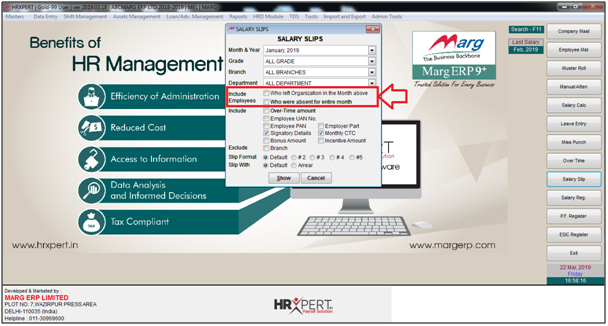
- Then, in ‘Include’ the employer will select whether to include ‘Over-Time Amount’, ‘Employee UAN Number’, ‘Employee PAN’ and ‘Employer Part’.
- Here, by default 'Signatory Details and 'Monthly CTC' is already been selected but if the employer needs to untick it then it can be done.
- Similarly, the employer will select whether to include ‘Bonus Amount’ and ‘Incentive Amount’.

- Then, in ‘Exclude’, the employer will select whether to exclude branch or not.

- In ‘Slip Format’ the employer will select a particular format in which the salary slip needs to be viewed. For now, keep it as “Default”.
- Next, in ‘Slip With’ the employer needs to select whether to view the Default Slip or with Arrear. So, for now keep it “Default” only.

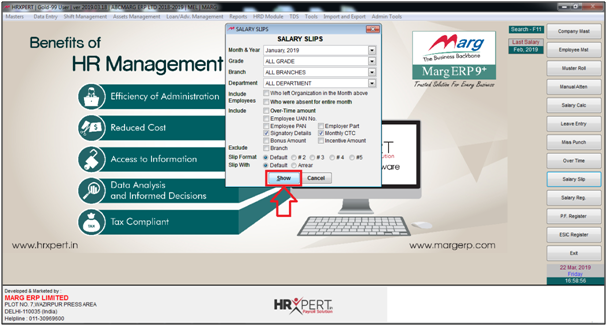
- The employer will now click on ‘Show’.
- The employer can now view the employee names and codes.
- Suppose the employer wants to view the salary slip of ‘Pankaj Kumar’ then select it.
- Now click on ‘Display’.
The employer can now view the salary slip and the gross wages displayed in the Medical field.

Fig 1. View of Salary Slip in HRXpert Software.

