

Welcome to  -
HRXpert
-
HRXpert
Home > Hrxpert > General Queries > How to Run Server.exe file of HRXpert Software?
How to Run Server.exe file of HRXpert Software?

Overview/Introduction to Server.exe File of HRXpert Software
Process to Run Server.exe File of HRXpert Software
OVERVIEW/INTRODUCTION TO SERVER.EXE FILE OF HRXPERT SOFTWARE
Server Backup allows taking Automatic Backup of all companies’ time wise i.e. the user can take the backup of all the Companies all together at once from Server Backup.
- Server file of HRXPERT software allows you to synchronise your data of Payroll software (Employee’s In & Out details, Employee’s leaves etc) on ESS portal.
PROCESS TO RUN SERVER.EXE FILE OF HRXPERT SOFTWARE
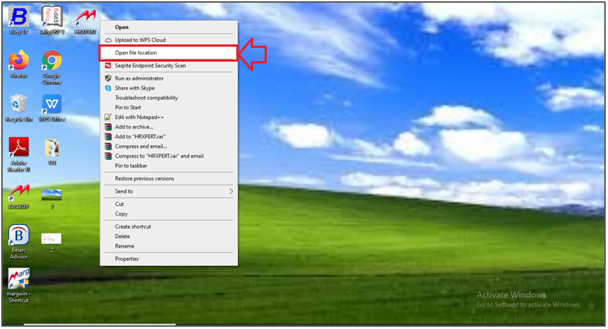
- Right Click on HRXpert Icon.

- Select 'Open File Location'.
- Then HRXpert folder will open in which the user will select 'Payserver' folder. Press Enter.

- A HRXpert Backup Server window will appear. Enter Admin details.
- Then click on 'Ok'.

- Then an Authorization, Backup, Services Server screen will appear.
- Select the 'Yes' option from the Data Backup drop down list.
- Select the 'Yes' option from the Data Synchronize drop down list.
- Click on 'ok'.

- The settings related to server type authorization, backup and services are displayed.

A. Data Backup
- Backup Path: Define the backup location for data backup. By default, the location of the backup is Payserver/Backup, but it can be changed as per the user's requirements.
- Take Backup After: Define the Backup time interval, i.e. the software will automatically take the complete backup after every defined minute. For example, if the user defines 120 minutes, then the software will automatically take the backup after every 120 minutes.
- First Backup After: Define the backup after the very first configuration of the server.exe file. For example, if the user defines 15 minutes, then the server will take the first backup after 15 minutes and then after every 120 minutes.
- Maximum Backup's: Define how many backups of the financial year need to be taken. It saves space as the last backup stores all the important data of the relevant financial year.
- Backup Of: Select which backup needs to be taken, i.e. All, Current.
B. Data Synchronization for ESS
- Start Time: Define the Data synchronization starting time, i.e. the software will automatically starting synchronizing the backup on defined time. For example, if the user defines 13:00(24hrs), then the software will automatically synchronize the backup on at 1:00 pm of the day.
- End Time: Define that time on which the data synchronization needs to be start. For example, if the user defines 23:59(24hrs), then the software will automatically stop the data synchronization at the defined time.
- Interval: Define the Interval time as per the requirement.
- Make the desired changes in the server settings.
- Then click on 'RUN' key on it.
- After following the above steps, the software will start taking data backup automatically as per the defined time period.

