


Welcome to  -
Marg Books
-
Marg Books
Home > Marg Books > Inventory Master > What is the process of Barcode Management in Marg Books ?
What is the process of Barcode Management in Marg Books ?

Overview/Introduction to Barcode Template In Marg Books
Process to Enable Barcode In Marg Books
Process to Design Barcode In Marg Books
Process to Configure Barcode Printer With Marg Books
Process to Generate Master Wise Barcode In Marg Books
Process to Generate Batch Wise Barcode In Marg Books
OVERVIEW/INTRODUCTION TO BARCODE TEMPLATE IN MARG BOOKS
- A Barcode is a visual representation consisting of parallel black lines called bars used to identify the item’s information.
- Marg Books has provided a very beneficial provision in the software through which the user can easily design new barcodes & can also customize the predefined barcode templates as per your requirement.
- By configuring the Barcode with the software, user can be able to do fast billing by scanning the Barcodes of the items.
- Apart from it, the user can also print the barcode both through the barcode and laser printer.
PROCESS TO ENABLE BARCODE IN MARG BOOKS
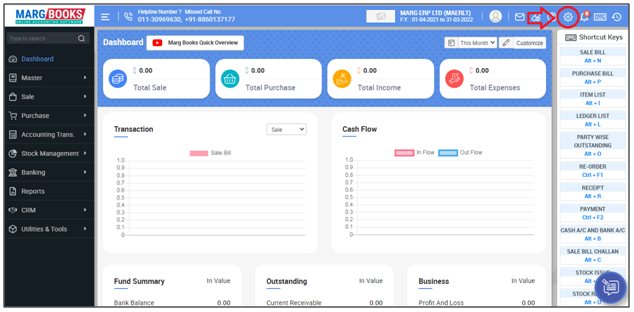
- From the right side of the dashboard window, click on ‘Settings’ icon.
- A ‘Dashboard setting’ window will appear.
- In Control Room field, click on ‘Configure’ tab.

- Now in the search Box, type ‘Barcode’.
- Then in ‘Barcode Management’ option, the user will select ‘Yes’ and click on ‘Configure’ tab.

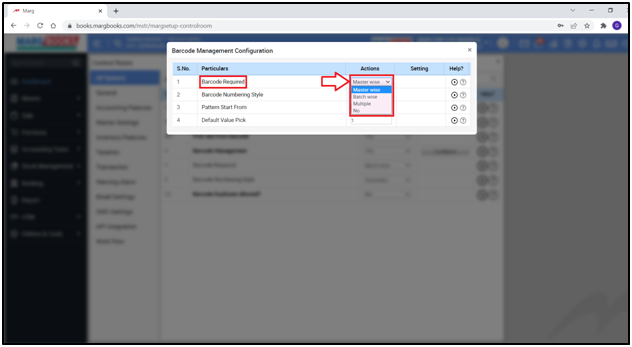
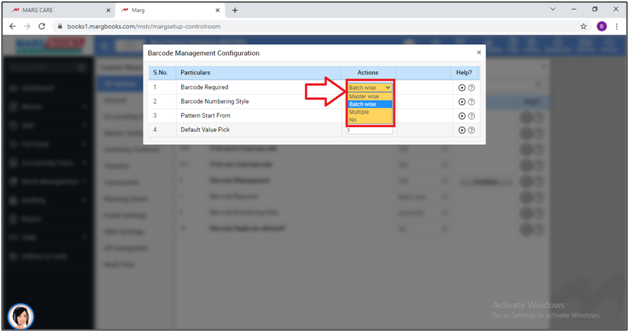
- A ‘Barcode Management Configurations’ window will appear where the user will select the options as per the requirement.
a. Barcode Required: In this option the user will select on the basis of which the barcode needs to be generated.
1. Master Wise: If the barcode number of selected item always remains fix then the user will select ‘Master Wise’ from the drop-down.
2. Batch Wise: If the barcode number of selected item keeps on changing with their batch numbers then the user will select ‘Batch Wise’ from the drop-down.
3. Multiple: If there is multiple barcodes of the single batch then user can maintain the barcode of each batch it by selecting ‘Multiple’ from the dropdown.
Suppose select ‘Master Wise’.
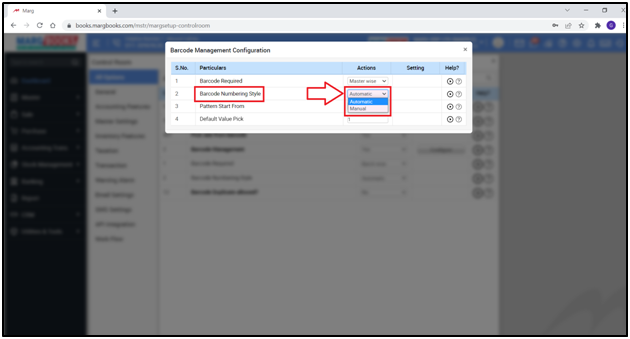
b. Barcode Numbering Style: The user will select whether the barcode needs to be maintained automatically or needs to be mentioned manually.
Suppose the user will select ‘Automatic’.
c. Pattern Start From: Here the user will mention the series which needs to be followed for the barcode number generation.

d. Default Value Pick: Here the user will mention the Number of Quantities to be picked at the time of loading item by scanning their barcode.
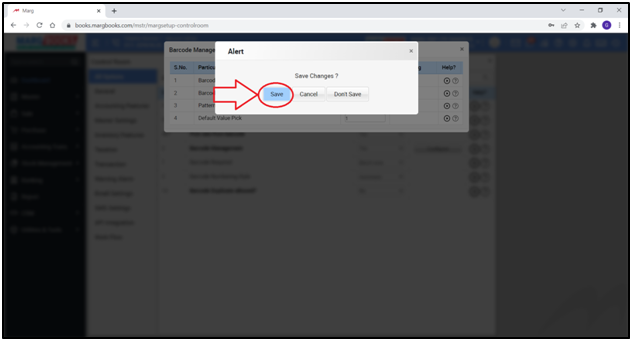
Then press ‘ESC’ key to save the changes.

- An ‘Alert’ window will appear.
- The user will click on ‘Save’ to confirm the saving process.
PROCESS TO DESIGN BARCODE IN MARG BOOKS
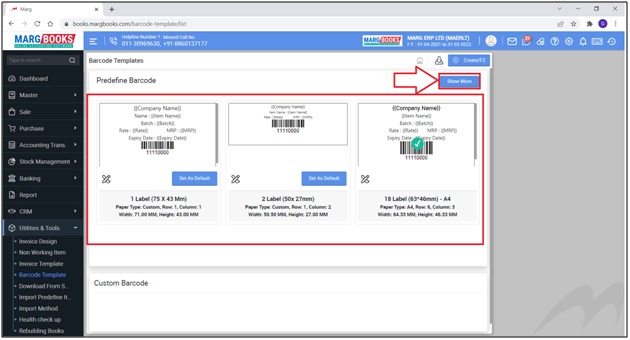
- Now from the ‘Utilities & Tools’, the user will click on ‘Barcode Template’.

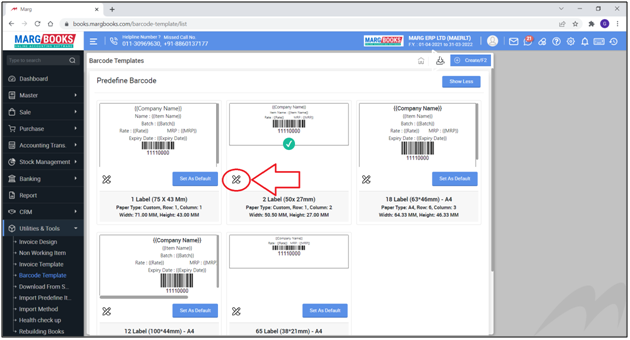
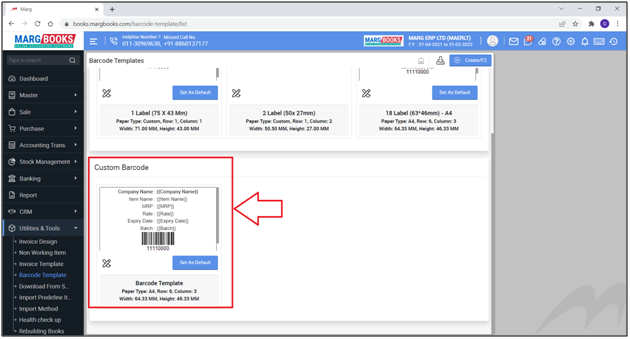
- Now the user can view all the pre-defined barcode templates available in the software and click on ‘Show More’ to view more templates.
- In order to set the selected format as default, the user needs to click on ‘Set as Default’ icon.
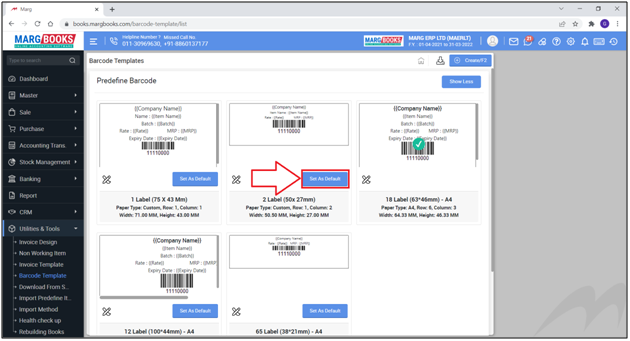
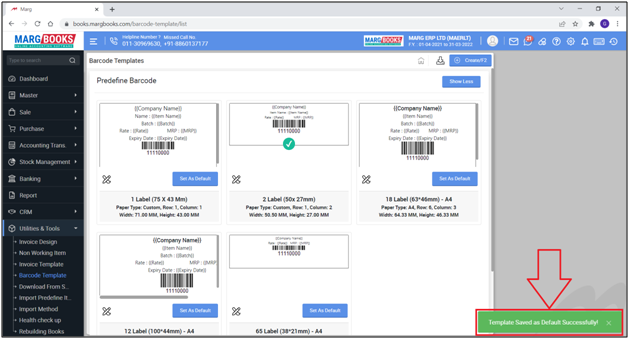
- Then the user can view that the selected Barcode has been selected as default in the software.
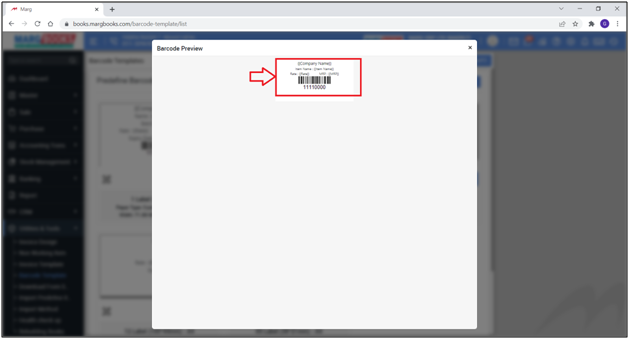
- And if the user needs to view the preview of the selected barcode, the user needs to click on the ‘View’ icon shows at the right side of the selected barcode.

- Thereafter the user can view that the preview of the selected barcode.
- In order to customize the existing barcode format, the user will click on ‘Customize’ Icon.
And if the user need to Design New Barcode Format then the user will follow the below-mentioned steps:
- The user needs to click on ‘Create’ Icon.

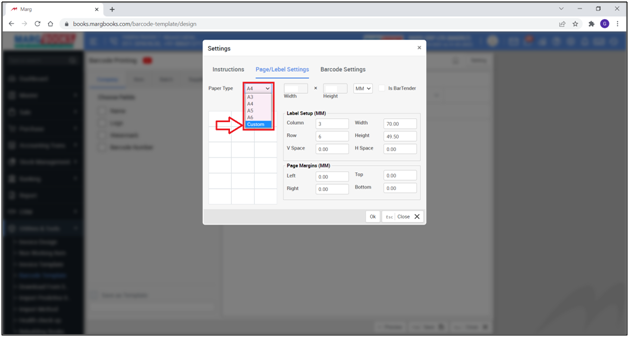
- A 'Page/label Settings' window will appear where the user will mention the settings of that page on which the label is being printing.
- In 'Paper Type' field the user will select the type of paper from the drop-down as per the requirement .
Note: If the user needs to print the barcode with Laser printer then select A3, A4 as per the requirement and if needs to print with Barcode printer then always select 'Custom' from the dropdown.
- Suppose select 'Custom'.
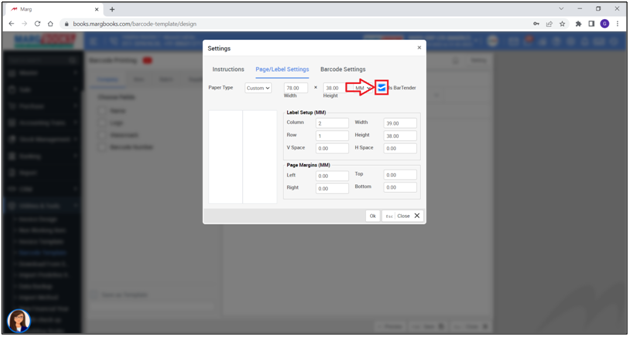
- Now the user will select the unit of measurement as per the requirement.
- Suppose select 'MM'.
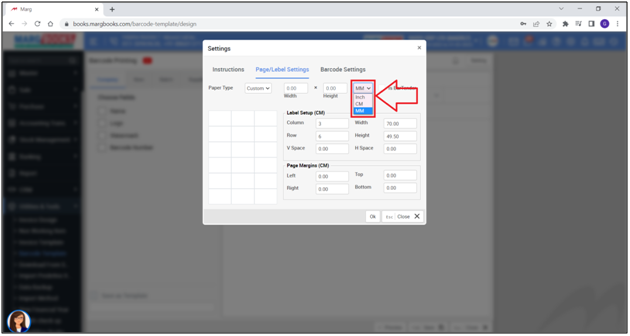
- The user will mention the height & width of the page on which the barcode needs to be printed.

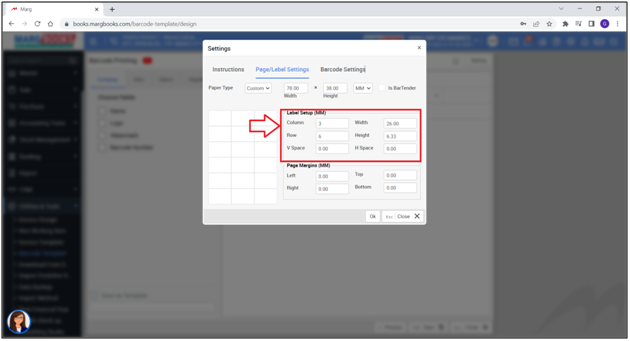
- In 'Label Setup' section, the user will mention the measurements of the label as per the requirement. However the software will auto pick the default settings of the barcode but if it needs to be changed then it can easily be done:
a. Column: Here mention the number of the Label's column that needs to be printed on the each page.
b. Row: Here mention the number of the Label's Row that needs to be printed on the each page.
c. V. Space: Here mention the measurement of vertical space needs to be maintained after each label on the page.
d. Width: Here mention the width of the each label.
e. Height: Here mention the height of the each label.
f. H. Space: Here mention the measurement of Horizontal space needs to be maintained after each label on the page.
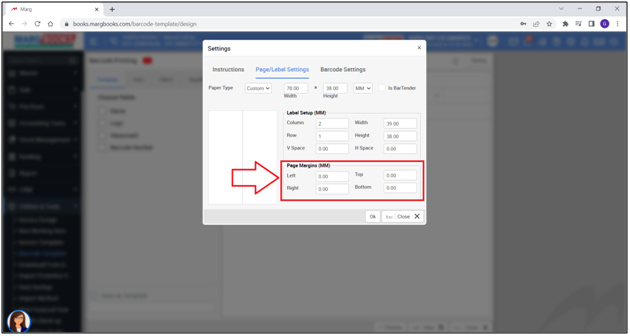
- In 'Page Margin' section, the user will mention the measurements of the label as per the requirement i.e. Column,Width, Row, Height etc.
- Then place a check mark on 'Bar Tender' option.
Note: If the user prints the barcode from barcode printer then place a check mark & if prints from laser printer then keep this field blank.
- Then the user will click on 'Barcode Settings'.
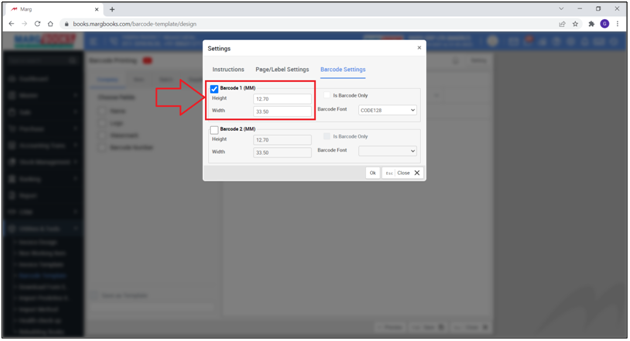
- Here the user will mention all the measurements of the barcode that needs to be printed.

- Now the user will mention the height & width of the barcode as per the requirement.
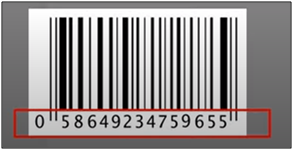
- If user needs that only the barcode needs to be printed on the label then place a check mark on this option otherwise the software will also print the barcode number on the label (refers to Fig 1.1).
- Suppose the user needs to print the barcode along with its number so keeping the check box as blank.
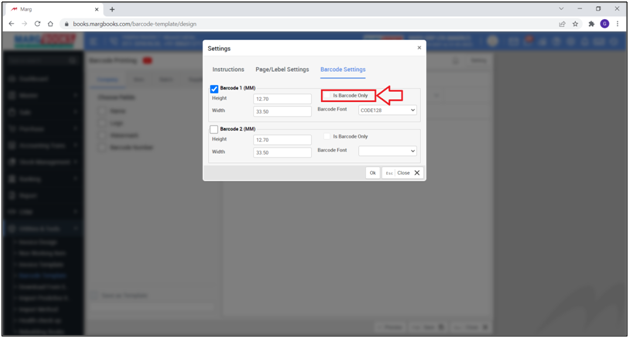
Fig 1.1. View of Barcode lines & Barcode Number
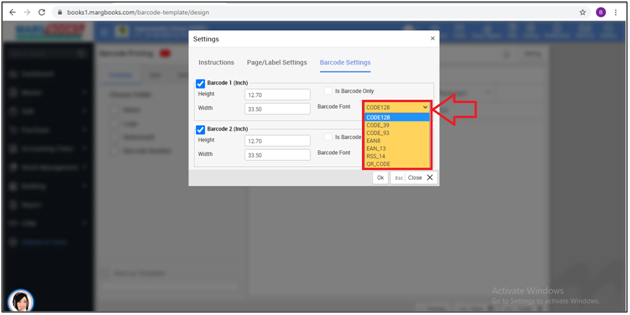
- In 'Barcode Format', the user will select the format of barcode as per the requirement i.e. Q.R code, code 128 etc.
Now if the user needs tp print same barcode 2 times on the page then it can be print only by placing check mark on Barcode (2 inch) field.
Then click on 'Ok'.

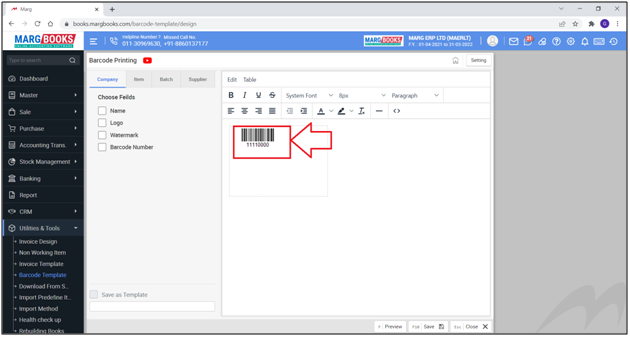
- Thereafter the user can view the preview of the barcode according to the measurements mentioned in the configurations.
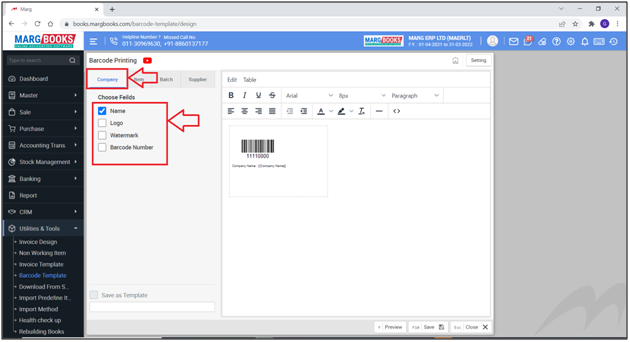
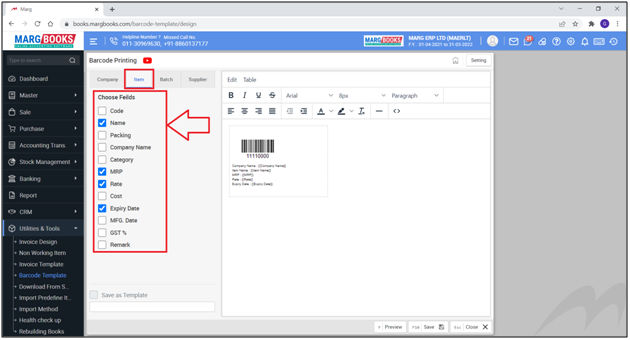
- In order to print the other necessary details of the barcode, the user needs to place the check marks beside the options displays at the left side of the screen.
- Suppose the user needs to print the company of the product on the barcode so place a check mark on 'Name' field.
- Similarly, if the user needs to print some other item details on the barcode then place check marks on them.
- Now if the user needs to print the details of the item on the above of barcode then the user will cut the whole text by pressing 'Ctrl+X' key.
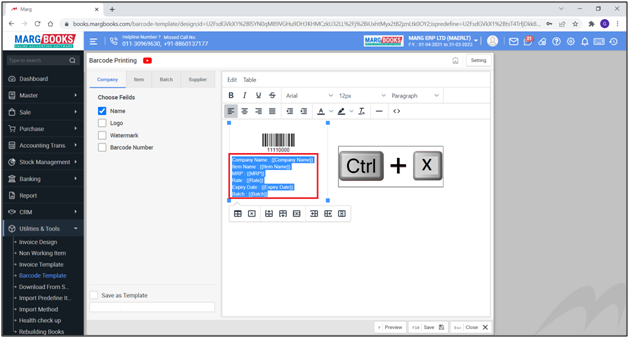
- Then paste the copied text on the above given space by pressing 'Ctrl+V' key.

- If the user needs to view the preview of the customized barcode then click on 'Preview'.

- In this way the user can view the preview of the barcode according to the mentioned configurations.

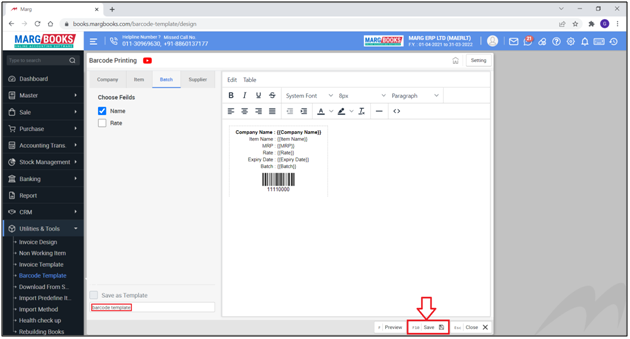
- The user will mention the name of the barcode format as per the requirement then click on 'Save'.
- Now the user can view the designed template has been saved successfully.
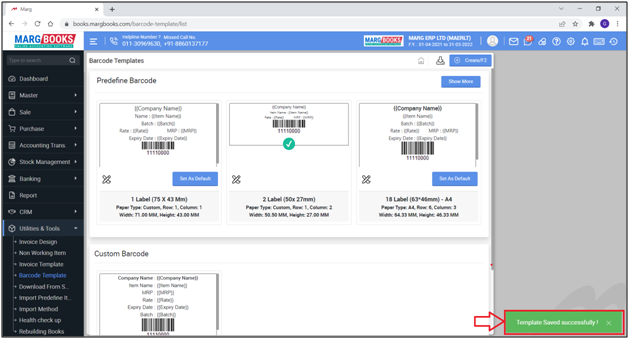
- And the designed barcode has been saved in the list of the 'Custom Barcode'.
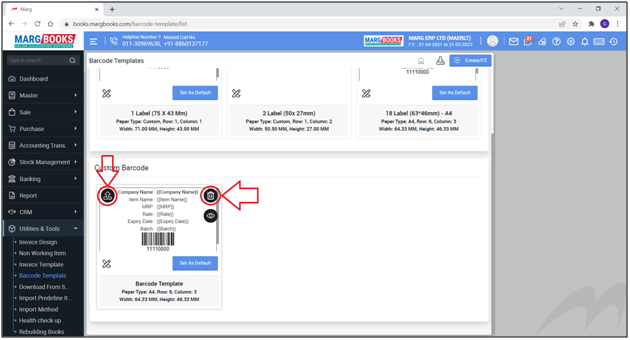
- In order to delete & export the selected barcode format the user needs to click on their respective icons (as shown below):
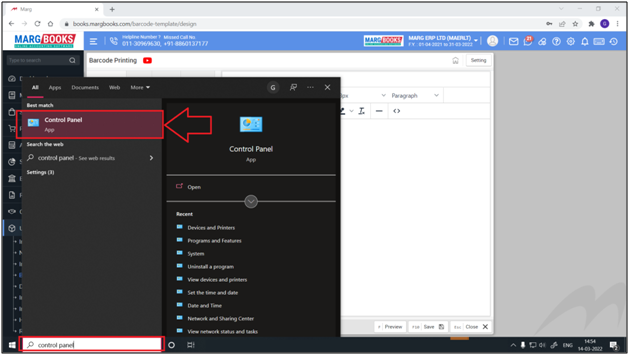
PROCESS TO CONFIGURE BARCODE PRINTER WITH MARG BOOKS
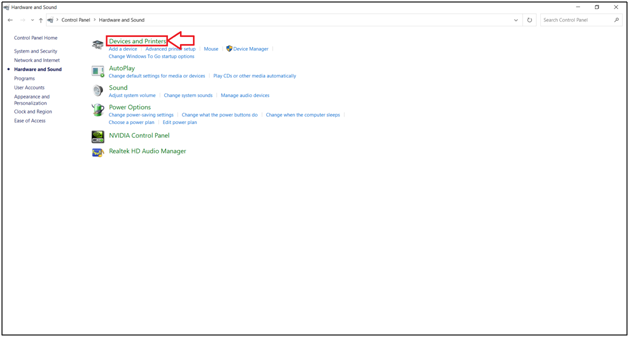
- For this firstly the user will type 'Control Panel' in the search Box.
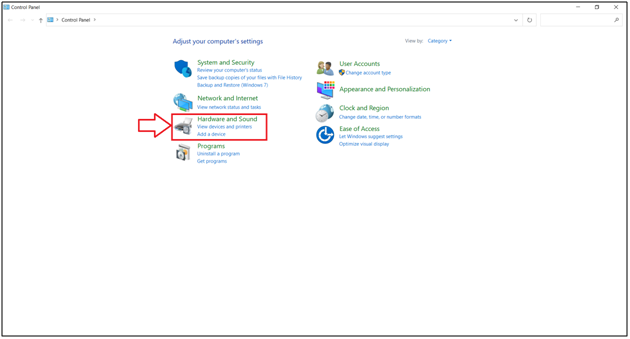
- Now select 'Hardware & Sounds'.
- Thereafter select 'Devices & Printers'.
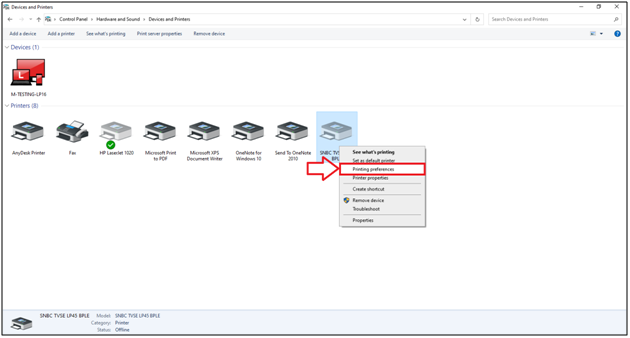
- The user will select the barcode printer then 'Right click' on it.

- Then the user will select 'Printing Preferences'.
- Now the user will click on 'New'.
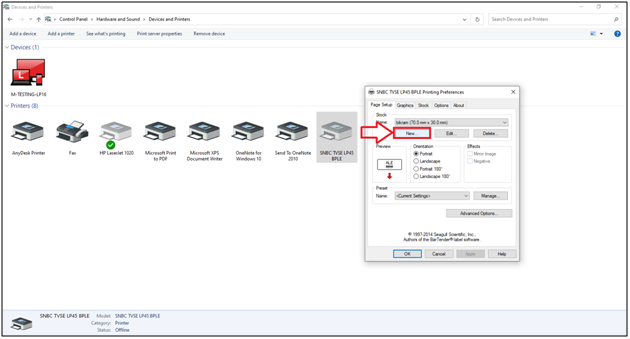
- Here the user will mention the name of the printer as per the requirement.
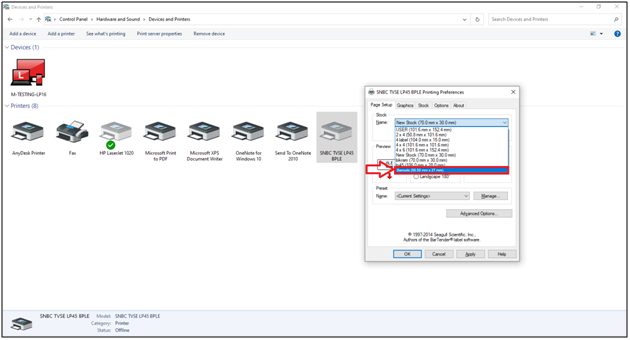
- Then the user will mention the height & width of the label (same as the mentioned in the configurations of the software).
- Click on 'OK'.

- Now the user can view that the selected printer is being displayed in the drop-down list.
PROCESS TO GENERATE MASTER WISE BARCODE IN MARG BOOKS
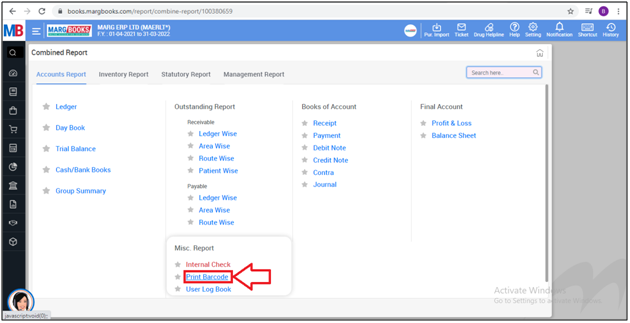
- Now in order to print barcode from the software, the user will Go to 'Report'.

- A 'Misc Report' window will appear.
- The user will select 'Print Barcode'.
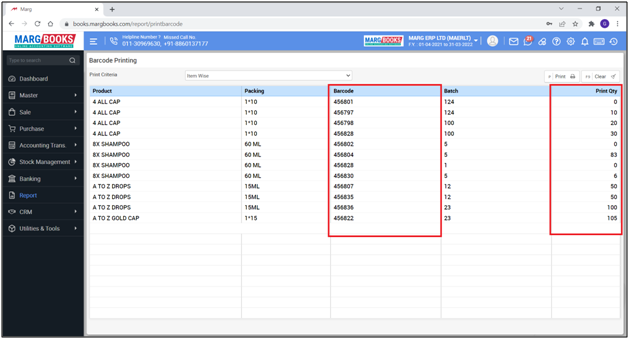
- A 'Barcode Printing' window will appear.
- The user will select the printing criteria of the barcode as per the requirement i.e. Item Wise, Company Wise etc.
- Suppose select 'Item Wise'.

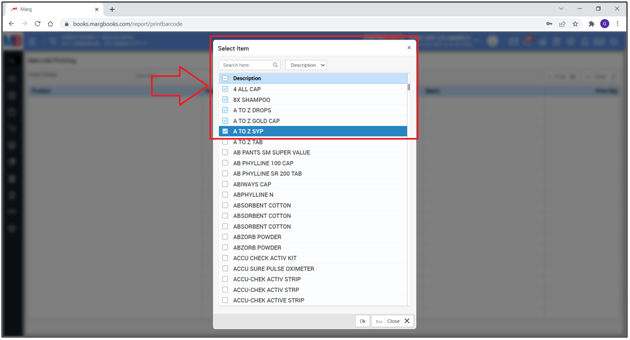
- A 'Select Item' window will appear.
- The user will select the items of which the barcode needs to be printed.
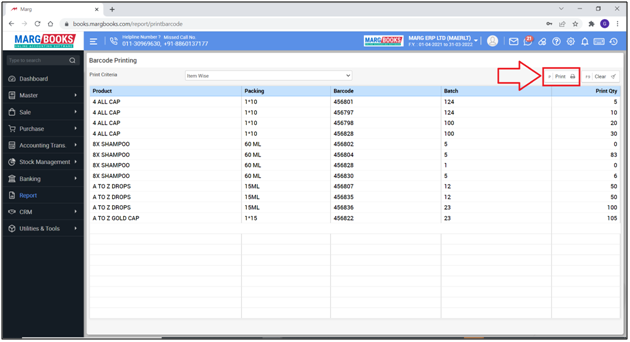
- Thereafter the user can view all the selected items along with their barcode numbers & quantity of the available stock.
- Then simply click on 'Print'.
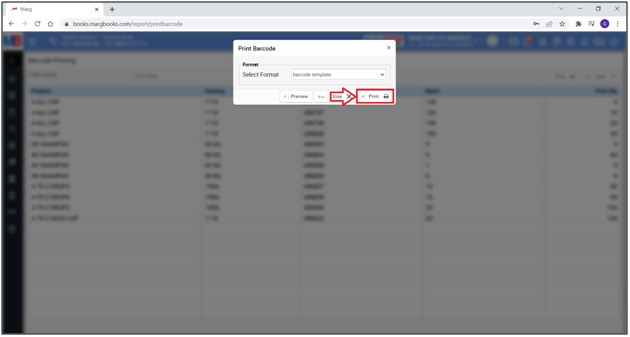
- A 'Print Barcode' window will appear.
- The user will select the format of the barcode as per the requirement.
- Suppose select 'Barcode Template'.
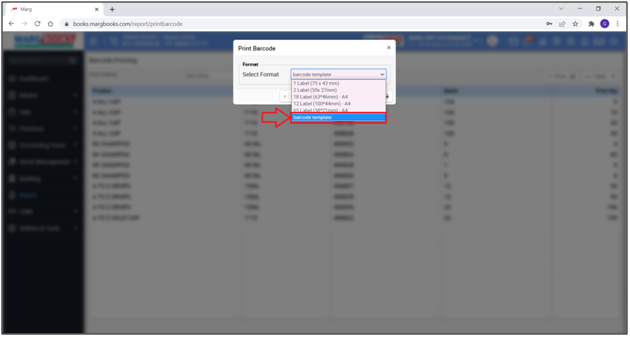
- Then click on 'Print'.
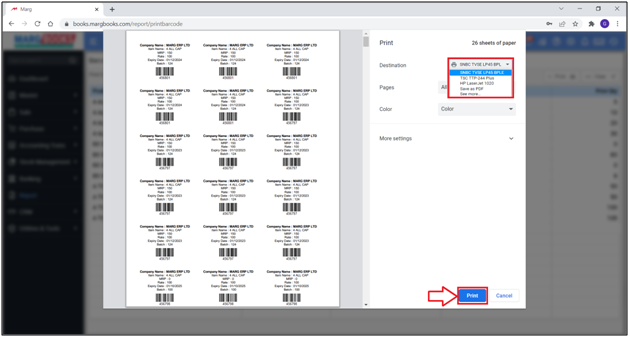
- A 'Print' window will appear.
- The user will select the printer from which the barcode needs to be printed.
- Then click on 'Print'.
Note: The user can also print these barcode with the help of Laser printer by only selecting that printer from the drop-down.
PROCESS TO GENERATE BATCH WISE BARCODE IN MARG BOOKS
- From the right side of the dashboard window, click on ‘Settings’ icon.
- A ‘Dashboard setting’ window will appear.
- In Control Room field, click on ‘Configure’ tab.
- Now in the search Box, type ‘Barcode’.
- Then in ‘Barcode Management’ option, the user will select ‘Yes’ and click on ‘Configure’ tab.
- In 'Barcode Required' option the user will select ‘Batch Wise’.
- Then press 'ESC' key to save the changes.
- An ‘Alert’ window will appear.
- The user will click on ‘Save’ to confirm the saving process.
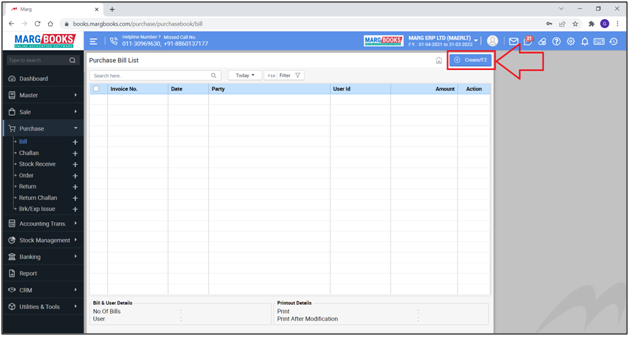
- Now go to Purchase > Bill.

- A 'Purchase Bill List' window will appear.
- The user will click on 'Create'.
- Thereafter the user will mention all the necessary details of the purchase bill i.e. Party Name, Bill number etc.
- And after selecting the item, the user can view the batch details window where the software will show the auto generated barcode of the selected batch.
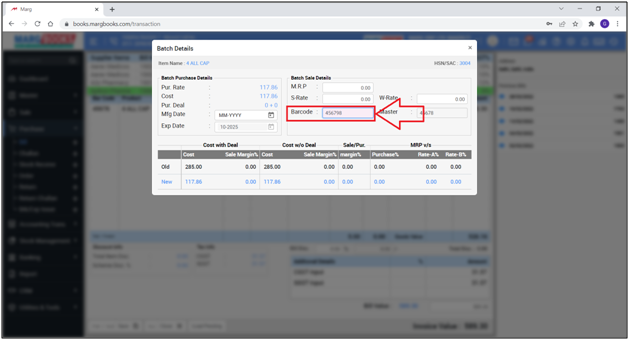
- Also, the user can view that barcode details in the column of barcode enabled in the purchase bill.
- Then press 'Ctrl+W' key to save the selected bill.
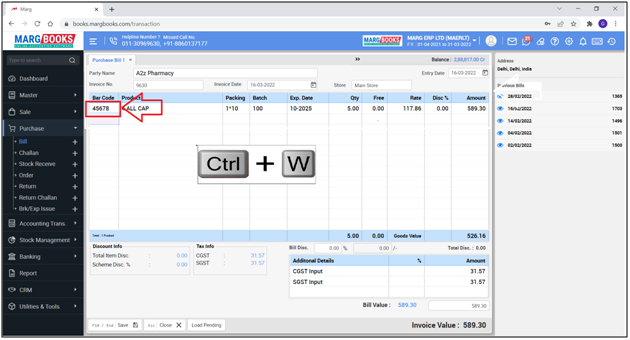
After following the above steps the user can view that the barcode of selected batch has been generated and the purchase bill will get saved in the records.


