

Welcome to  -
Marg ERP 9+
-
Marg ERP 9+
Home > Margerp > Erp Bridger > How to import Multiple Sale and Purchase Bill through ERP Bridger in Marg software ?
How to import Multiple Sale and Purchase Bill through ERP Bridger in Marg software ?

Overview/Introduction to ERP Bridger in Marg ERP Software
Steps to create method to import inventory
Steps to import inventory through ERP Bridger
OVERVIEW/INTRODUCTION TO ERP BRIDGER IN MARG ERP SOFTWARE
- ERP Bridger is a tool developed by Marg and this tool can be used in import and export of data.
- The user can easily import data from other software to Marg if that software has a provision of data export.
- In Marg Software, the user can export or import data in 4 formats i.e. XLS, CSV, DBF and XML.
- ERP Bridger is very useful to the ones who need to transfer their data from one software to another for accounting purposes, inventory purposes etc.
- The user can also import vouchers like receipt voucher, payment voucher etc through excel file to Marg.
- Anyone using multiple software can easily see the consolidated outstanding of any particular customer.
STEPS TO CREATE METHOD TO IMPORT INVENTORY
- Firstly, Go to Masters > MARG Setups > Advanced Features > ERP Bridger- Import Inventory. Press Enter.
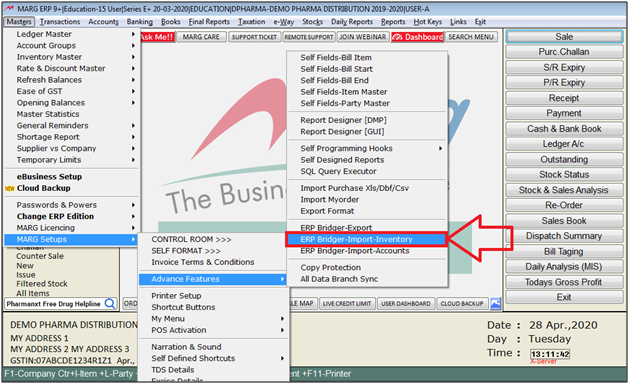
Fig 1.1 Menu view to ERP Bridger- Import Inventory in Marg ERP Software
- An ERP to Marg ERP 9+ Inventory window will appear.
- The user will now select ‘Method’.

Fig 1.2 View of ERP to Marg ERP 9+ Inventory window in Marg ERP Software
- An ERP to Marg ERP 9+ Inventory Method window will appear.
- In the Name field, the user will enter the name for this method.
- Suppose, enter ‘Sales’.

Fig 1.3 View of ERP to Marg ERP 9+ Inventory method window in Marg ERP Software
- An alert window will appear ‘Not found. Want to create’, the user will click on ‘Yes’.
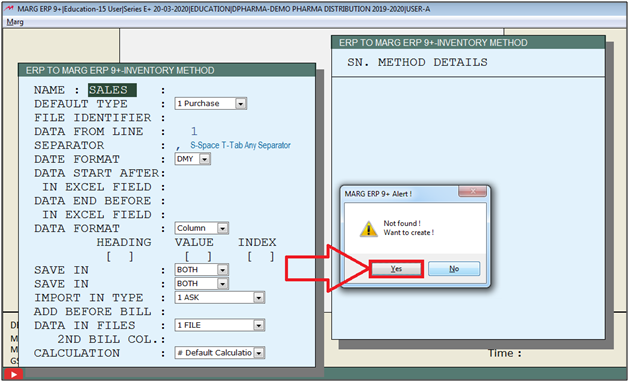
Fig 1.4 View of alert window in Marg ERP Software
- Then, the user can give the description for this method.
- Suppose, enter SAP.
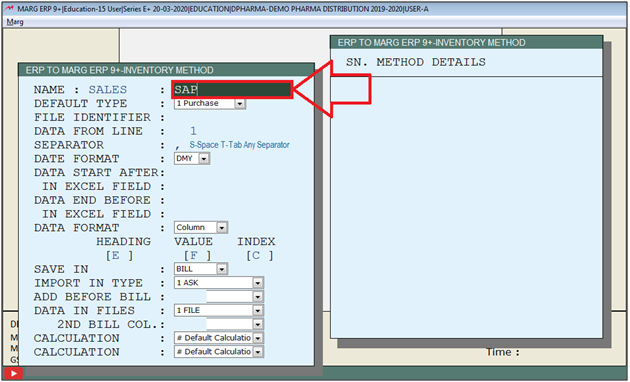
Fig 1.5 View of ERP to Marg ERP 9+ Inventory method window in Marg ERP Software
- In Default Type, the user will select the type for this method from the drop down.
- Suppose, select ‘7 Sale’.

Fig 1.6 View of ERP to Marg ERP 9+ Inventory method window in Marg ERP Software
- In 'File identifier', the software will automatically pick that file name which have been imported previously in the software.
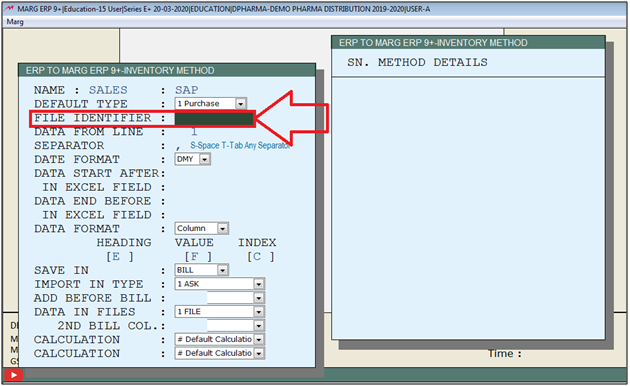
Fig 1.7 View of ERP to Marg ERP 9+ Inventory method window in Marg ERP Software
- In the excel sheet that the user wants to import, the user can view that the data starts from line 2.

Fig 1.8 View of Excel sheet
- So, in ‘Data from line’, the user will enter ‘2’.
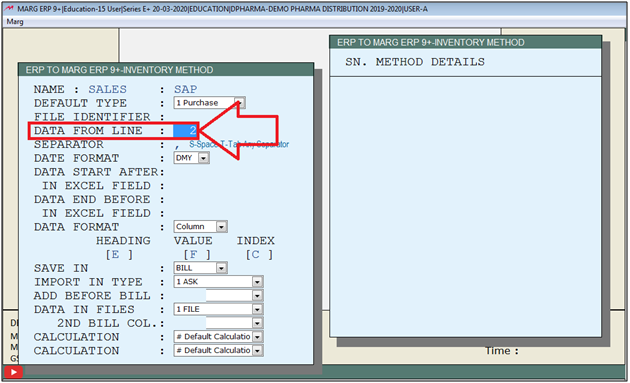
Fig 1.9 View of ERP to Marg ERP 9+ Inventory method window in Marg ERP Software
- In 'Save In', the user needs to select whether the user needs to import the transaction in bill or challan.
- Suppose, select 'Bill'.
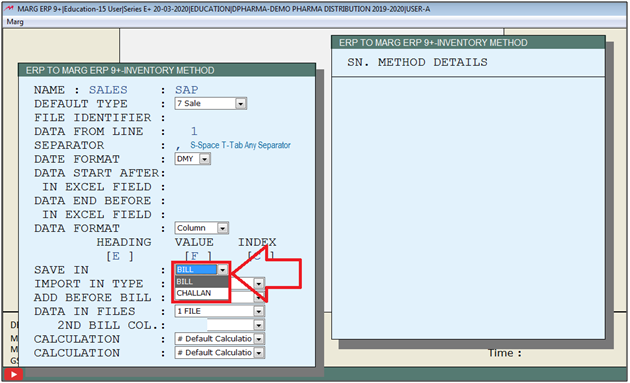
Fig 1.10 View of ERP to Marg ERP 9+ Inventory method window in Marg ERP Software
- In ‘Import in Type’, if the user wants that the software should ask whether the user wants to import in sale, purchase, challan etc., then select ‘Ask’.
- Also, in ‘Main Flag’ the user can define a flag for import.
- Suppose for sales, user can define 'S' or for purchase user can define 'P' as per the requirement.
- Suppose, the user selects ‘Main Flag’.
NOTE 1: In this case user also need to add a column in the excel sheet and needs to mention 'S' for the sale and 'P' for the purchase to bifurcate the transactions of sale, purchase,etc.

Fig 1.11 View of ERP to Marg ERP 9+ Inventory method window in Marg ERP Software
- In 'Calculation type', the user needs to select in which calculation type user needs to import the transactions i.e. exclusive or inclusive.
- Suppose, select 'Default'.
Note 2: when user select 'Default Calculation' then software will automatically pick the calculation type according to nature of transaction.Suppose, if user uses 2 (Exclusive) calculation type for sale and select 'Default calculation type at the time of import sale transaction then software will automatically take 2 (Exclusive) as default calculation type .
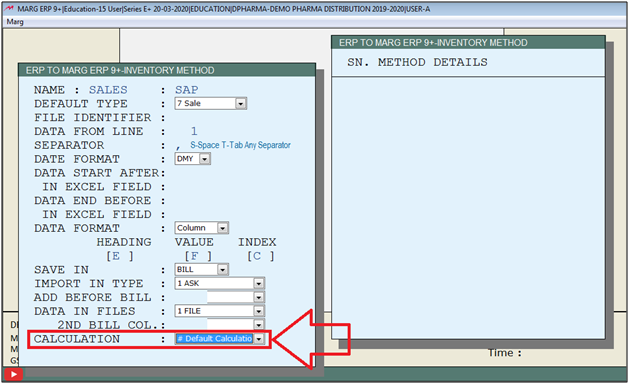
Fig 1.12 View of ERP to Marg ERP 9+ Inventory window in Marg ERP Software
- An ‘ERP to Marg ERP 9+ Inventory’ window will appear.
- In ‘Sale/GST Outward’, the user will mention the main flag value.
- Suppose, enter ‘S’.
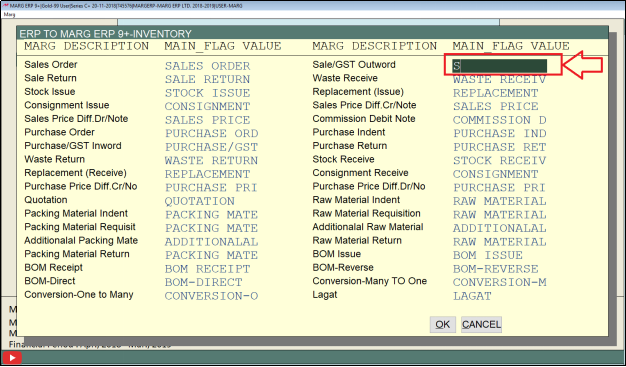
Fig 1.13 View of ERP to Marg ERP 9+ Inventory window in Marg ERP Software
- The user will now click on ‘Ok’.

Fig 1.14 View of ERP to Marg ERP 9+ Inventory window in Marg ERP Software
- An Import Method window will appear. Press Enter.

Fig 1.15 View of Import Method window in Marg ERP Software
- A Format Variables window will appear.
- The user will now search the heading to be imported from the Excel sheet.
- Suppose, select Bill Number.

Fig 1.16 View of Font Variables window in Marg ERP Software
- In the excel sheet, the user can view that Bill Number is in column A.

Fig 1.17 View of Excel sheet in Marg ERP Software
- Then, in Import method window the user will enter ‘A’ in Excel field.

Fig 1.18 View of Import Method window in Marg ERP Software
- Press Enter twice.
- Again, Format Variables window will appear.
- The user will search the heading to be imported from the Excel sheet.
- Suppose, now select Bill Date.

Fig 1.19 View of Font Variables window in Marg ERP Software
- In the excel sheet, the user can view that Bill Date is in column B.

- Then, in Import method window the user will enter ‘B’ in Excel field.

Fig 1.20 View of Import Method window in Marg ERP Software
- Press Enter twice.
- Similarly, the user will select all the headings to be imported from the Excel sheet.

Fig 1.21 View of Import Method window in Marg ERP Software
Note 3: Whenever the user takes any numeric value like Batch Number or Bar Code, then in Marg Software the numeric value is changed to text. As the numeric value begins from Right side, then with the help of ‘Trim’ option any space will be removed and the value will get compressed.
- Press Enter and then press Escape key to save.
Now the user can import data through ERP Bridger but at the time of import data user can face two issues :
a. The ERP Bridger option does not show in transaction menu.
b. Sometimes Software shows 'You are not authorized' at the time of import data through ERP Bridger.
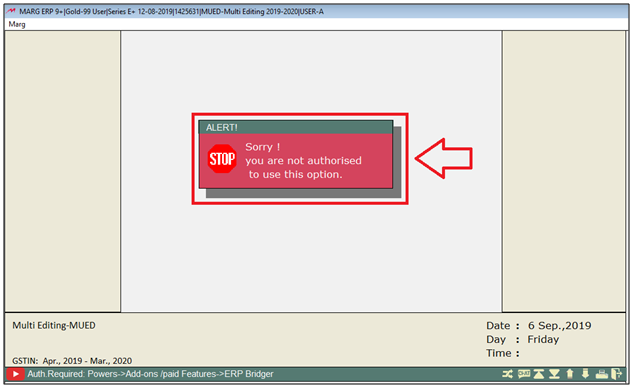
Fig 1.22 View of Import Method window in Marg ERP Software
Then both the issues as explained above can be resolved by the given links.
Links for the reference are as below:
|
Query |
Solution's link |
|
ERP Bridger option doesn't show in transaction menu |
|
|
Software shows 'You are not authorized' at the time of import data through ERP Bridger |
Steps to import inventory through ERP Bridger
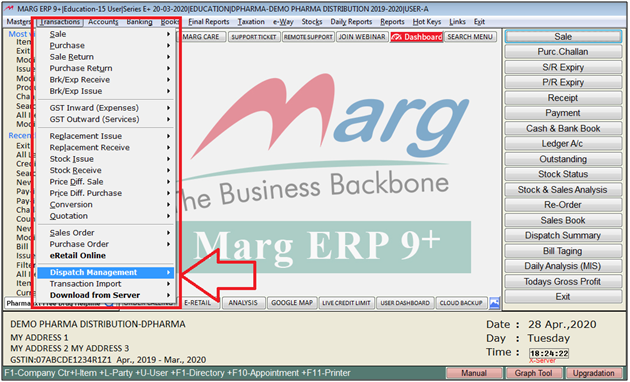
- Go to Transactions > ERP Bridger > Import Inventory. Press Enter.

Fig 1.23 View of Marg ERP 9+ window in Marg ERP Software
- An Import-Excel/DBF/TXT window will appear.
- In 'Method' the user will select required method to import inventory.
Note 4: If in case user has multiple method to import the inventory then user can easily choose the required method at the time of import.
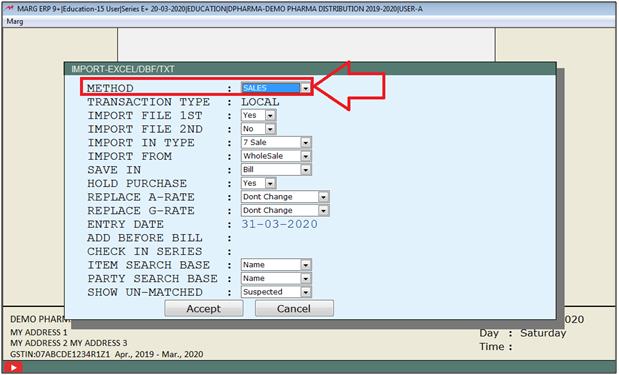
Fig 1.24 View of Import Excel/DBF/TXT window in Marg ERP Software
- In ‘Transaction Type ’, the user can select whether the transaction needs to be imported in local sale type or central.
- Suppose,select Local.

Fig 1.25 View of Import-Excel/DBF/TXT window in Marg ERP Software
- In 'Import File 1st' user needs to select 'No' from the dropdown.
Note 5: If user has the data in two different files then user needs to select other file in 'Import File 2nd, otherwise keep 'No' in this field.
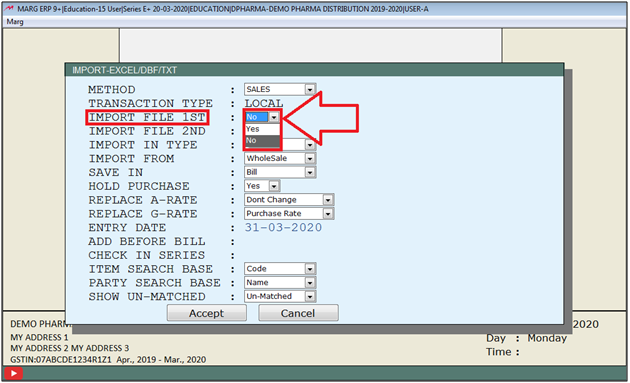
Fig 1.26 View of Import-Excel/DBF/TXT window in Marg ERP Software
- A 'Copy Marg Help From' window will appear.
- The user will select location from where user needs to import the transaction.
- Then click on 'Select'.
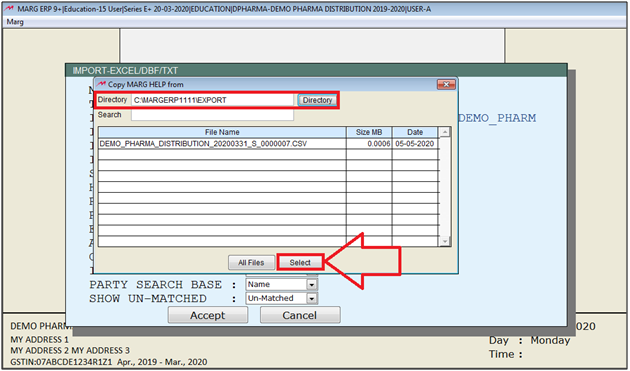
Fig 1.27 View of Import-Excel/DBF/TXT window in Marg ERP Software
- Thereafter the selected path will automatically get picked in this field.

Fig 1.28 View of Import-Excel/DBF/TXT window in Marg ERP Software
- Now in ‘Import From’ the user will select whether the import is to be done from wholesale or Retail.
- Suppose, select ‘Wholesale’.
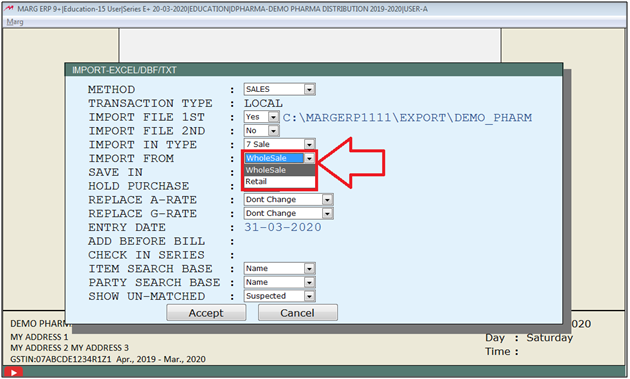
Fig 1.29 View of Import-Excel/DBF/TXT window in Marg ERP Software
- In ‘Save In ’, the user will select whether to save in Bill or in Challan.
- Suppose, select ‘Bill’.

Fig 1.30 View of Import-Excel/DBF/TXT window in Marg ERP Software
- In 'Replace A-Rate/Replace G-Rate', the user needs to select with which rate user needs to replace A/G- Rate.
- However if user has no need to replace rates then user can easily select 'Dont change' from the dropdown.
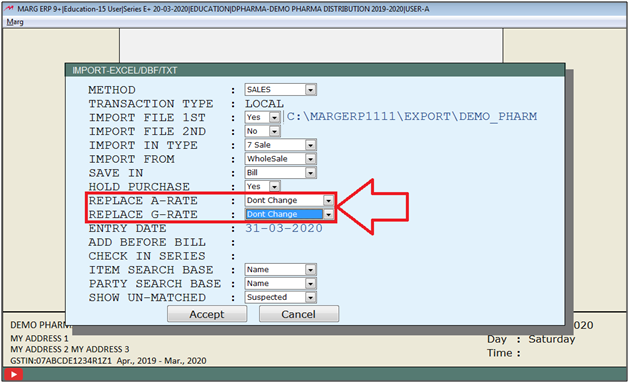
Fig 1.31 View of Import-Excel/DBF/TXT window in Marg ERP Software
- Next, in ‘Entry Date’, the user will specify the entry date. Suppose, enter ’31-03-18’.

Fig 1.32 View of Import-Excel/DBF/TXT window in Marg ERP Software
- In ‘Add Before Bill’ the user needs to mention that characters which is needed to be add in the series of the sale bill.
- Suppose, enter AB.
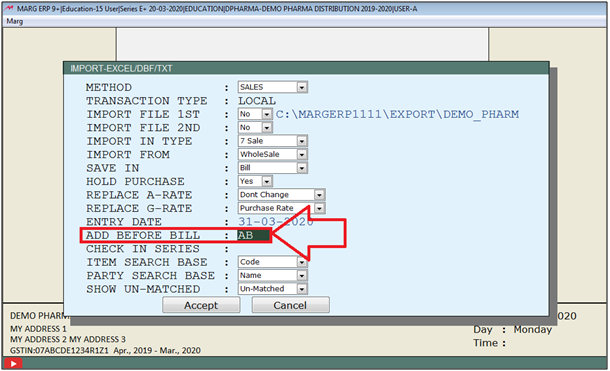
Fig 1.33 View of Import-Excel/DBF/TXT window in Marg ERP Software
- In ‘Item Search Base’ the user will select the base for item search from the drop down.
- Suppose, select ‘Name’.
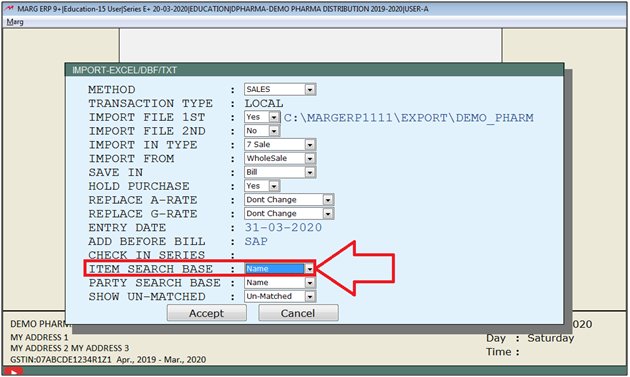
Fig 1.34 View of Import-Excel/DBF/TXT window in Marg ERP Software
- In ‘Party Search Base’ the user will select the base for party search from the drop down.
- Suppose, select ‘Name’.
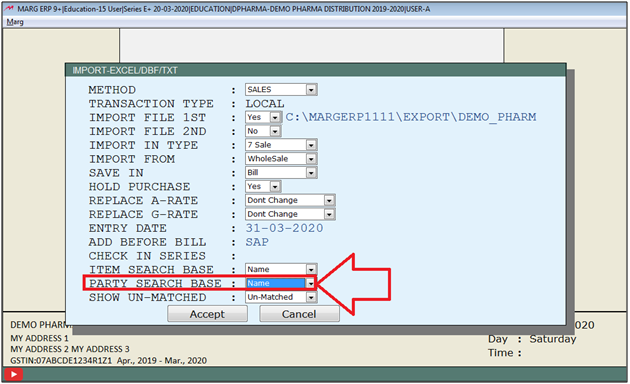
Fig 1.35 View of Import-Excel/DBF/TXT window in Marg ERP Software
- Now in ‘Show un-matched’ the user will select whether unmatched items will be displayed or all items that are also mapped will be displayed along with the un-matched.
- Suppose, the user will select ‘Un-matched’.
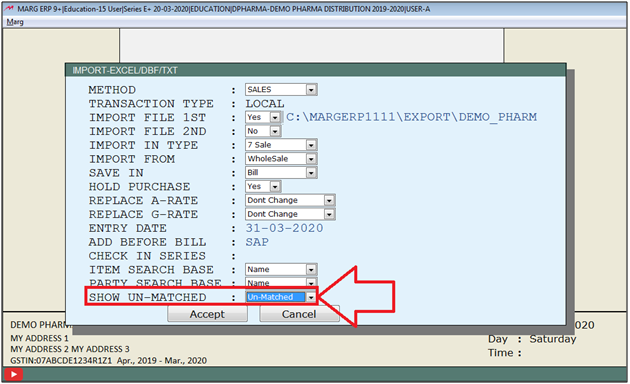
Fig 1.36 View of Import-Excel/DBF/TXT window in Marg ERP Software
- Then click on ‘Accept’.
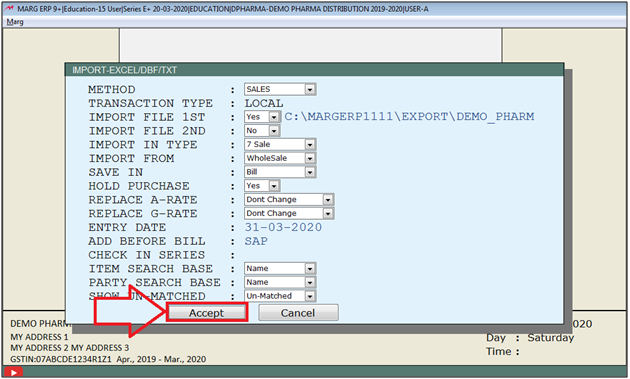
Fig 1.37 View of Import-Excel/DBF/TXT window in Marg ERP Software
- A ‘Sale Type’ window will appear.
- The user will select the sale type.
- Suppose, select ‘Local’.
- Press Enter.
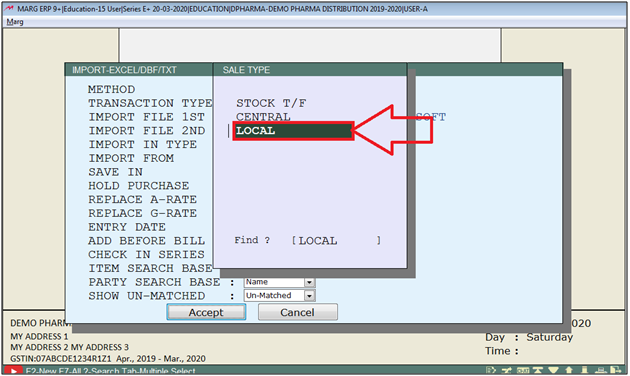
Fig 1.38 View of Import-Excel/DBF/TXT window in Marg ERP Software
- The user can now view that data importing has started.

Fig 1.39 View of Importing Data pop-up in Marg ERP Software
- A ‘Party Mapping’ window will appear. Here, the software has displayed the list of unmatched party details.
- To map the records, press enter.
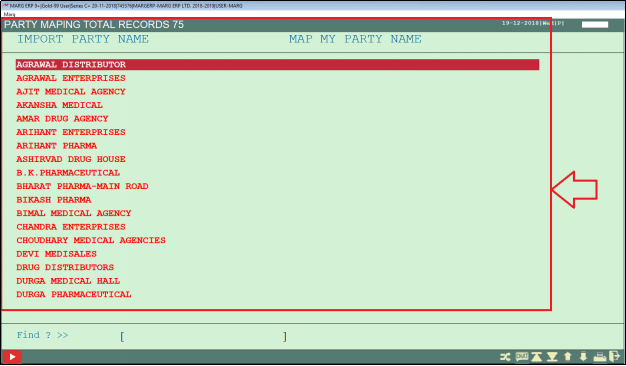
Fig 1.40 View of Party Maping window in Marg ERP Software
- A Software ledger window will appear.
- The user will now select the ledger to map. Suppose, select ‘Ahuja Medicine Centre’.
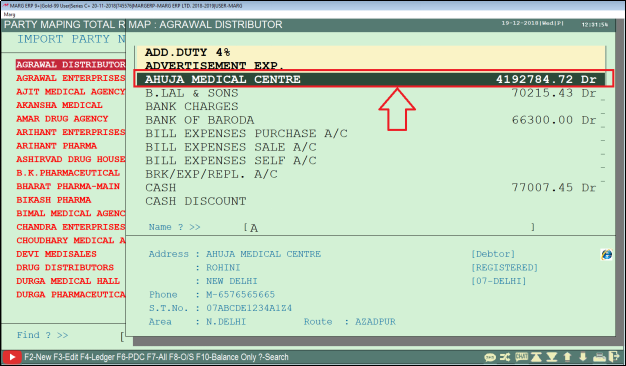
Fig 1.41 View of Software ledger window in Marg ERP Software
- The user can now view that this particular party has been mapped.
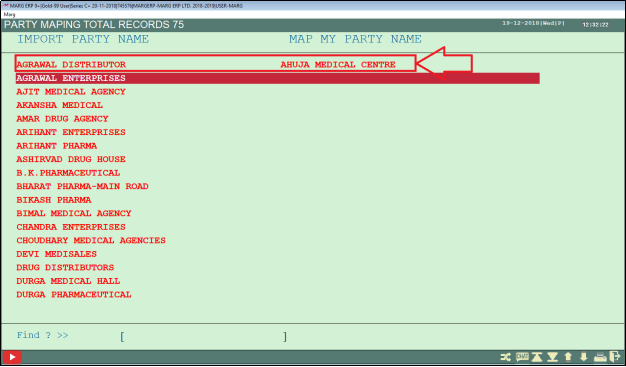
Fig 1.42 View of Party Maping window in Marg ERP Software
- Similarly, the user will map all the parties.
- Press Escape key and then click on ‘Yes’ to save.
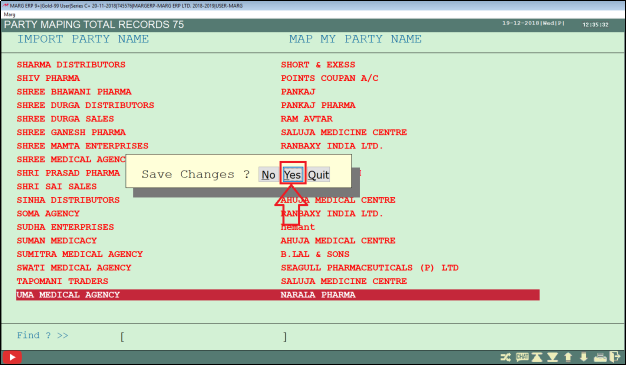
Fig 1.43 View to save changes in Marg ERP Software
- Now the software will search for un-matched items.
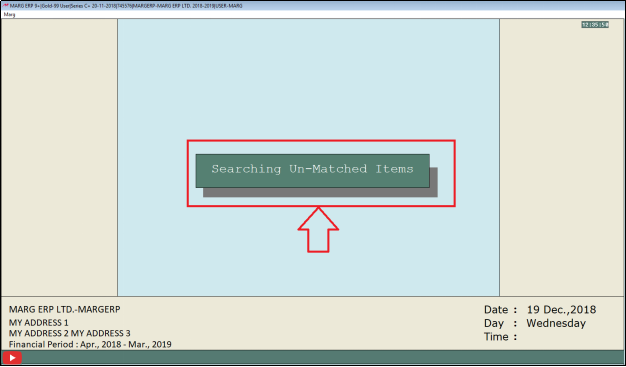
Fig 1.45 View of Searching Un-matched Items in Marg ERP Software
- An ‘Item Maping Total Records 209’ window will appear. Here, the software has displayed the list of unmatched items.
- To map the records, press enter.
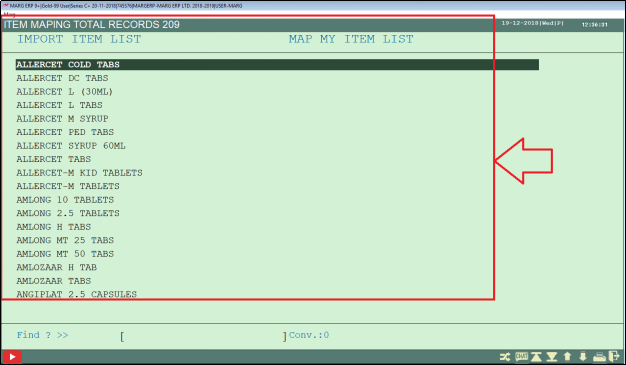
Fig 1.46 View of Item Maping window in Marg ERP Software
- A Software Item Detail window will appear.
- The user will now select the item to map. Suppose, select ‘Becosule Syrup’.
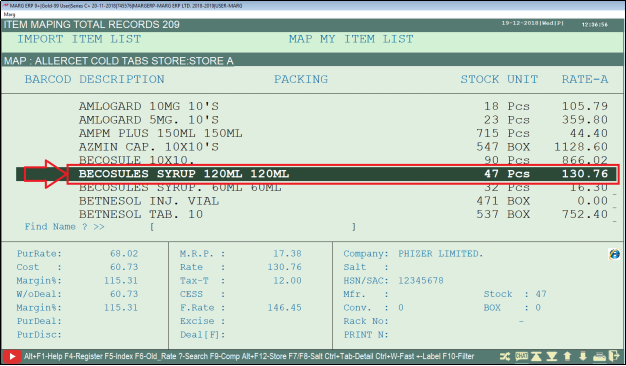
Fig 1.47 View of Software Item Detail window in Marg ERP Software
- The user can now view that this particular item has been mapped.
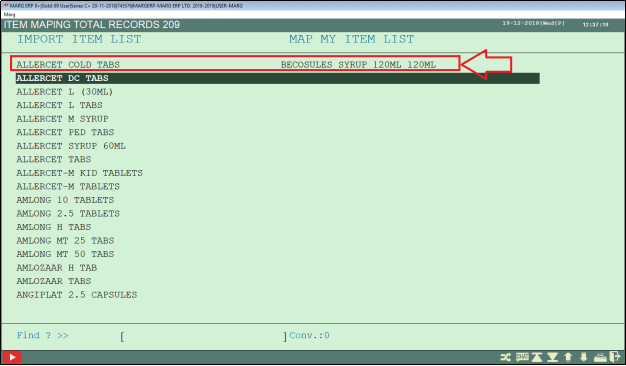
Fig 1.48 View of Item Maping window in Marg ERP Software
- Similarly, the user will map all the items.
- Press Escape key and then click on ‘Yes’ to save.
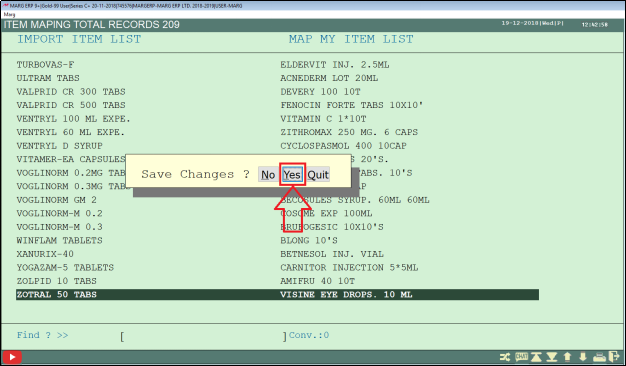
Fig 1.49 View to save changes in Marg ERP Software
- A ‘Start Importing’ window will appear. Click on ‘Accept’.
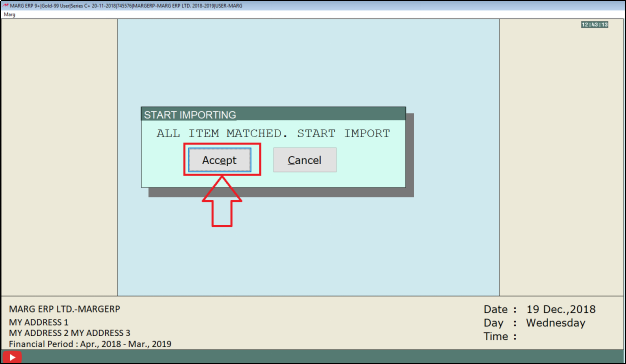
Fig 1.50 View of Start Importing window in Marg ERP Software
- The user can now view that Importing has started.
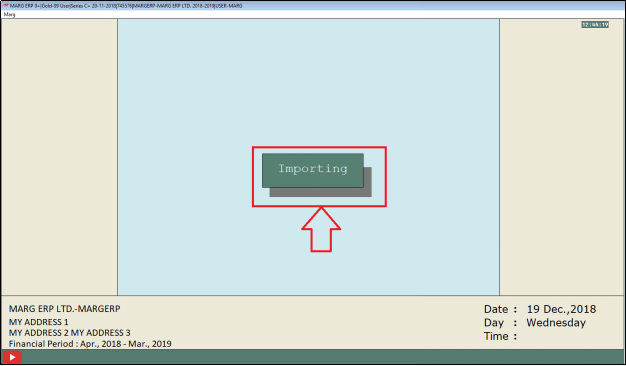
Fig 1.51 View of Inventory Importing process in Marg ERP Software
- An Alert window of ‘Bill Imported Properly’ will appear.
- Click on ‘Ok’.
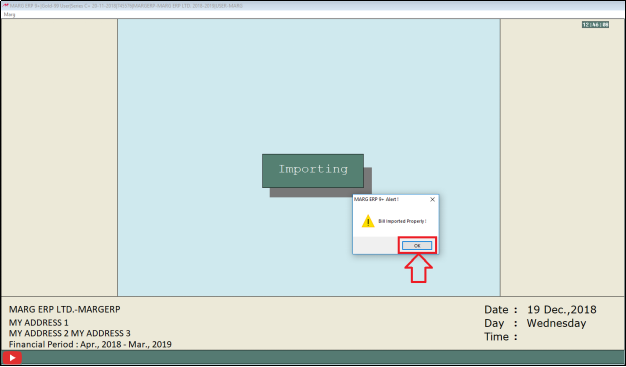
Fig 1.52 View of Alert window in Marg ERP Software

In This Page


