

Welcome to  -
Marg ERP 9+
-
Marg ERP 9+
Home > Margerp > E Invoicing > How to generate e-Invoice of Brk Exp Receive entry in Marg Software ?
How to generate e-Invoice of Brk Exp Receive entry in Marg Software ?

In Order to generate e-Invoice of Brk Exp Receive entry in Marg Software, the user needs to follow the below steps:
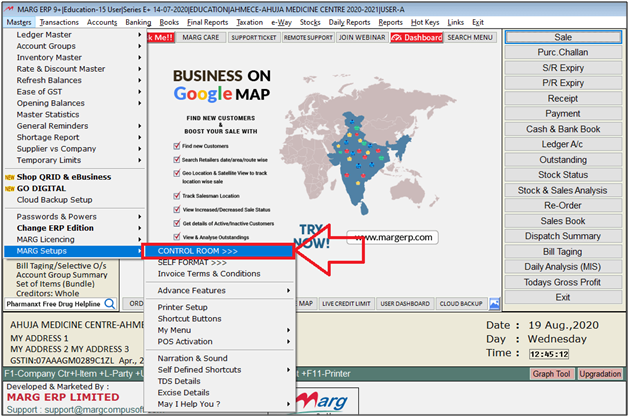
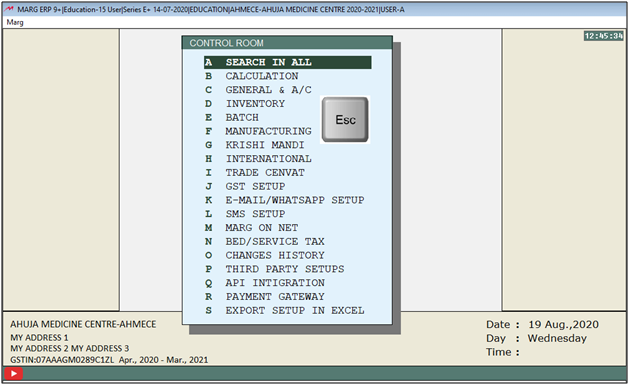
- Firstly, Go to Masters > Marg Setups > Control Room.
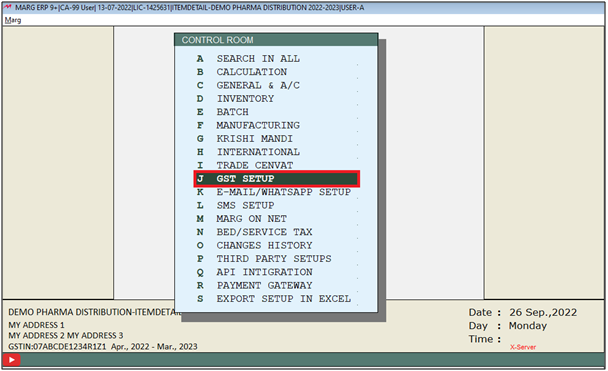
- A 'Control Room' window will appear.
- The user will select ‘GST Setup’.
- A 'VAT Setup' window will appear in which the user will click on ‘Accept’.
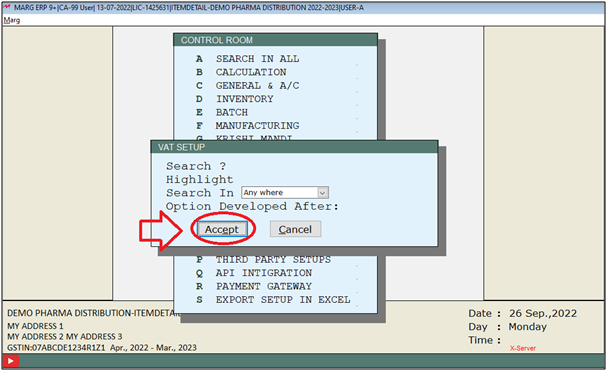
- Again a 'VAT Setup' window will appear.
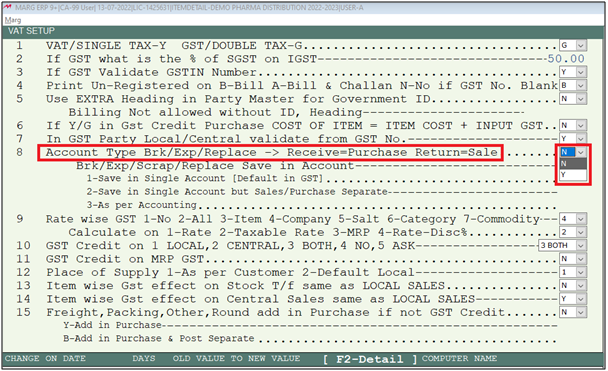
- In 'Account Type Brk/Exp/Replace -> Receive=Purchase Return=Sale' option, the user will select 'N'.
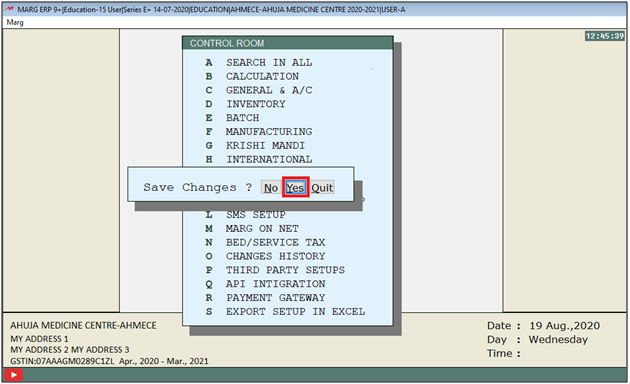
- The user will now press 'ESC' key twice.
- Now click on ‘Yes’ to save the changes.
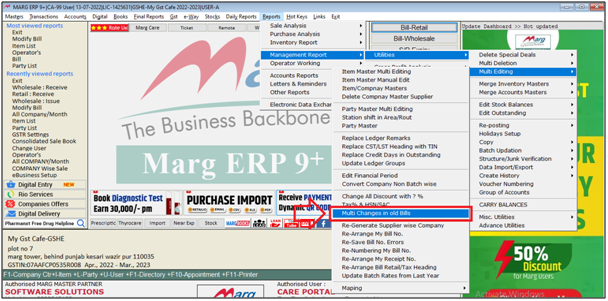
- Then go to Reports > Management Report > Utilities > Multi Editing > Multi Changes in old Bills.
- If showing 'Sorry! You are not Authorised to use this option' Click here to resolve this alert
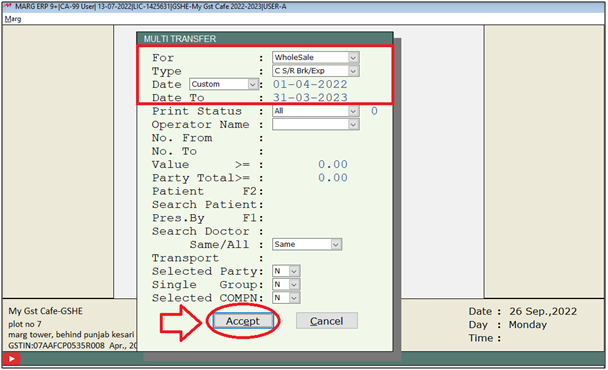
- A 'Multi Transfer' window will appear. In 'Type' option, the user will select 'S/R Brk/Exp'.
- Enter Date Range.
- Then click on 'Accept'.
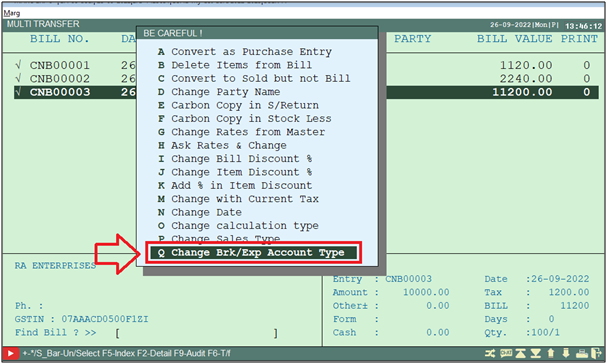
- Again a Multi Transfer window will appear. Press (*) key to select all the bills.
- Then press 'F6' on it.

- Now select 'Change Brk/Exp Account Type' option.
- Then type 'Sure'.
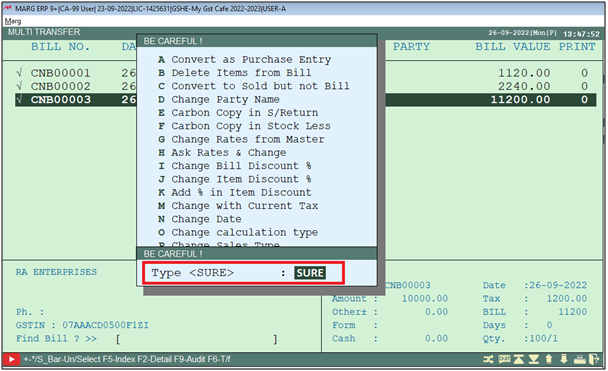
- After following the above steps, all the selected bills will get resaved with the changes.

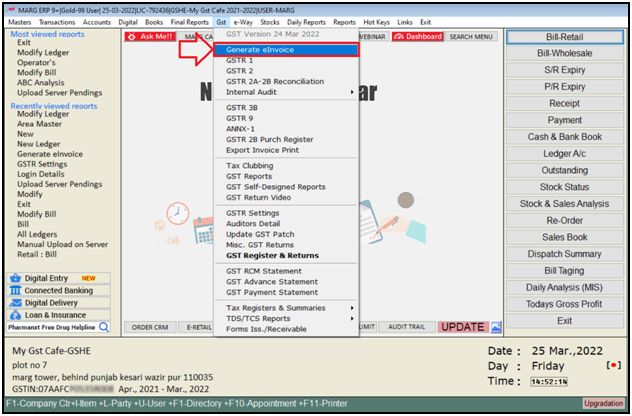
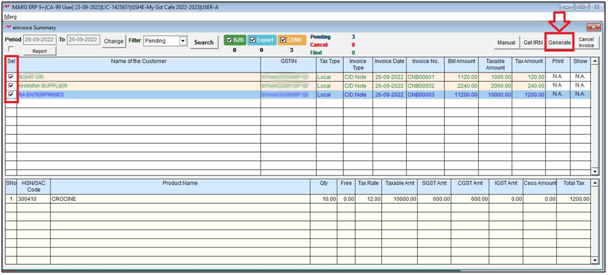
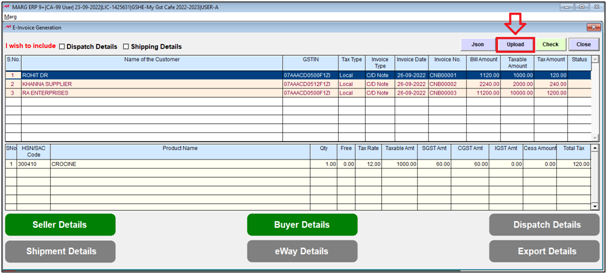
- Now in order to generate e-Invoice, the user will go to GST > Generate eInvoice.
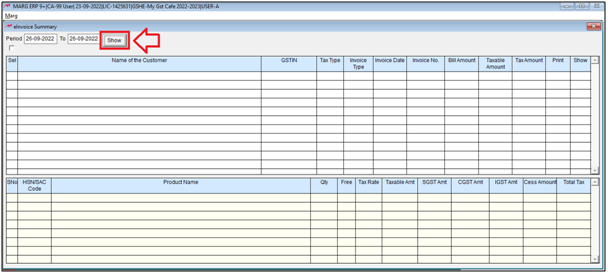
- An ‘eInvoice Summary’ window will appear. In Period field, the user will mention the date i.e. from which date till which date the invoices needs to be viewed.
- Click on ‘Show’.
- Select the invoices for which the e-Invoice needs to be generated.
- Then click on 'Generate'.
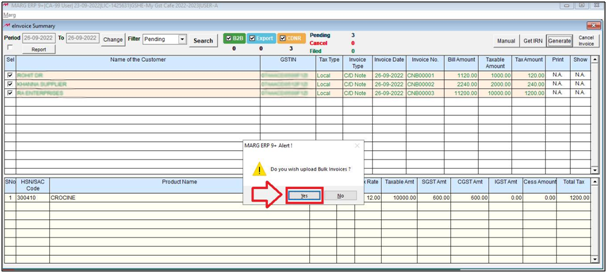
- An alert of 'Do you wish upload Bulk Invoices' will appear. Click on 'Yes'.
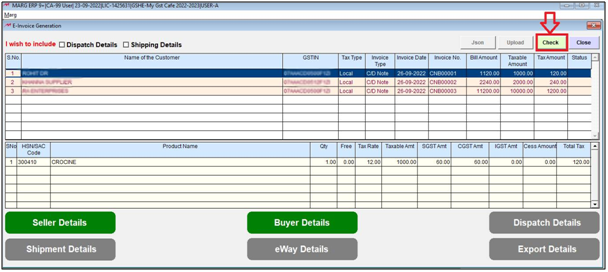
- In order to check that if there are any errors in the invoices which are getting uploaded, the user will click on ‘Check’ button.
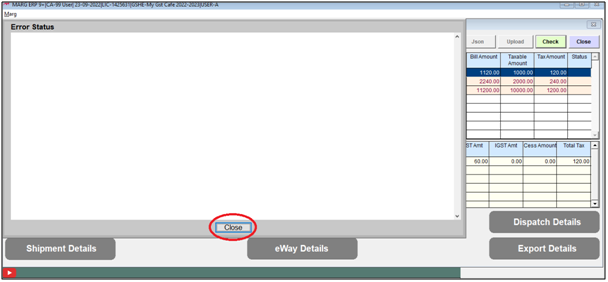
- An ‘Error Status’ window will get displayed in which if there will be any errors in the invoices which are getting uploaded then it will be shown here otherwise it will be shown as blank.
- Now click on ‘Close’.
- Then in order to upload the invoices on e-Invoice Portal, click on ‘Upload’ button.

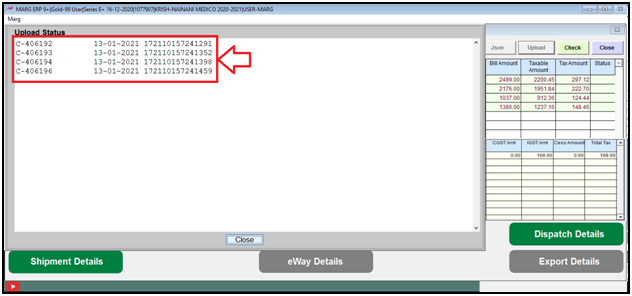
After successfully uploading the invoices, the user will get bill wise acknowledgement no. in the box.

In This Page


