

Welcome to  -
Marg ERP 9+
-
Marg ERP 9+
Home > Margerp > Daily Working > How to view Sale Report with collection in Marg Software?
How to view Sale Report with collection in Marg Software?

With the help of this option, the user can view the sale report with collection i.e. Bill value, Qty, Cash Receipt etc. In order to view Sale report with collection details, the user will follow the below steps:
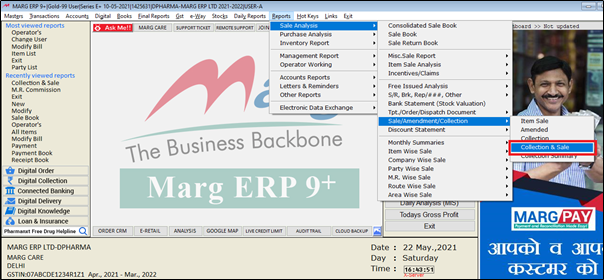
- Go to Reports > Sale Analysis > Sale/Amendment/Collection > Collection & Sale.
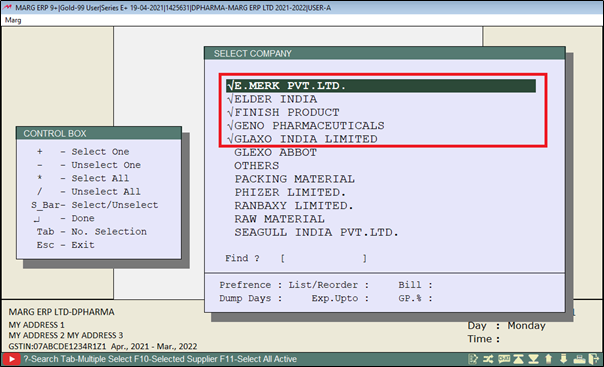
- A Select company window will appear in which the user will select the company as per the requirement.
Note : Single company can be selected by plus (+) or space bar key and multiple can be selected by Asterisk (*) key .
- Then press 'Enter' on it.
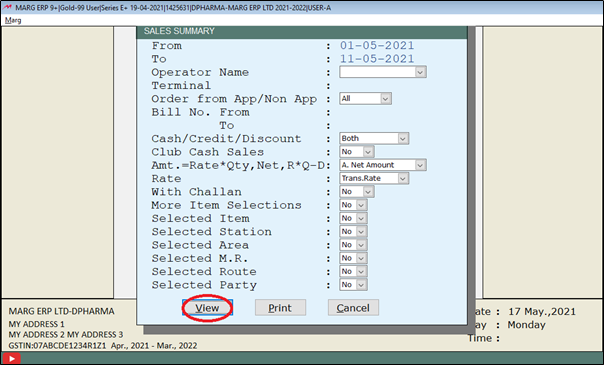
- Then a Sale summary window will appear in which the user will enter date range.

Other option's description:
1. Operator Name: If we have are working in Multi user environment so here user can select the user name for which the user want to generate the report.
2. Terminal: If we have are working in Multi user environment so here user can mention the Terminal/System name for which the user want to generate the report.
3. Bill No. From: Here the user can define the Bill number from which we will generate the report.
4. To : Here the user can define the End Bill number upto which we will generate the report.
5. Cash/Credit/Discount: If the user want the report only for Cash Billing so user can select the Cash otherwise select credit for credit bills.
4. Club Cash Sales: If the user want to merge cash sale in the report then select 'Yes'.
5. Amt.=Rate*Qty, Net, R*Q-D: Here the user can define the Amount calculation as per the requirement.
6. Rate: Here the user can select the Rate on which we will generate the report.
7. With Challan: If the user want to include the Challan then user can select 'Yes' so that this report contain the value and item details of Including Challan.
8. More Item Selection: If the user want to select more filter then user can select 'Yes'.
9. Selected Item: If we want the report of any specific items then we select this option 'Yes' so it will asking to select the specific item.
10. Selected Station: If we want the report of any specific station then we select this option 'Yes' so it will asking to select the specific station.
11. Selected Area: If we want the report of any specific Area then we select this option 'Yes' so it will asking to select the specific Area.
12. Selected M.R.: If we want the report of any specific M.R then we select this option 'Yes' so it will asking to select the specific M.R.
13. Selected Route: If we want the report of any specific Route then we select this option 'Yes' so it will asking to select the specific Route.
14. Selected Party: If we want the report of any specific Party then we select this option 'Yes' so it will asking to select the specific Party.
- Then click on 'View/Print' as per the requirement.
After following the above steps, the sale report will get generated with collection details.


In This Page


