

Welcome to  -
Marg ERP 9+
-
Marg ERP 9+
Home > Margerp > Data Import Export > How to Export Tally Data and Import in Marg Software ?
How to Export Tally Data and Import in Marg Software ?

Tally Data Import in Marg Software
Overview :- With the help of this new feature, the user can import data from Tally ERP 9 Software to Marg ERP 9+ Software. There are 3 different ways to import data from Tally to Marg which are as mentioned below:
A. Masters without Balance
B. Masters with Balance
C. Full Transfer
Through this effective feature, you can Import the Complete Data up to Balance Sheet from Tally ERP 9 like All Masters, All Transaction with Item & Complete Accounts.
Process of Tally Data Import in Marg with Inventory
For importing the data of Tally Software to Marg ERP 9+ Software, Go to Tally ERP 9 software

Fig. 1.1 Snapshot of Tally ERP 9 Software
- In Tally ERP 9 software, in order to select a company first press ALT+F3 key. Then enter on “Select Company”.

Fig. 1.2 Select Company option from Gateway of Tally
- Enter “Select Company”.
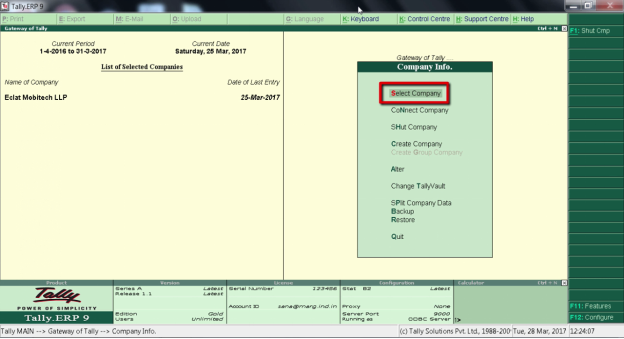
Fig. 1.3 Select Company option from Gateway of Tally
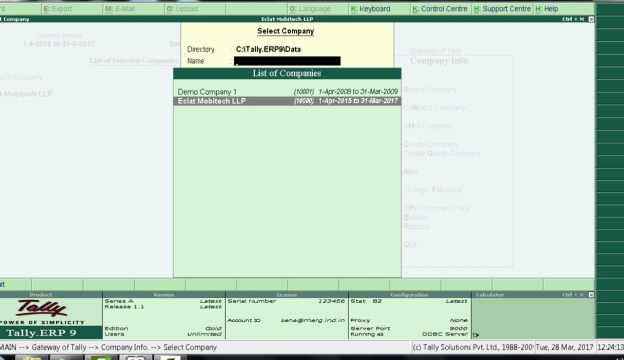
Fig. 1.4 View of List of Companies in Tally ERP 9 Software

Fig. 1.5 View of List of Companies in Tally ERP 9 Software
- If the company is working in combined financial years then the user firstly has to split it. Suppose the user needs to import the data of the financial year from April 2016 to March 2017 to Marg Software but the data of the user’s company is from April 2015 to March 2017. So, the user needs to first split the data of that particular company into two financial years i.e. April 2015 to March 2016 & April 2016 to March 2017.
- In order to split the data, press ESC key then select the option of Split Company Data from Gateway of Tally Software.

Fig. 1.6 Process for Splitting the Data into two financial years
- Enter on “Split Company Data”.
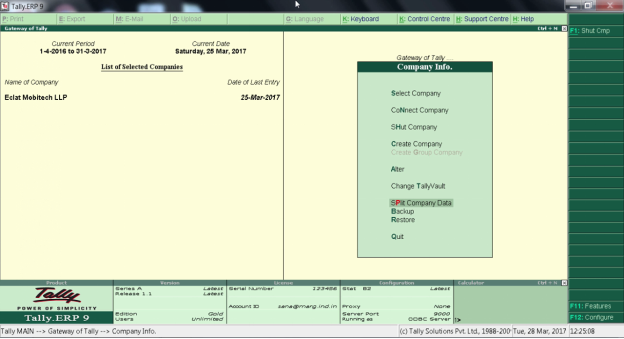
Fig. 1.7 Process for Splitting the Data into two financial years
- In Split Company Data option, the user will select that company whose data needs to be split.
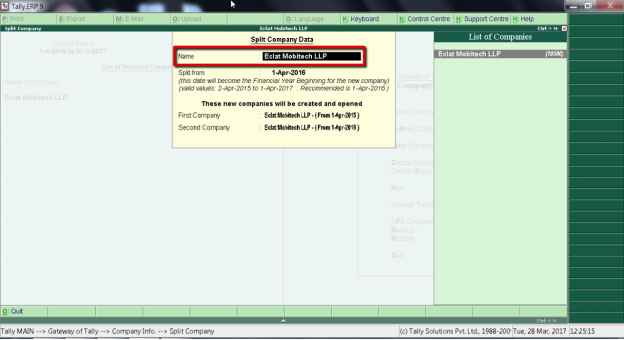
Fig. 1.8 Select Company Name from Split Company Data Option in Tally ERP 9 Software
- Then in Split From option, it allows to split the data from a particular date as per the needs and requirements of the user.

Fig. 1.9 Split From Option in Tally ERP 9 Software
- Press enter once the user has entered the date. Then, Select “Yes” to accept it.

Fig. 1.10 Process for Splitting the Data in Tally ERP 9 Software
- The software will ask whether the user needs to split the data. Enter “Yes”.

Fig. 1.11 Process of Splitting the Data in Tally ERP 9 Software

Fig. 1.12 Process of Splitting the Data in Tally ERP 9 Software
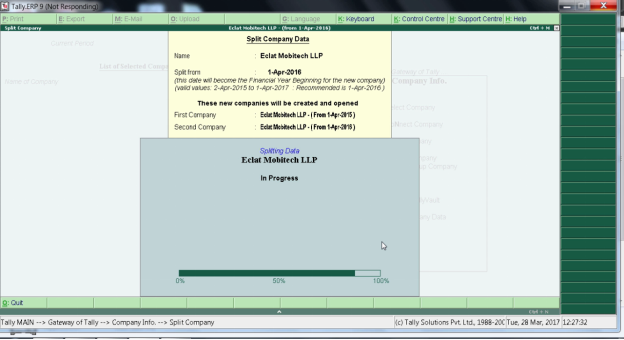
Fig. 1.13 Process of Splitting the Data in Tally ERP 9 Software
- In this way the data of the user’s company will be split into 3 companies.
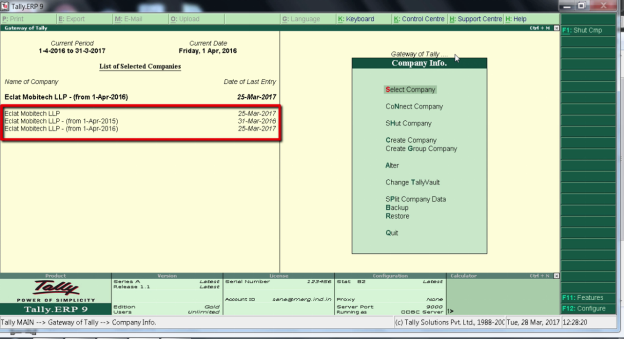
Fig. 1.14 View of Split Companies in Tally ERP 9 Software

Fig. 1.15 Select Company option from Gateway of Tally
- If we select the option “Select Company”, there is one common company where all the data is available and the user can easily access it.

Fig. 1.16 View of First Split Company in Tally ERP 9 Software
- The second company as shown the data for the financial year of April 2015 to March 2016 and the third company displays the data for the financial year April 2016 to March 2017.
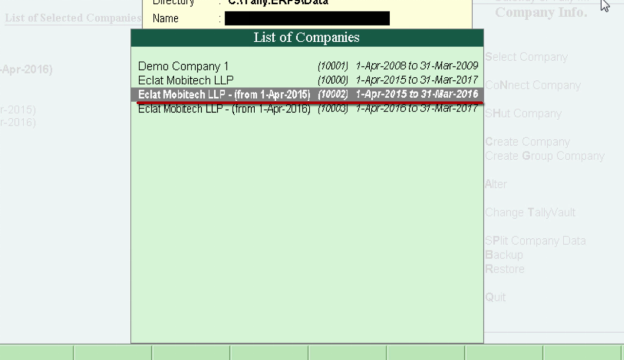
Fig. 1.17 View of Second Split Company in Tally ERP 9 Software
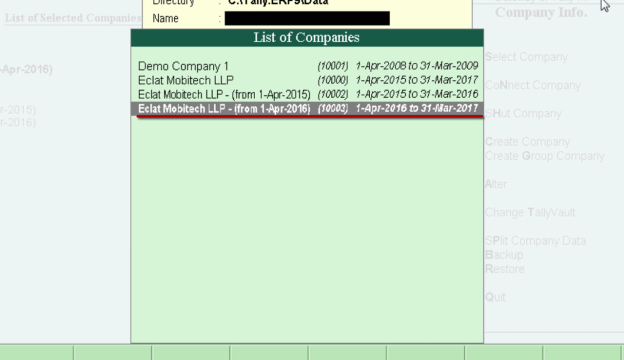
Fig. 1.18 View of Third Split Company in Tally ERP 9 Software
- Now, if the user needs to import the data of the financial year (April 2016 to March 2017) into Marg ERP 9 + Software then the user will select that particular company.
- From Tally Software, the user has to export:
A. Masters
B. Day Book
C. Stock Summary

Fig. 1.19 Options to be Exported from Tally Software
Process of Exporting Day Book in Tally ERP 9 Software
- In order to export Day Book from Tally ERP 9 Software, press Esc key.
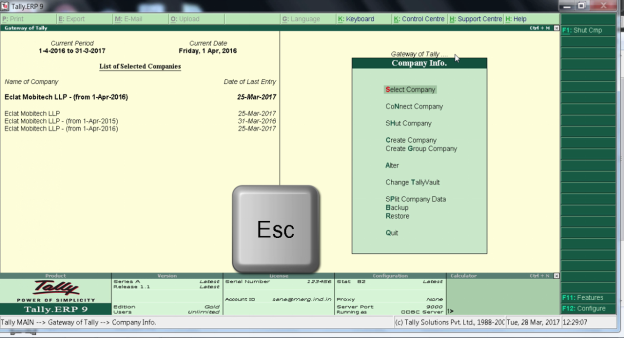
Fig. 2.1 Process of Exporting Masters and Day book from Tally ERP 9 Software
- Select “Display”.
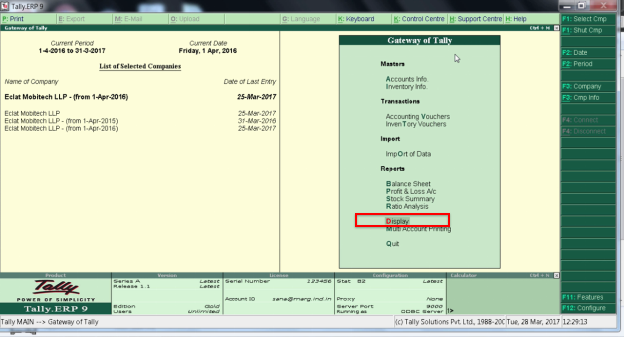
Fig. 2.2 Process of Exporting Day book from Tally ERP 9 Software
- Select “Day Book”.

Fig. 2.3 Process of Exporting Day book from Tally ERP 9 Software
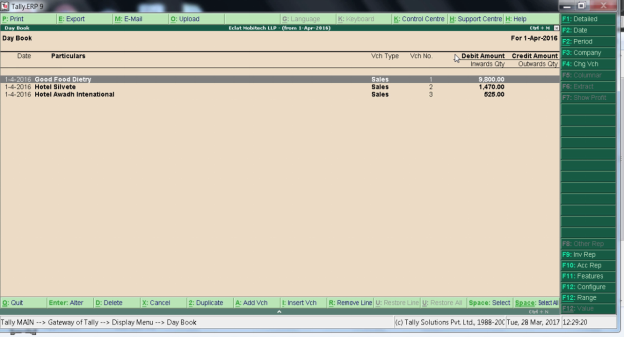
Fig. 2.4 View of Day Book Window in Tally ERP 9 Software
- Press Alt+ F2 function key.
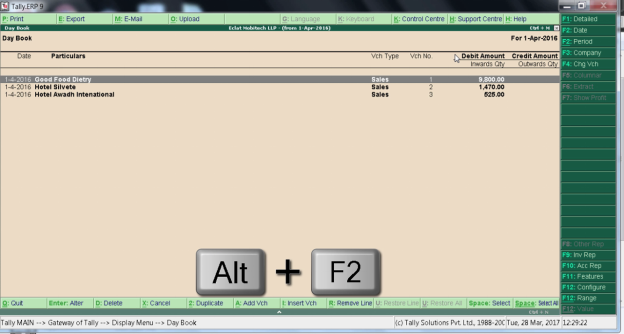
Fig. 2.5 Process of Exporting Day Book in Tally ERP 9 Software
- Now, the user will specify the dates.

Fig. 2.6 Process of Inserting Date in Tally ERP 9 Software
- Press ALT+E for exporting the Day Book.
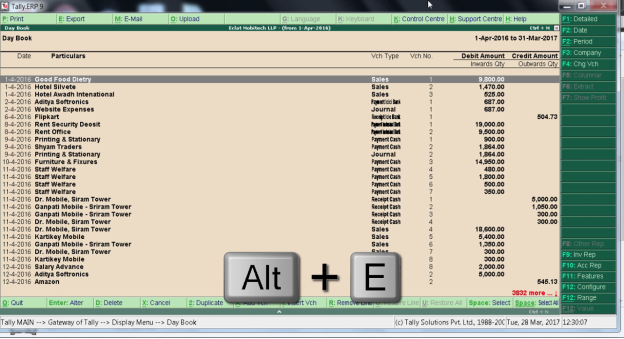
Fig. 2.7 Process of Exporting Day Book in Tally ERP 9 Software
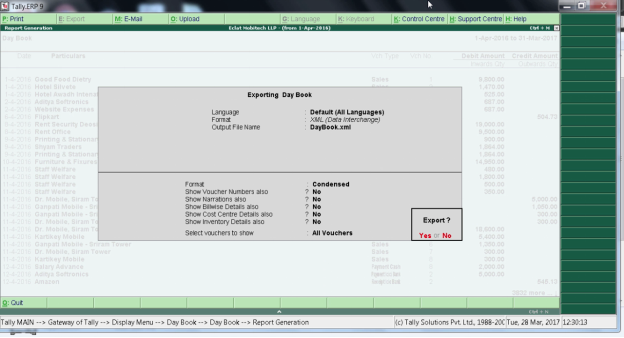
Fig. 2.8 Process of Exporting Day Book in Tally ERP 9 Software
- Press “N” for No.

Fig. 2.9 Process of Exporting Day Book in Tally ERP 9 Software
- Select “All Languages”.
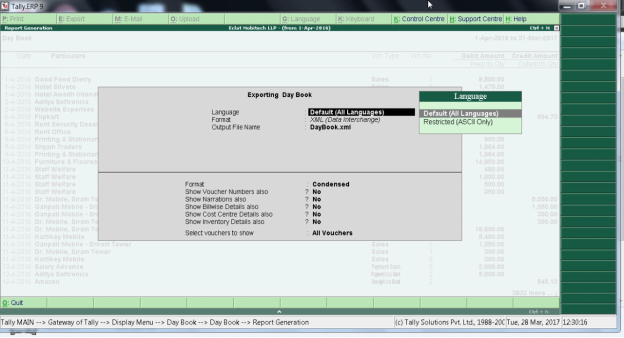
Fig. 2.10 Option for Selecting Language in Tally ERP 9 Software
- Select “XML Format”.
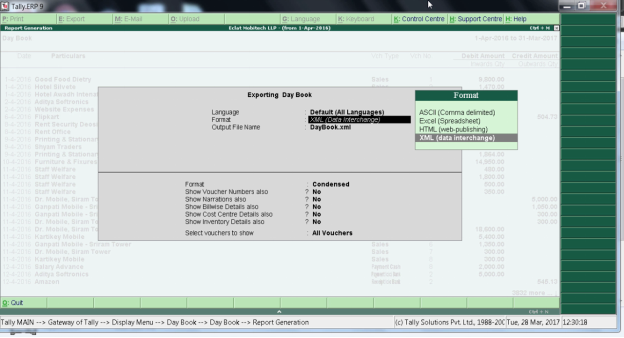
Fig. 2.11 Option for Selecting Format in Tally ERP 9 Software

Fig. 2.12 Process of Exporting Day Book in Tally ERP 9 Software
- Select “Detailed” option in Format.
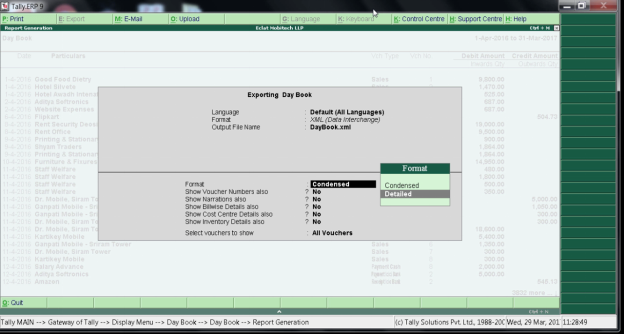
Fig. 2.13 Option for Selecting Format in Tally ERP 9 Software
- Afterwards, select those options which the user wants to export as per the needs and requirements. Set them to “Yes”.
- Select “All Vouchers” option.
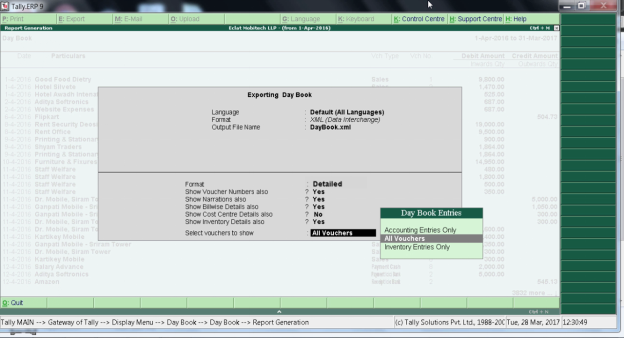
Fig. 2.14 Option for Selecting Vouchers in Tally ERP 9 Software
- Thereafter, Press “Y” for exporting the Day Book.
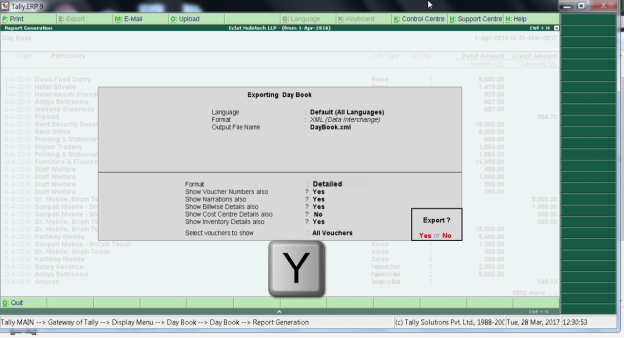
Fig. 2.15 Process of Exporting Day Book in Tally ERP 9 Software
- Now, the Day Book has been exported.
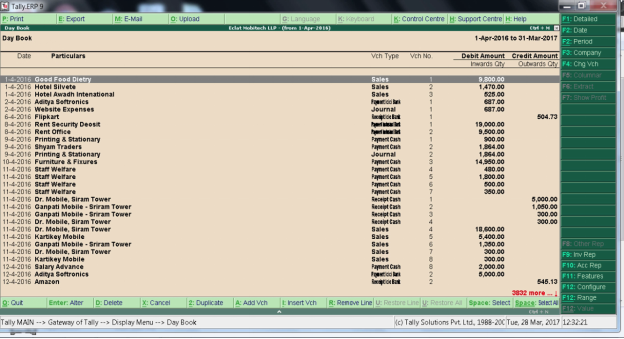
Fig. 2.16 Completion of Exporting Day Book in Tally ERP 9 Software
Process of Exporting Masters in Tally ERP 9 Software
- Press Esc Key.

Fig. 3.1 Process of Exporting Masters in Tally ERP 9 Software
- Enter on List of Accounts.

Fig. 3.2 Process of Exporting Masters in Tally ERP 9 Software
- Press Alt + E.
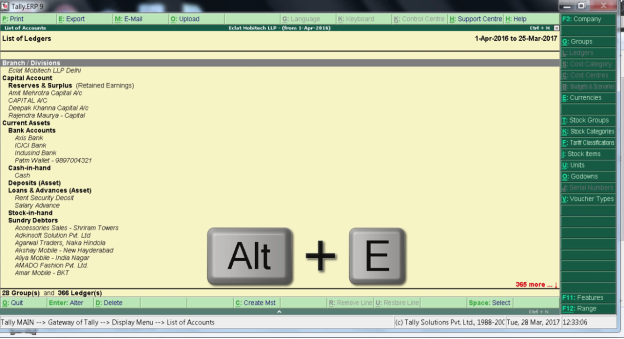
Fig. 3.3 Process of Exporting Masters in Tally ERP 9 Software
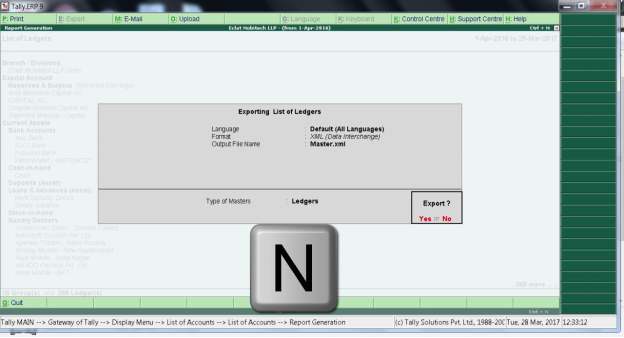
Fig. 3.4 Process of Exporting Masters in Tally ERP 9 Software

Fig. 3.5 Option for Selecting Language in Tally ERP 9 Software
- In fig. 3.6, Select “XML Format”.
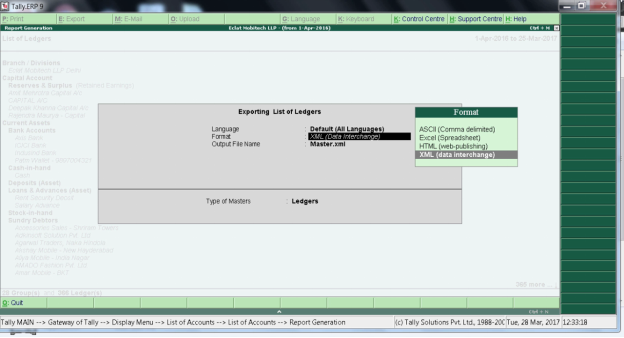
Fig. 3.6 Option for Selecting Format in Tally ERP 9 Software

Fig. 3.7 Process of Exporting Masters in Tally ERP 9 Software
- Select All Masters from “Type of Masters” option.
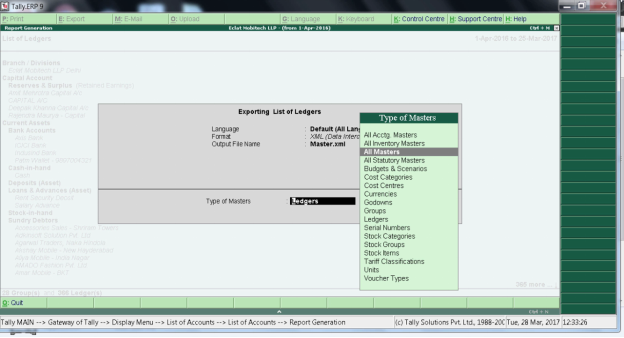
Fig. 3.8 Process of Exporting Masters in Tally ERP 9 Software
- Press “Y” to export.
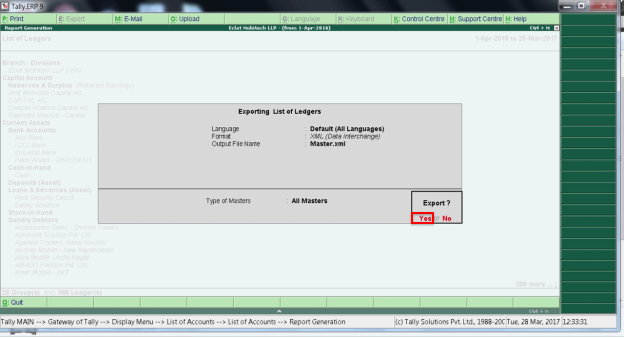
Fig. 3.9 Process of Exporting Masters in Tally ERP 9 Software
Process of Exporting Stock Summary in Tally ERP 9 Software
- In order to export Stock Summary, go to Gateway of Tally. Select “Stock Summary”.

Fig. 4.1 Process for Exporting Stock Summary in Tally ERP 9 Software
- Press ALT+ F2 Key.
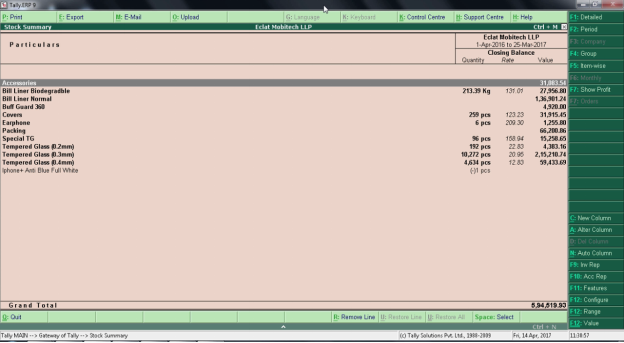
Fig. 4.2 Process for Exporting Stock Summary in Tally ERP 9 Software
- Then, specify the dates.

Fig. 4.3 Process for Exporting Stock Summary in Tally ERP 9 Software
- Press Enter and then press ALT+ E key in order to export the stock summary.

Fig. 4.4 Process for Exporting Stock Summary in Tally ERP 9 Software
- Press “N”.

Fig. 4.5 Process for Exporting Stock Summary in Tally ERP 9 Software
- Select “All Languages”.
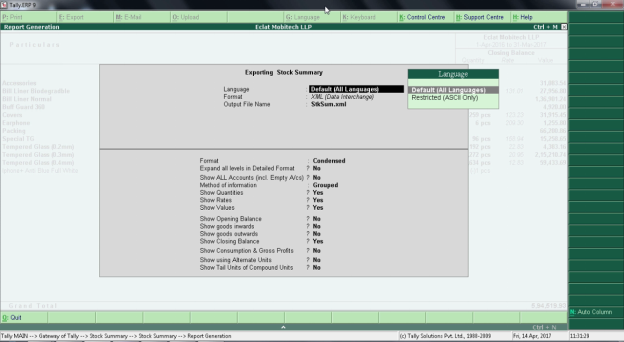
Fig. 4.6 Process for Exporting Stock Summary in Tally ERP 9 Software
- In Format, select “XML (data interchange)”.
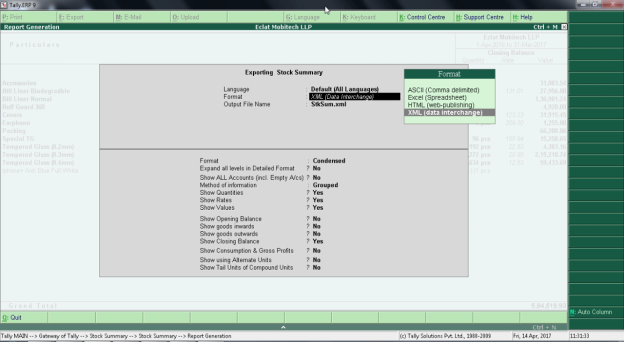
Fig. 4.7 Process for Exporting Stock Summary in Tally ERP 9 Software
- Select “Detailed” option in Format as shown in Fig. 4.8.
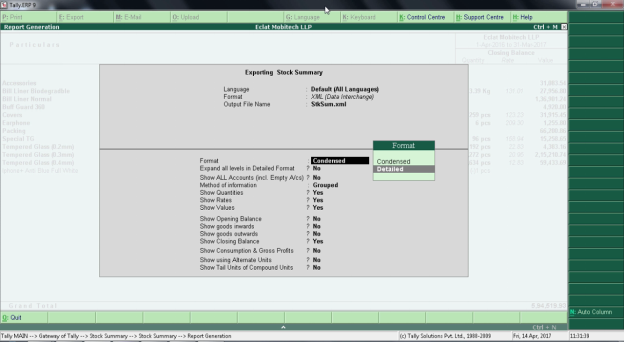
Fig. 4.8 Process for Exporting Stock Summary in Tally ERP 9 Software
- In Method of information, select “Item-Wise”.
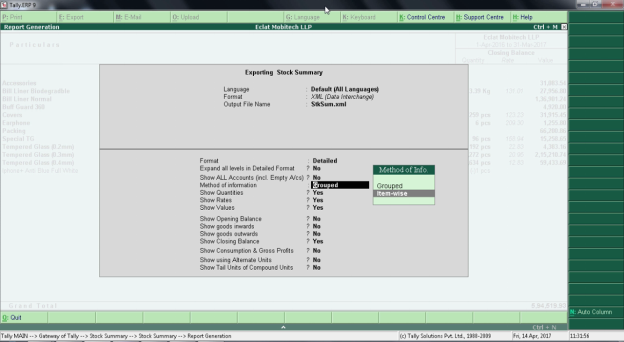
Fig. 4.9 Process for Exporting Stock Summary in Tally ERP 9 Software
- Then in order to export, press “Y”.

Fig. 4.10 Process for Exporting Stock Summary in Tally ERP 9 Software

Fig. 4.11 Completion of Exporting Stock Summary in Tally ERP 9 Software
- So, in our Tally ERP 9 folder; Day Book, Masters and Stock Summary Files have being created.
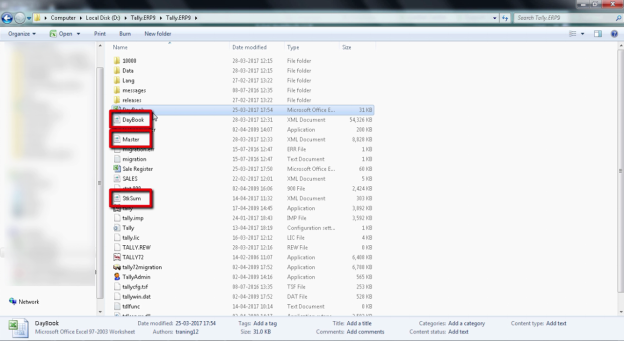
Fig. 4.12 Creation of Day Book & Masters file in Tally ERP 9 Folder
- Now, the user has to import Day Book, Masters and Stock Summary in Marg ERP9+ Software.
- Firstly, we will select that particular company in which the data has to be imported.
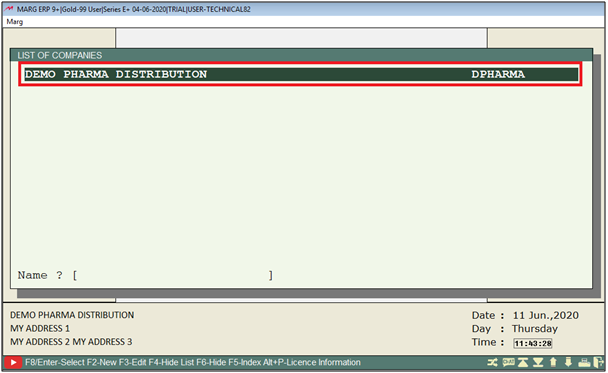
Fig. 5.1 Snapshot of Homepage of Marg ERP 9+ Software
Before importing the date user needs to make sure that the power of EXPORT/IMPORT has been properly configured in the software.
a) To enable export power from the control room please click on the given link http://shorturl.at/cjyz7
b) To enable export power for user please click on the given link http://shorturl.at/EF248
- After that, the user will go to Reports >> Management Report >> Utilities >> Data Import/Export >> Tally/Busy Export/Import.

Fig.5.2 Menu View of Tally ERP 9 in Marg ERP 9+ Software
- A Tally & Busy Import/Export window will appear. Select 'Tally 9 Import/Export'.
- Then click on Okay.
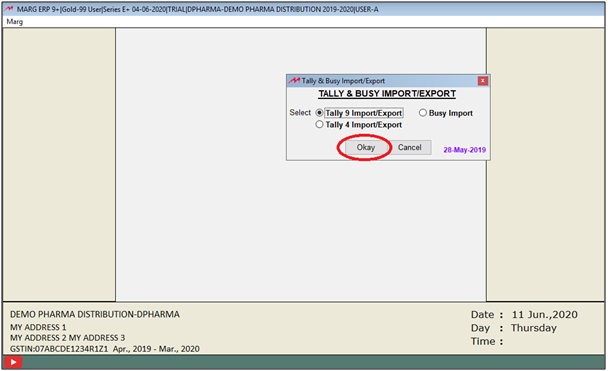
Fig. 5.3 View of Tally & Busy Import/Export Window in Marg ERP 9+ Software
- Then a Tally Import Export window will appear.
- Here, the user will first select Import from Tally. Then select Masters w/o Balance, Masters with Balance or Full Transfer.
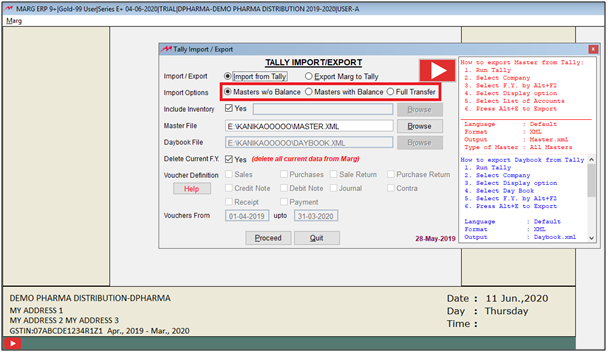
Fig. 5.4 Importing Options in Marg ERP 9+ software
- Afterwards, the user will click “Browse”.
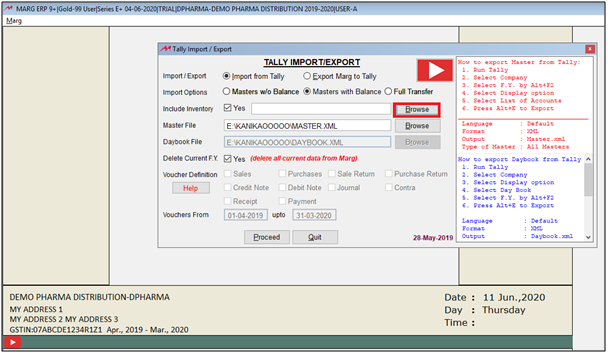
Fig. 5.5 View of Import/Export in Marg ERP 9+ Software
- Then a Select the Master XML file window will appear.
- Here, select “Stock Summary.XML File” which the user had exported from Tally Software.
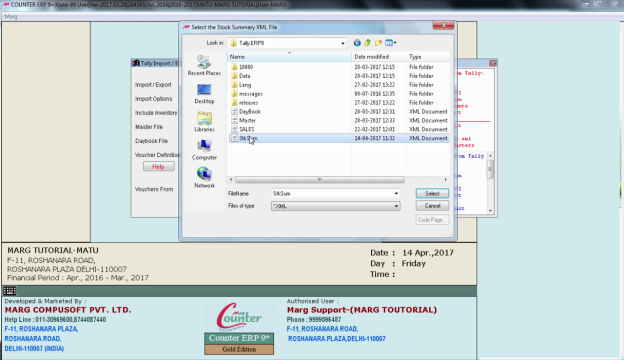
Fig. 5.6 Selecting “Stock Summary.XML File” from Tally ERP 9 Folder
- Similarly, select “Masters.XML File” which the user had exported from Tally Software
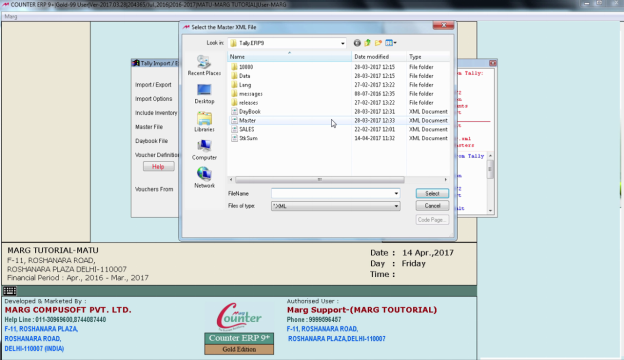
Fig. 5.7 Selecting “Masters.XML File” from Tally ERP 9 Folder
- And then select the “Day Book” which is exported from Tally ERP 9 Folder.

Fig. 5.8 Selecting “Day Book File” from Tally ERP 9 Folder
- Select “Proceed” once the user has browsed both Masters and Day Book file from Tally ERP 9 Folder.

Fig. 5.9 Selecting Proceed Option from Tally Import/Export Window
- This way the data of Tally Software will be imported in Marg ERP 9+ software.
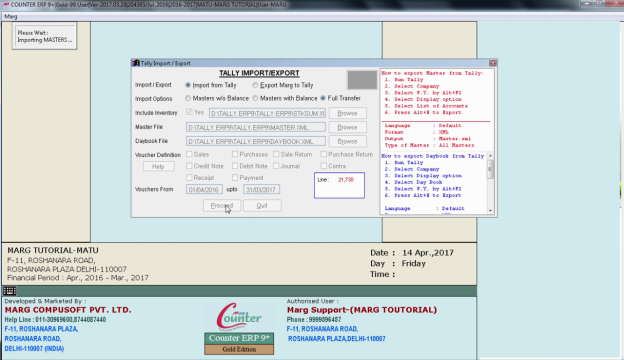
Fig. 5.10 Importing Data in Marg ERP 9+ Software

Fig. 5.11 Importing Data in Marg ERP 9+ Software

Fig. 5.12 Importing Data in Marg ERP 9+ Software
- Go to Final Reports > Trial Balance.

Fig. 5.13 Menu View of Trial Balance in Marg ERP 9+ Software
- The user will be able to view all the data which is being imported in Marg ERP 9+ Software.
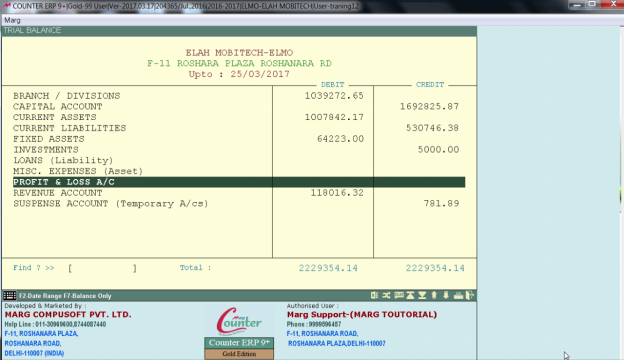
Fig. 5.14 View of Imported Data in Marg ERP 9+ Software

In This Page


