

Welcome to  -
Marg ERP 9+
-
Marg ERP 9+
Home > Margerp > Data Import Export > How to Import Busy Data in Marg ERP Software ?
How to Import Busy Data in Marg ERP Software ?

Introduction to Busy Data Import in Marg ERP Software
Process to Exporting Busy Data for Marg ERP Software
Process to Importing Busy Data in Marg ERP Software
Introduction to Busy Data Import in Marg ERP Software
With the help of this new & advanced feature, the user can import data from Busy Software to Marg ERP 9+ Software. There are 3 different ways to import data from Busy to Marg which are as mentioned below:
- Masters without Balance
- Masters with Balance
- Full Transfer
Through this effective feature, the user can Import the Complete Data up to Balance Sheet from Busy Software like All Masters, All Transactions with Item & Complete Accounts.
Process to Exporting Busy Data for Marg ERP Software
- For importing the data of Busy Software to Marg ERP 9+ Software, Go to Busy Software

- In Busy software, firstly switch to Company’s Menu >> Then Click on Open Company as shown below.
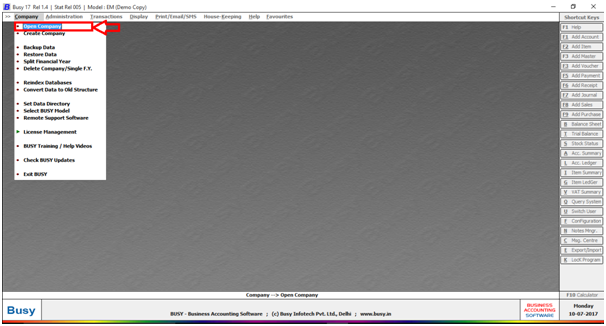
- Then the user will select that particular company whose data needs to be imported in Marg ERP Software.

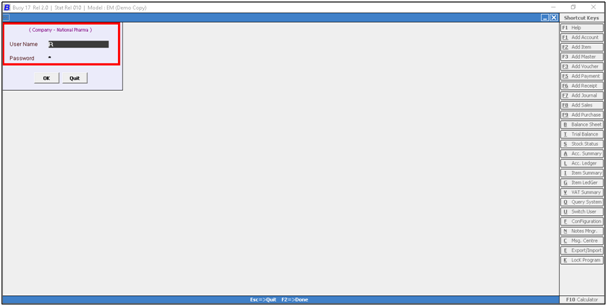
- Enter the Username & Password.
- After that switch to Administration Menu >> Data Export Import Option >> Select Data Export Import XML >> Then Click on Export Data >> Click on Masters.

- Now, from Export Masters Data window, select those Masters type which are required to be exported. Suppose the user needs to export all masters so click “Select All Masters”.
- Then below the user will see the “File Path”. In file path, the user will specify that particular path where the user needs to export these Masters. Like, the user has created a folder “Busy XML” in the drive. The user will go to that particular folder and simply select and copy the path of that folder. Then switch to file path and paste the path of that folder here as shown below.

- Then click on “Export”.
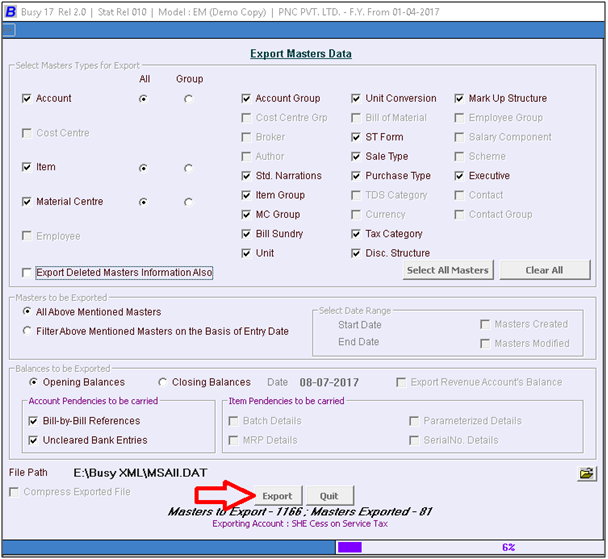
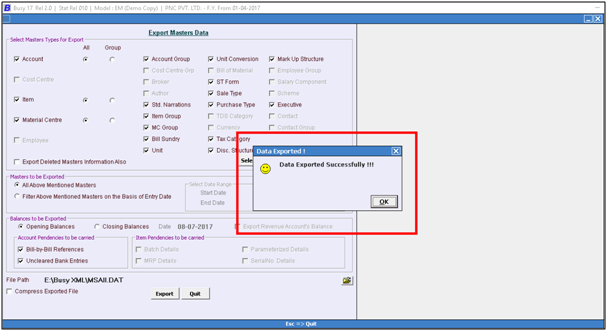
- The user can see that the data is getting exported. So, in this way the data has been exported successfully.

Fig. 1.1 Process of Exporting “All Masters” in Busy Software
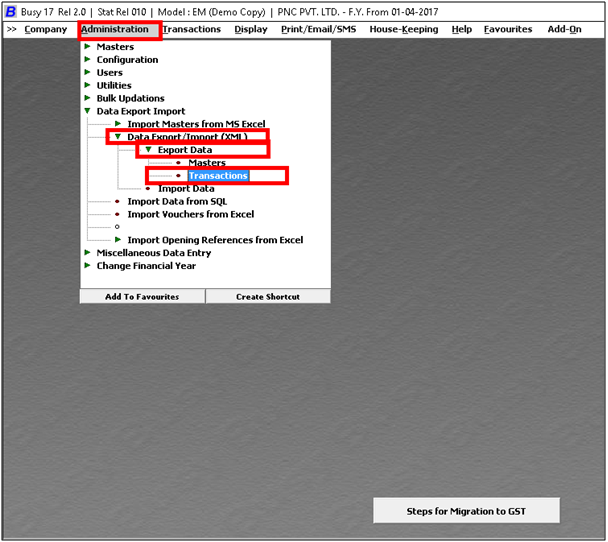
- Similarly, if the user needs to export Transactions then again switch to Administration Menu >> Data Export Import Option >> Select Data Export Import XML >> Then Click on Export Data >> Click on Transactions.
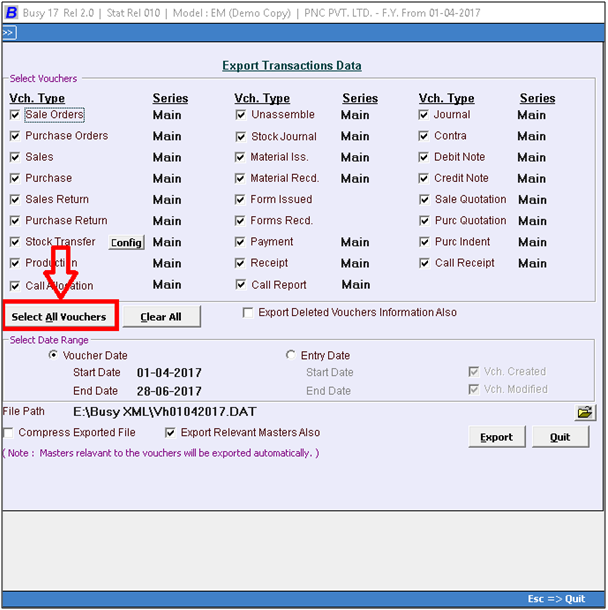
- Now, from Export Masters Data window, select those Voucher types which are required to be exported. Suppose the user needs to export all vouchers so click “Select All Vouchers”.
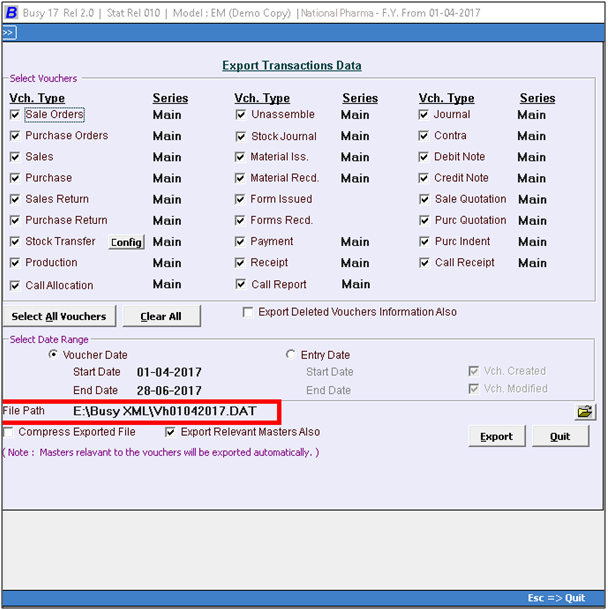
- Then below the user will see the “File Path”. In file path, the user will specify that particular path where the user needs to export these Transactions. Like, the user has created a folder “Busy XML” in the drive. The user will go to that particular folder and simply select and copy the path of that folder. Then switch to file path and paste the path of that folder here as shown below.
- Then click on “Export”.
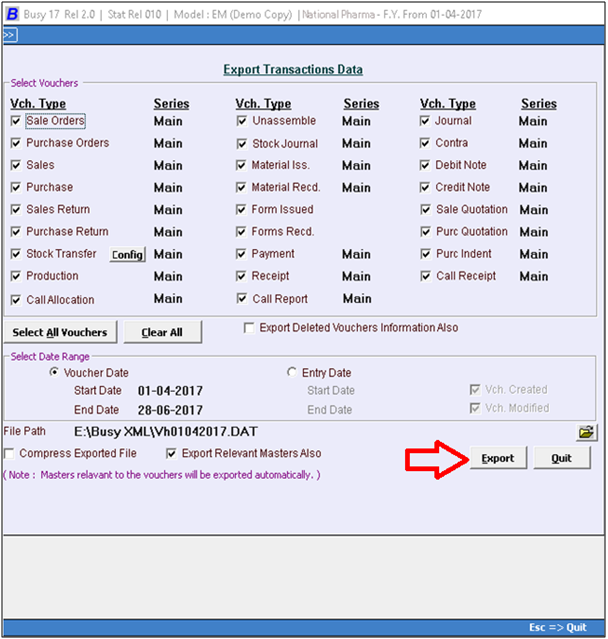
- Then the Software will indicate that “Export process is going to start. Do you wish to continue?” The user will click on “Yes”.
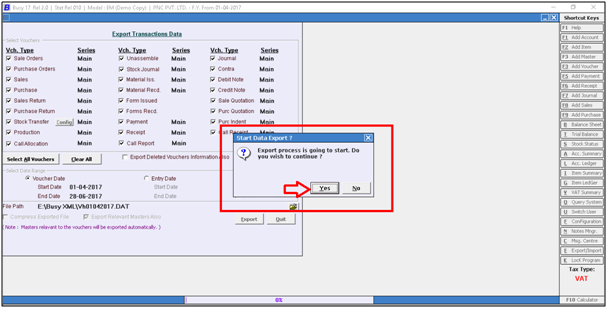
- The user can see that the data is getting exported. So, in this way the data has been exported successfully.

Fig. 1.2 Process of Exporting “All Vouchers” in Busy Software

Process to Importing Busy Data in Marg ERP Software
- Firstly, the user can view the list of companies in Marg ERP Software. Here, the user will enter on that particular Company in which the data needs to be exported.

Now, go to Reports > Management Reports > Utilities> Data Import/Export > Tally/Busy Export/Import.
Links for the reference are as below:
|
Query |
Solution's link |
|
Close in Setup |
|
|
Software shows 'You are not authorized' at the time of importing data |

- Here the user will select “Busy Import”. Then click on “OKAY”.

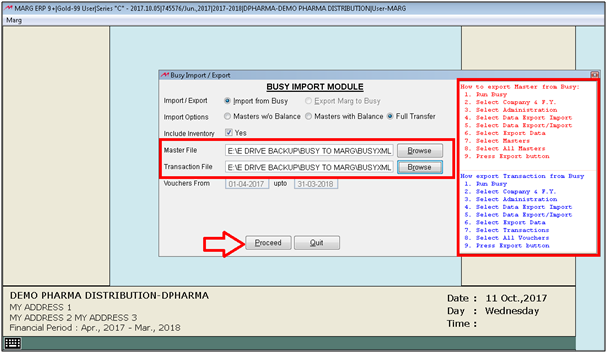
The user will find 3 different options to Import the Busy Data in Marg ERP Software which are:
- Masters w/o Balance
- Masters with Balance &
- Full Transfer

- If the user has to import Masters w/o balances i.e. Item Master, Ledger Master then Select “Masters w/o Balance”
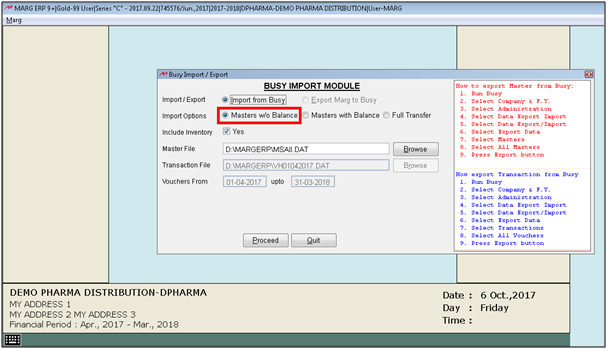
- If the user has to import Masters with Balances then Select “Masters with Balance” option.
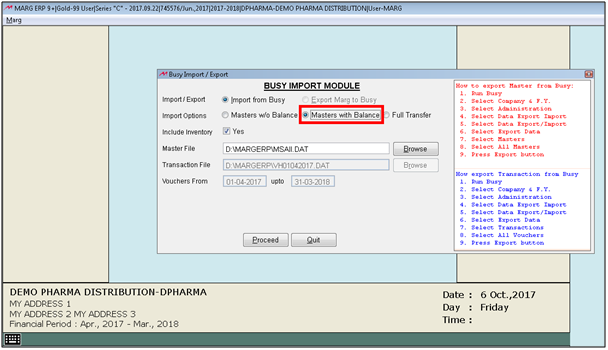
- And if the user has to import both then select “Full Transfer” option.

- For now let’s select Full Transfer.
- Then Click on “Include Inventory” if the user needs to import the inventory also.
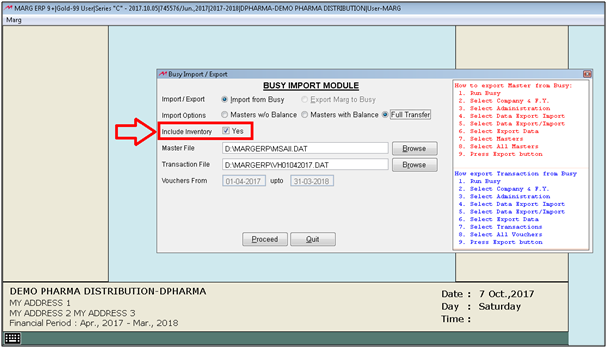
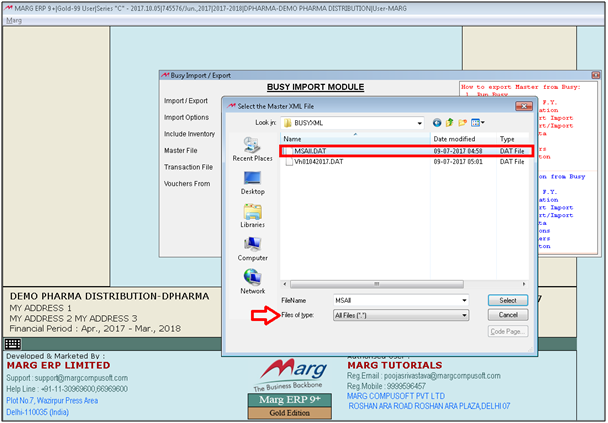
- Next option is “Master File”. Here, the user will paste that particular Master File which has been exported from Busy Software. For that go to Busy XML Folder >> Select the Path. And then in order to browse the Master File; click on Browse, paste that path and select “All Files”. Then select the Master file as shown below.
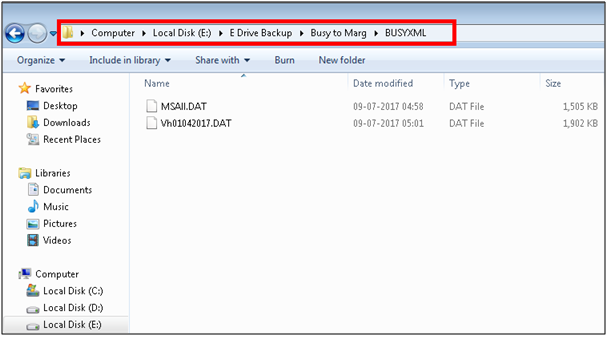
Fig. 1.3 Selecting the Path of Master File in Marg ERP Software
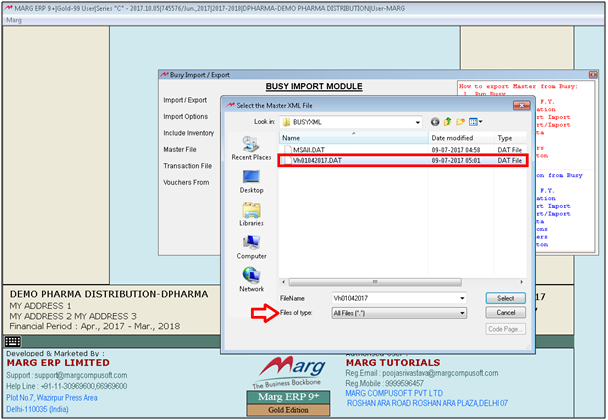
- Similarly, the user will browse the Transaction File.
- On the right hand side the user can also see the steps are given on how to export Masters and how to export Transaction from Busy Software. So, the user can follow these steps.
- Then click on “Proceed”.
- The user can see that Busy data is getting imported in Marg Software as shown below.
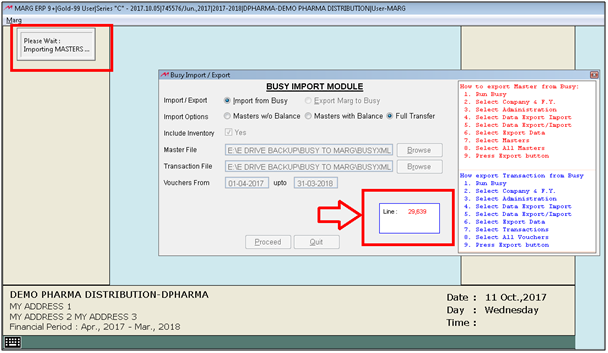
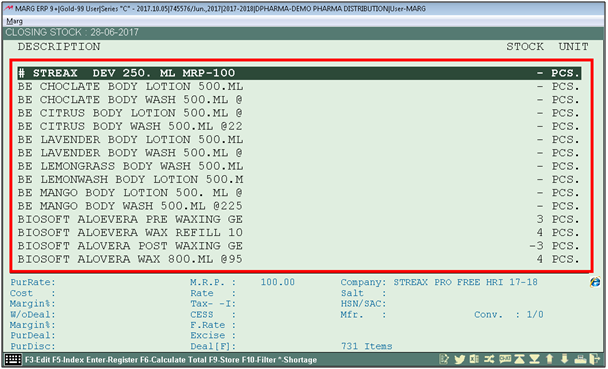
- If the user needs to check the inventory, go to Stocks > Current Stock.

- Here, the user can see that all the items and stock has been imported.
- Similarly, if the user goes to Books Menu > Then Select All ledgers, then the user can see all the ledgers has been imported.
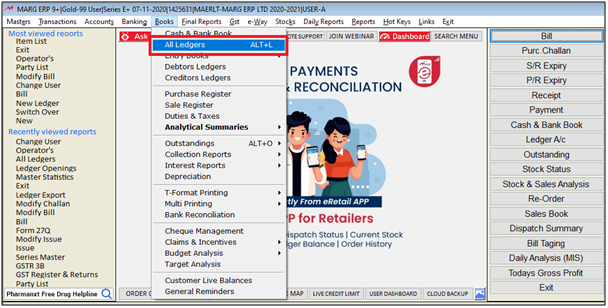
Fig. 1.4 Menu View to All Ledgers in Marg ERP Software

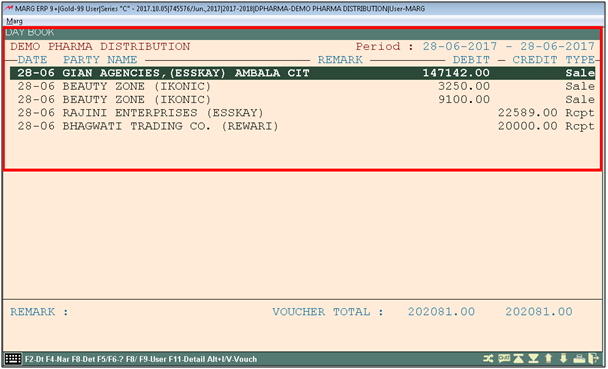
- Again if the user visits the Books Menu > Entry books > Day book can be viewed.

- A Day book window will appear. Enter date range and then press Enter on it.

- Now the user can view all the entries will get imported successfully.

In This Page


