

Welcome to  -
Marg ERP 9+
-
Marg ERP 9+
Home > Margerp > E Way Bill > How to Generate E-Way Bill through Marg Software ?
How to Generate E-Way Bill through Marg Software ?

Overview of e-Way Bill in Marg ERP Software
Process to Enter E-Way Bill Login Details in Marg ERP Software
Process to Generate Individual e-Way Bill in Marg ERP Software
OVERVIEW OF E-WAY BILL IN MARG ERP SOFTWARE
- E-Way Bill i.e. Electronic Way Bill is basically an electronic document generated on the GST portal indicating the movement of goods within the state or from one state to another state.
- e-Way bill is mandatory if the value of goods is more than Rs. 50,000 and e-Way bill is optional if the value of goods is less than Rs. 50,000.
PROCESS TO ENTER E-WAY BILL LOGIN DETAILS IN MARG ERP SOFTWARE
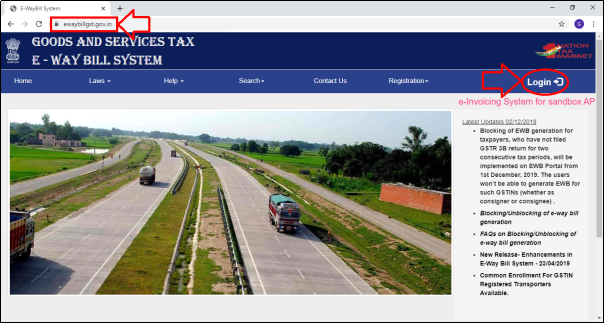
- Firstly, the user will visit to http://www.ewaybillgst.gov.in & Click on ‘Login’.
- Enter the Login Credentials i.e. Username & Password.
- Then mention the Captcha.
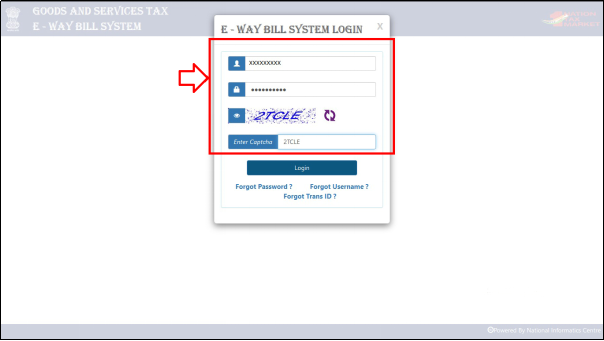
- Click on ‘Login’.
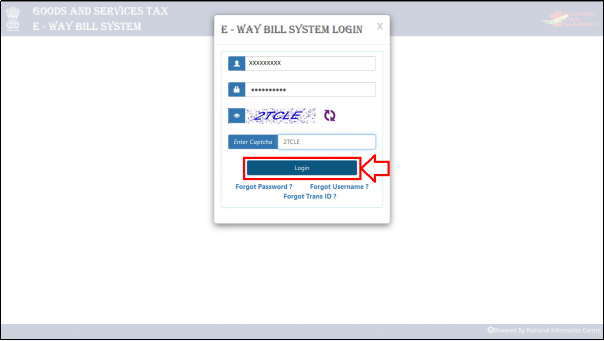
- A Dashboard of E-Way Bill Portal will appear.
- Click on 'Registration' >> Then select 'For GSP'.
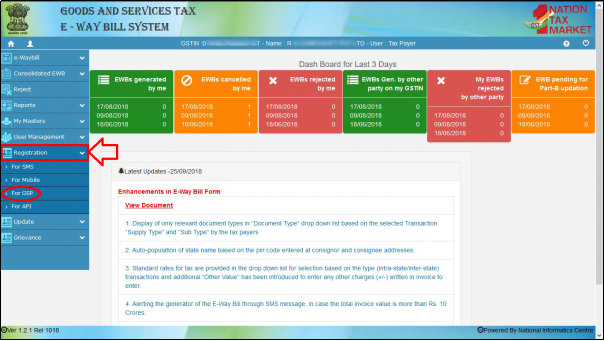
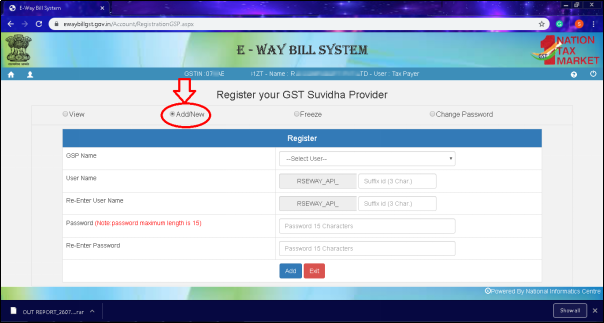
- A 'Register your GST Suvidha Provider' window will get displayed.
- The user will Enter the E-mail ID, Mobile No. then click on 'Send OTP'.
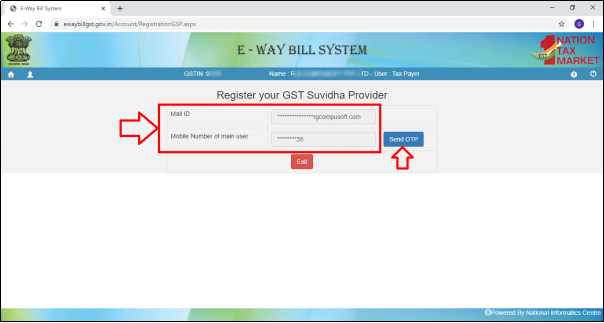
Fig. 1.1 Process to Register Your GST Suvidha Provider on E-Way Bill Portal
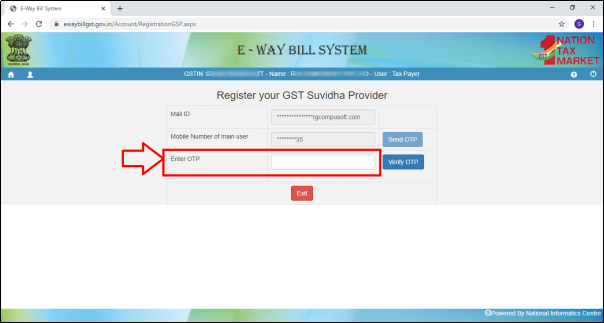
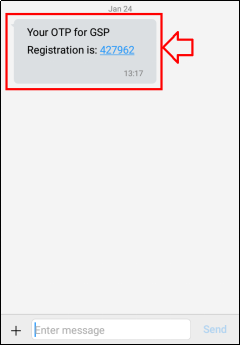
- The user will receive an OTP on their registered mobile no.
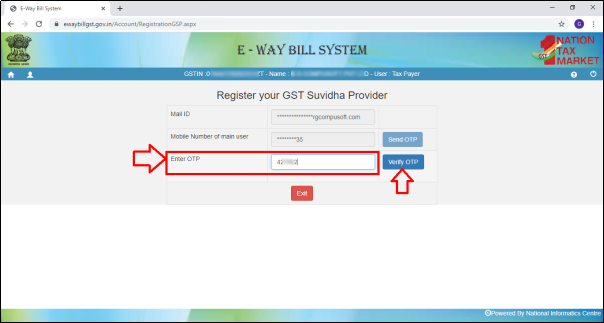
- Then enter the OTP and click on 'Verify OTP'.
- Click on 'Add/New'.
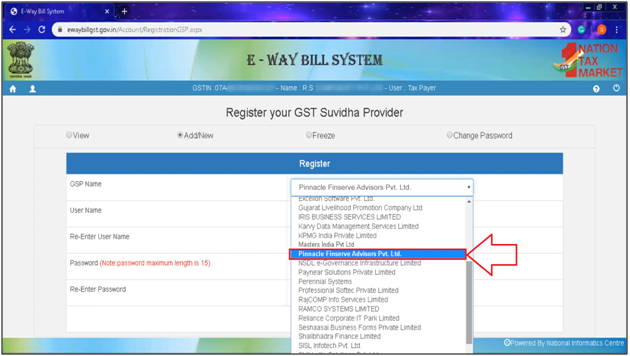
- Select the GSP Name i.e. Pinnacle Finserve Advisors Pvt. Ltd.'
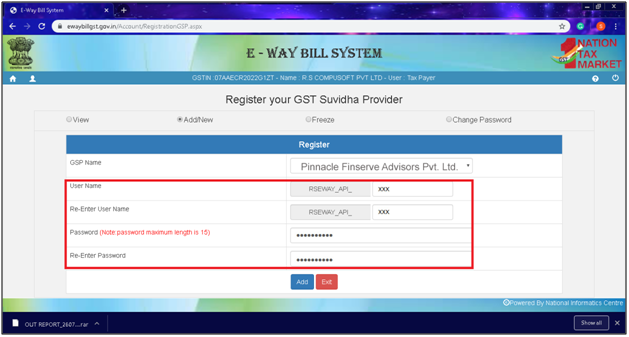
- Then Enter the Username and Password.
The username which is been received and the password entered here are the Login details e-Way Bill.
- Click on 'Add'.
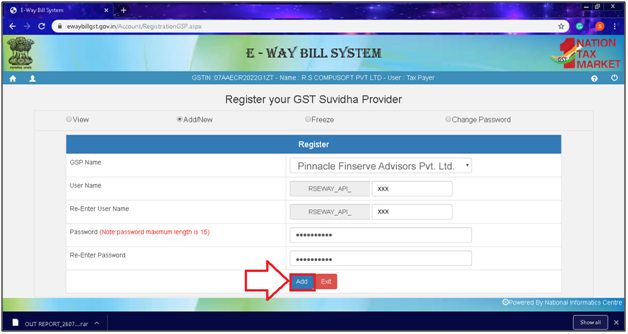
- The user will then view the message of 'Account Created Successfully'.
- Now after getting the login details of e-Way Bill, the user will go to the software.
- Go to e-Way >> Login Details.
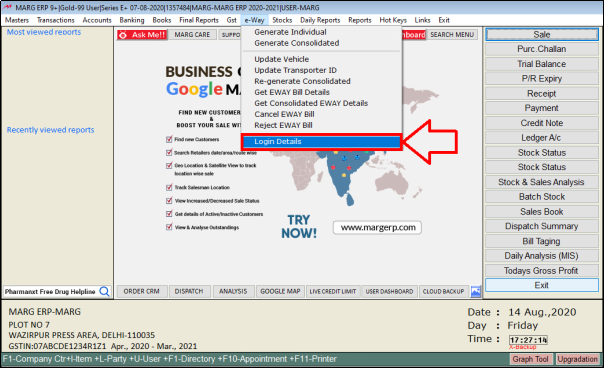
- A ‘GST e-Way Bill Login Credentials’ window will appear. Click on ‘Edit’.
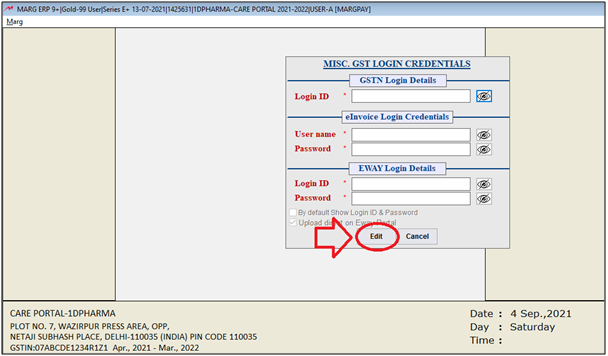
- The user will mention the User name which is been received at the time of GSP registration and the password as provided.
These are the credentials of e-Way bill, and it is not necessary that these credentials of e-Way bill are those which are of actual NIC portal. These can be different.
- So after filling these login details, click on ‘Save’.
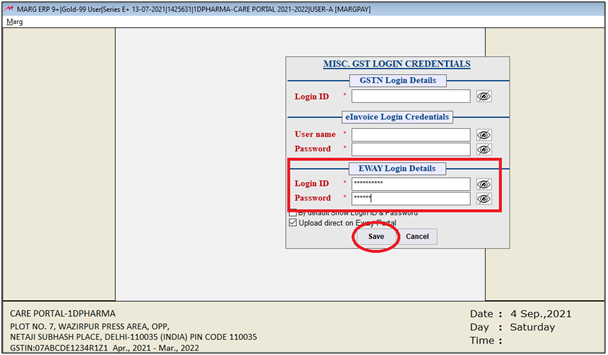
As user will will save it then the software will get these login details.
PROCESS TO GENERATE INDIVIDUAL E-WAY BILL IN MARG ERP SOFTWARE
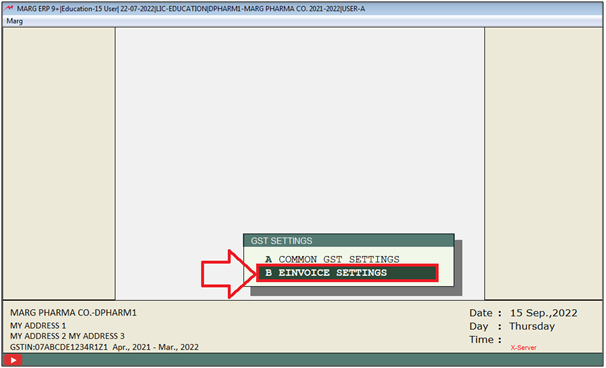
- Now Go to Gst > GSTR Settings.

- A 'GST Settings' window will appear.
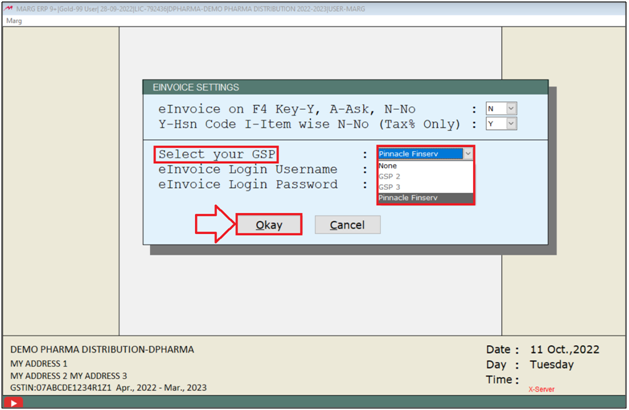
- The user will select 'eInvoice Settings'.
- An 'eInvoice Settings' window will appear.
- In 'Select Your GSP', the user will select 'Pinnacle Finserv'.
- Click on 'Okay'.
- Now in order to generate e-Way bill, go to e-Way >> Generate Individual.
It is basically for customers, means if the customer generates the e-Way bill and give to the transporter then in that case the customer will select 'Generate Individual'.

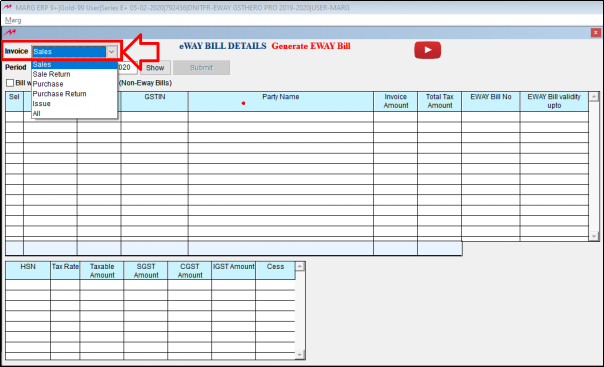
- A ‘e-Way Bill Details’ window will appear.
A. Invoice: Select the ‘Invoice’ of which the user needs to view the details of e-Way bills. So, the user will select ‘Sales’.
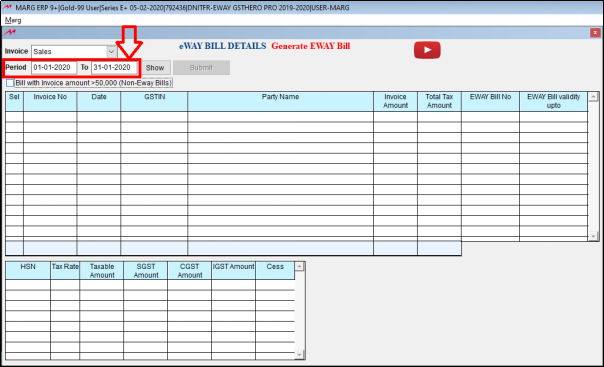
B. Date: Enter the ‘Date’ i.e. from which till which date the user needs to generate e-Way bills.
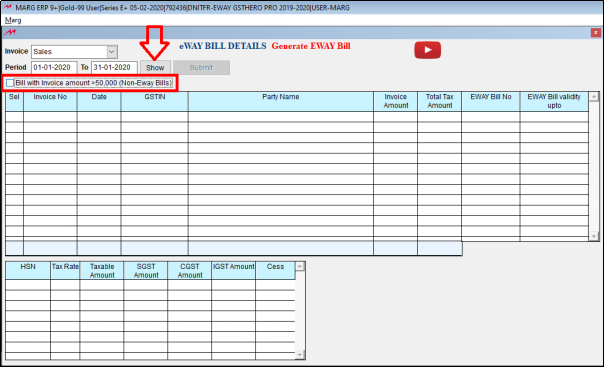
C. Bill with Invoice Amount Greater than 50,000: If the e-Way bill is being created for the consignment of Rs 50,000 or more than that then tick here. And if bills are not more than 50,000, then the user will not tick it.
Then click on ‘Show’.
- As the user will click on show, all the Invoices of ‘Sales’ will appear.
- The bills for which e-Way bill is being created will be shown along with the validity.
- The user can also view the HSN details below related to invoice.
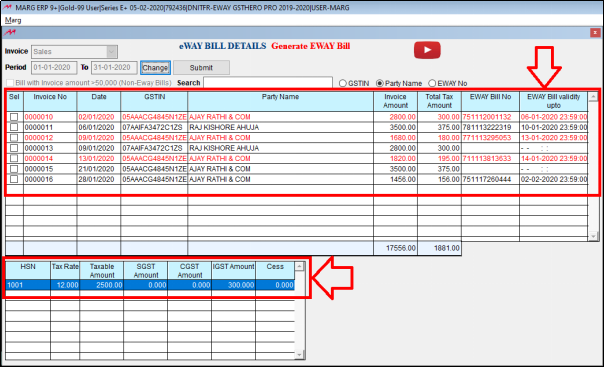
- Apart from it, the user can search the Invoice on the basis of GSTIN, Party Name, and E-Way number as per the requirement.

- Then select the invoice of whose e-Way bill is being created and click on ‘Submit’.
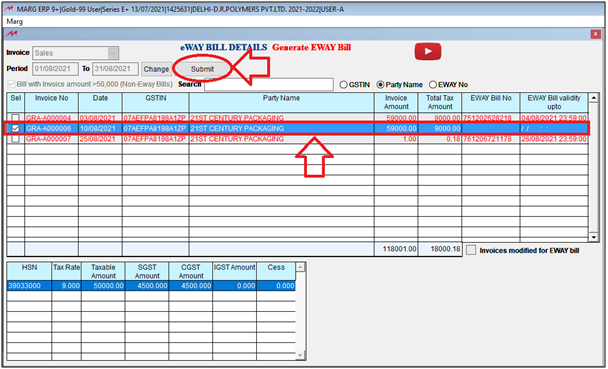
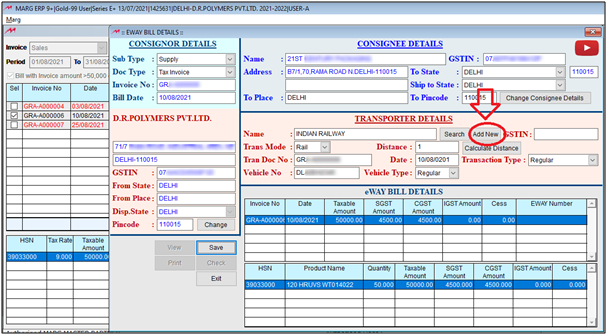
- So, the consignor and consignee details will get auto filled here. If the user needs to change them then will click on ‘Edit’ and can change it as per the requirement.

- Suppose the user needs to change the Consignor Details then the user will click on ‘Change’.

- And by clicking on ‘Change’ Consignee Details’, the user can change the consignee details.
- Like, in ‘To state’ and in ‘Ship to state’ there are 2 states on the basis of GSTIN of the consignor in both, but it might happen that the consignee need to send it somewhere else then in that case the user can change the state from here.

- Along with it, the user can view the Transporter details.
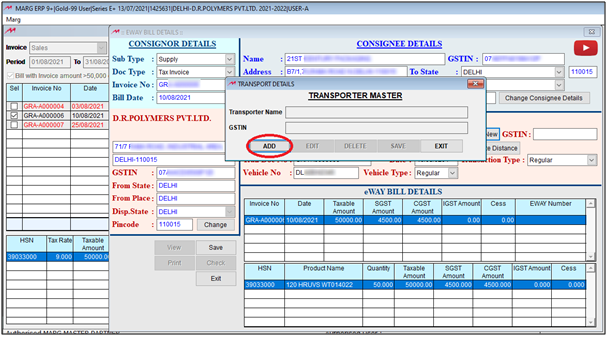
- The user can click on ‘Add New’ to add the new transporter.
- A 'Transporter Master' window will appear in which the user will click on 'Add' on add new transporter.
- The user can also select the Transport Mode as per the requirement Like Road, Rail, Air and Ship.

There are following conditions in which the Transporter Name, DOC No. and Vehicle does not required:
| S.NO | Conditions | Requirements |
|---|---|---|
| 1 | If Doc. No & Vehicle No. mentioned | No need to mention 'Transporter Name' in transport details |
| 2 | If the Transport Name mentioned | No need to mention 'Vehicle No. & DOC No.' in transporter details |
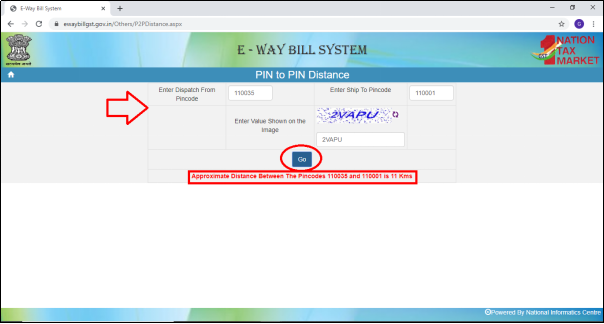
- Now if the user needs to calculate the distance from the dispatch location to ship location then click on ‘Calculate Distance’.

- A page of ‘e-Way Bill System’ will appear.
- The user will mention the ‘Dispatch from Pin Code’ and ‘Ship to Pin Code’ i.e. the user will mention the pin code of that location from where it is going to whichever location.
- Then mention those characters which is been shown in the image and click on ‘Go’.
- So, in this way the distance between both Pin Code will be shown after the calculation.
- After this, the user will click on ‘Save’ to save these details.
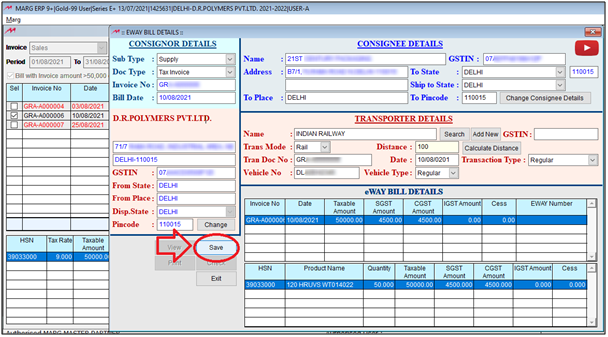
- After saving the details, the user can check that if these details are accurate or not by clicking on ‘Check’ button.
- As there are no errors means these details are correct.

After this, the user can view the three options to generate eway bill will get displayed which are mentioned below:
1. Offline Excel
2. Offline JSON
- When the user saves the e-Way bill through ‘Offline Excel’ or ‘Offline JSON’ then the user needs to login on e-Way portal and can upload the e-Way bill.
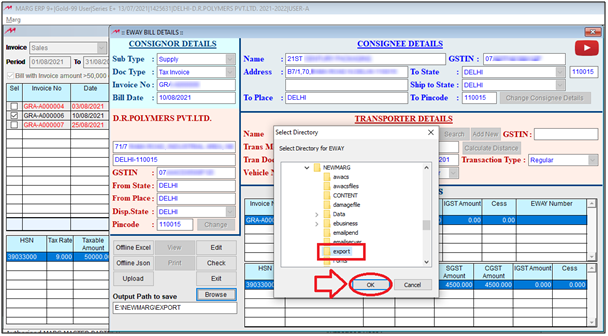
- But before that the user need to specify the ‘Output Path’ that the offline excel or the offline JSON which is been getting generated must be created at which location.
- For that the user will click on ‘Browse’.

- Select the location to save file the click on 'Ok'.
- Suppose the user will click on ‘Offline JSON’.
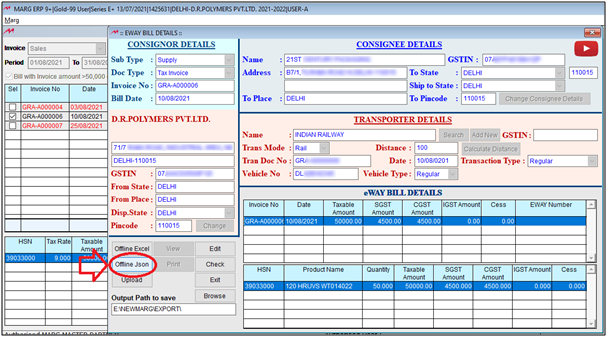
- Then the user can view that the e-Way bill has been generated.

3. Upload
Select, if the user needs to upload e-way bill directly on the e-way bill portal.
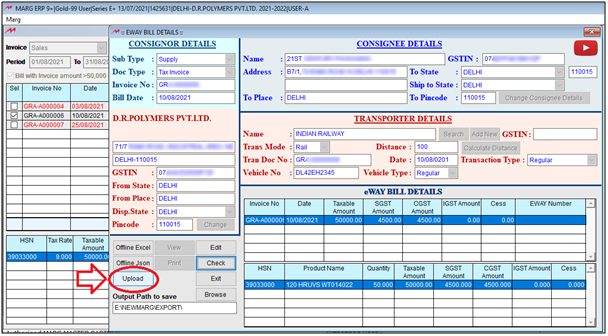
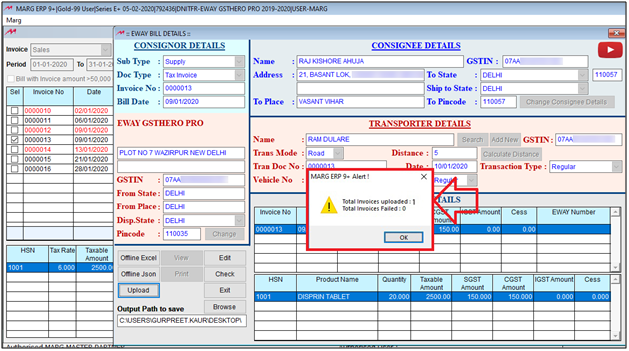
- As the user will click on upload then the user can view that the selected invoice has been uploaded.

In This Page


