

Welcome to  -
Marg ERP 9+
-
Marg ERP 9+
Home > Margerp > Fast Sms E Mail Reports > How to set E-Mail Scheduler for Stock and Sale Report in Marg Software ?
How to set E-Mail Scheduler for Stock and Sale Report in Marg Software ?

Overview Of E-Mail Scheduler For Stock And Sale Report
Process Of Email Setup In Marg ERP Software
Process Set Schedule E-Mail For Stock And Sale In Marg ERP Software
Process To Re-Send Scheduled Email In Marg ERP Software
Overview Of E-Mail Scheduler For Stock And Sale Report
In Marg ERP Software with the help of a mail scheduler for Stock & Sales Reports, the user can schedule and e-mail the stock & sales analysis report as per their requirement.
Process Of Email Setup In Marg ERP Software
- Go to Masters > Marg Setups > Control Room.

- A 'Control Room' window will appear.
- The user will select 'E-Mail Setup'.

- Now click on ‘Accept’.

An 'E-Mail Setup' window will appear.
a. Email Send From X-No S-MARG Server I-Individual Computer: Select the option as per the requirement.
S-Marg Server: Select the option if needs to send Email through Server of Marg.
I-Individual Computer: Select the option if need to send an Email through the computer.
Suppose select 'I'.

b. Email Send from W-Marg Wallet [Default] O-Outlook M-SMTP: Select the option 'M'.

c. If SMTP: If the user has an account on Gmail/Yahoo/Hotmail/Rediffmail/ibibo then the user will enter 'Smtp.gmail.com' and Port number '465'.

d. From Mail I.D: The user will now enter the e-mail ID from which the E-mail needs to be sent.

e. User ID: The user will enter the same E-mail ID, mentioned in 'From Mail ID'.

F. Want to Change Password: The user will select 'Y'.

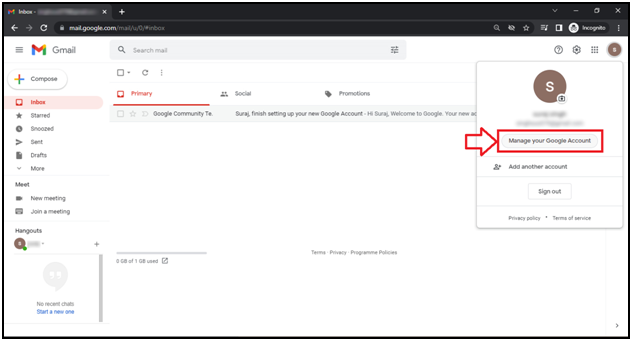
- Login to 'Gmail Account'.
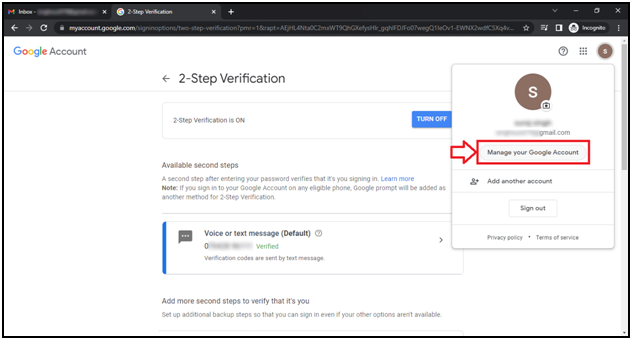
- From the right side of the Gmail Account, click on the 'alphabet' icon.
- Click on ‘Manage your Google Account’.
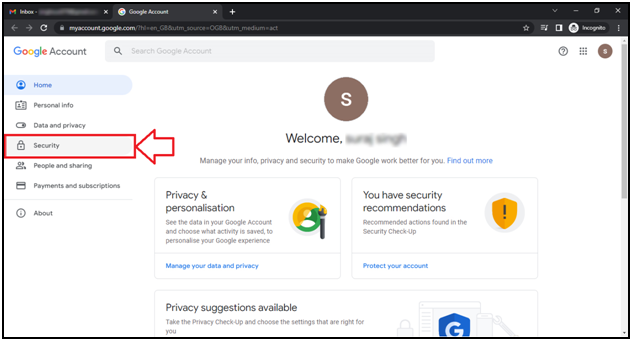
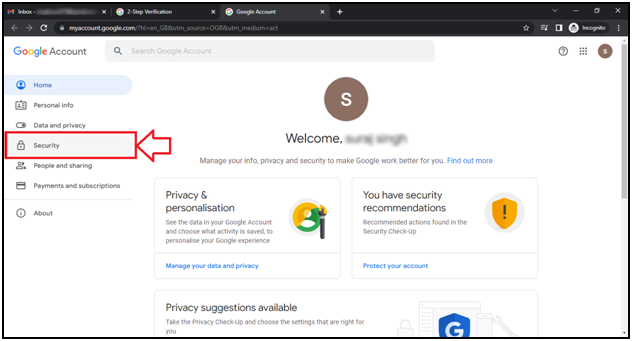
- Click on the 'Security' tab.
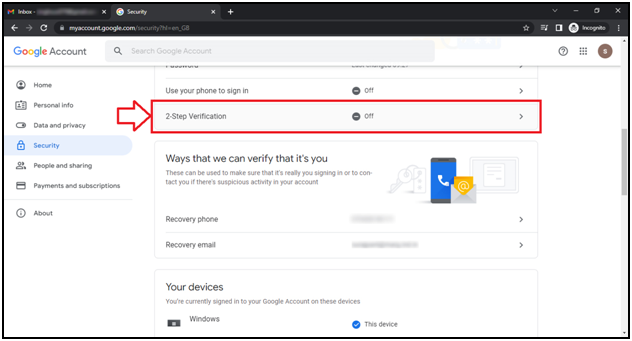
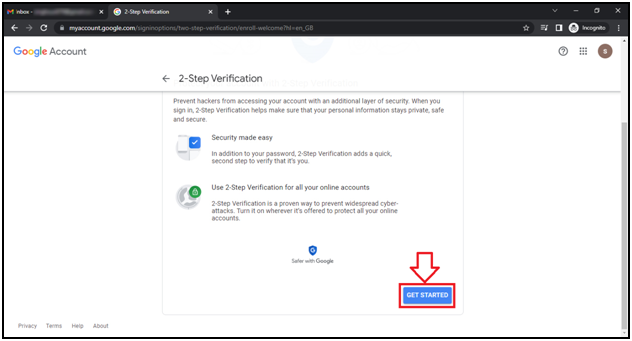
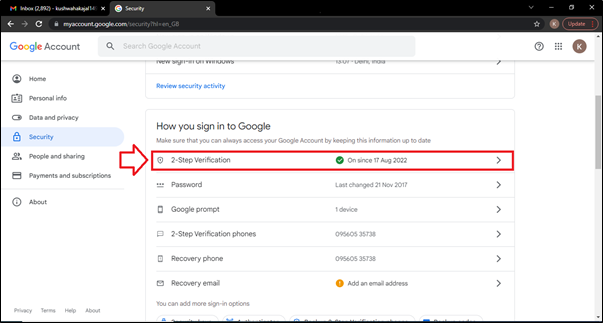
- Now click on '2-Step Verification' option.
- Click on 'Get Started' tab.
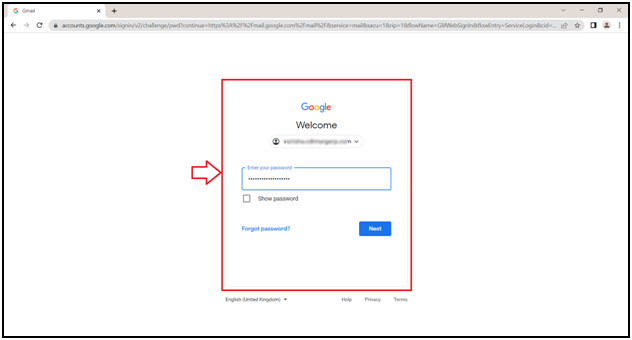
- Enter the Gmail 'Password' and click on 'Next' tab.

- The user will mention the mobile number which is linked to the Gmail account.
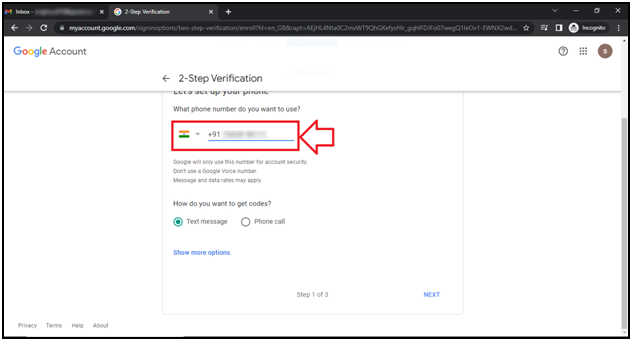
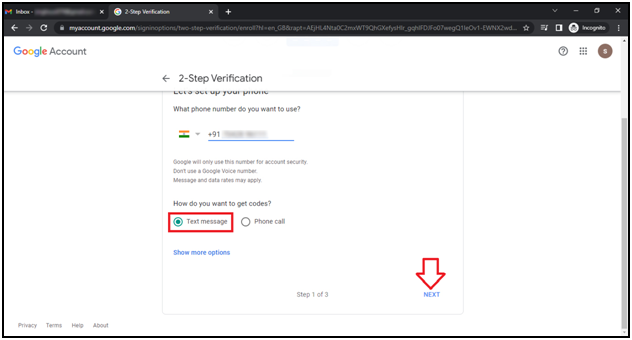
- Then select the ‘medium’ through which the Code needs to be received i.e. Text Message or Call.
- Suppose select Text message' and click on 'Next'.
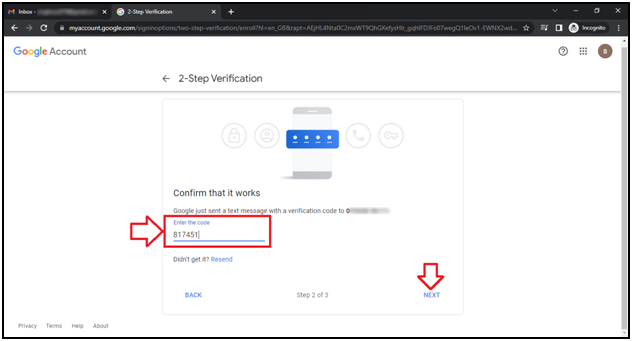
- The user will enter the OTP which is received via text message.
- Click on 'Next' tab.
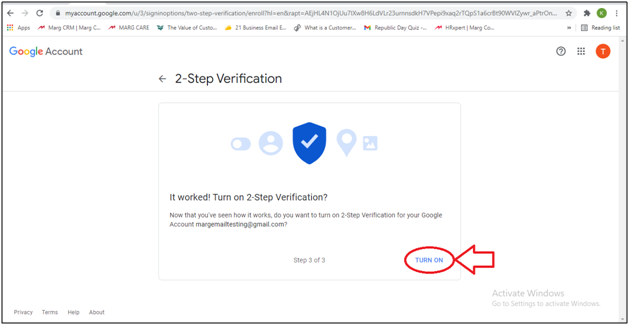
- A ‘2-Step Verification’ window will appear.
- Now the user will turn on the option of 2-Step Verification.
- The user will again click on ‘Manage your Account’ tab.
- Click on ‘Security’ tab.
- The user will click on ‘2- Step Verification’ option.
- A ‘2- Step Verification’ window will appear.
- Click on ‘App Passwords’.
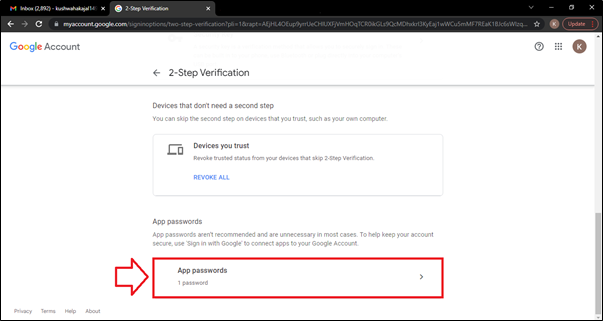
- In Case 'App Password' option does not display in 2-Step Verification'.
- Search 'App' after entering in the 'Security' Tab and click on 'App Passwords'.

- The user will type MargERP and click on 'Create'.

- After that Gmail will generate the App Password.
- Copy this password and save it for future use.
Note: This Password will only show once, that's why save it for future use.

-
Now type the generated password (Without Space) instead of entering the Gmail Password.

- Again mention the same password.

- The user will now press 'ESC' key twice.

- Now click on ‘Yes’ to save the changes.

Process Set Schedule E-Mail For Stock And Sale In Marg ERP Software
- Go to Daily Reports > Fast Reports > Schedule Email-Party.

- Click on 'Add'.

- In 'Party' option, the user will select the party for which the email needs to be scheduled.

- Mobile and E-Mail will get auto-fetch from the party ledger.

- In 'CC' and 'BCC' options, the user will mention the mail ID if needs to share it with another person also.

- In 'Period' option, the user will select options as per the requirement.

a. Account Statement: Select the option 'Y' if need to send an Account statement.
b. Bill Statement: Select the option 'Y' if need to send a Bill statement.
c. Item wise Sales: Select the option 'Y' if need to send Item wise Sales.

- Now the user will click on 'Save'.

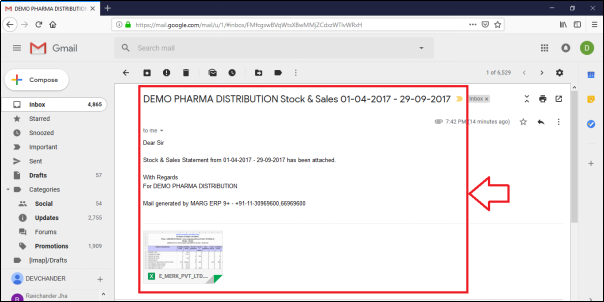
- The user can view E-Mail will be scheduled.

- The report will get send to the party.
Process To Re-Send Scheduled Email In Marg ERP Software
- If the user needs to send a report instantly then it can be done easily.
- Go to Daily Reports > Fast Reports > Re-send Scheduled Emails.

- In ‘Reporting Date’, the user will enter the date on which the report is to be sent.

The user will select the options as per the requirement.
a. Pending: Select the option if needs to send a report only to the pending parties.
b. All: Select the option if needs to send a report to all party at once.


In This Page


