

Welcome to  -
Marg ERP 9+
-
Marg ERP 9+
Home > Margerp > Gstr 1 > How to Upload GSTR 1 Directly on the Portal through Marg Software ?
How to Upload GSTR 1 Directly on the Portal through Marg Software ?

Overview to Directly Upload GSTR-1 on the Portal through Marg ERP Software
Process to Directly Upload GSTR-1 on the Portal through Marg ERP Software
OVERVIEW TO DIRECTLY UPLOAD GSTR-1 ON THE PORTAL THROUGH MARG ERP SOFTWARE
- GSTR-1 is a monthly or quarterly Return that is required to be filed by all the Taxpayers registered under GST.
- It is necessary to provide the details of all the outward supplies, i.e., provide the return details of the Total Sales of the monthly/quarter for which the user is filing the return.
- Marg ERP has provided a very beneficial provision in the software through which the user can directly upload the GSTR-1 on the Portal through Marg ERP Software.
PROCESS TO DIRECTLY UPLOAD GSTR-1 ON THE PORTAL THROUGH MARG ERP SOFTWARE
- Firstly, the user needs to enable API Access in GST Portal.
- Go to www.gst.gov.in

- Then click on 'Login'.

- Mention the ‘Username’ and ‘Password’.
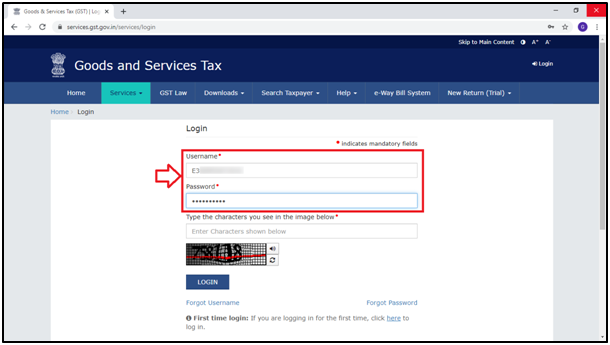
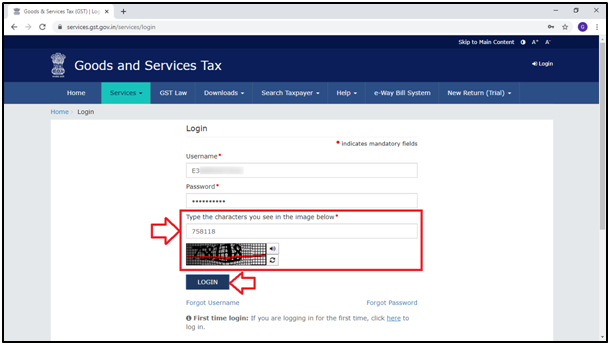
- Then type the characters as displayed in the image and click on ‘Login’.
- From the top right side of GST Portal, click on ‘My Profile’.
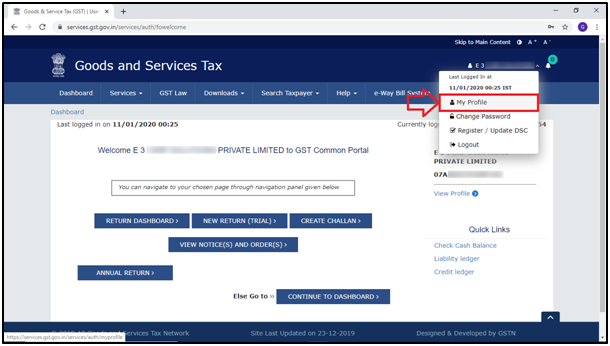
- A ‘My Profile’ window will appear.
- From the ‘Quick Links’ Tab, the user will click on ‘Manage API Access’.
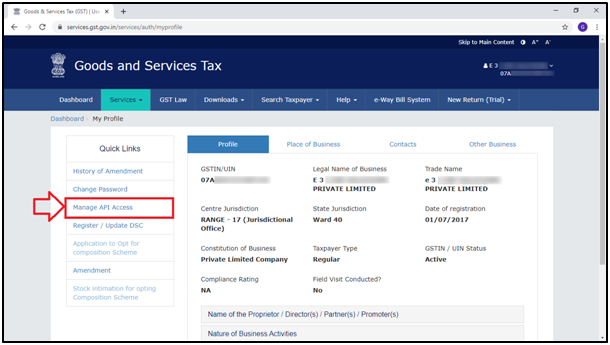
- A ‘Manage API Access’ window will appear.
- In ‘Enable API Request’ field, the user will select ‘Yes’

- Then select ‘Duration’.
- Suppose, if the user select 6 hours and click on ‘Confirm’. Then while uploading GSTR1, an OTP will be received on the registered mobile number which will be valid for only 6 hours i.e. the user can download as many JSON files in 6 hours.
- And after 6 hours, when the user visits again to reconcile then OTP needs to be provided again in order to download JSON file.
- Similarly, if the user selects 30 days then the user can download as many JSON files in 30 days.
- And again after 30 days, the user needs to provide an OTP again in order to download JSON file.
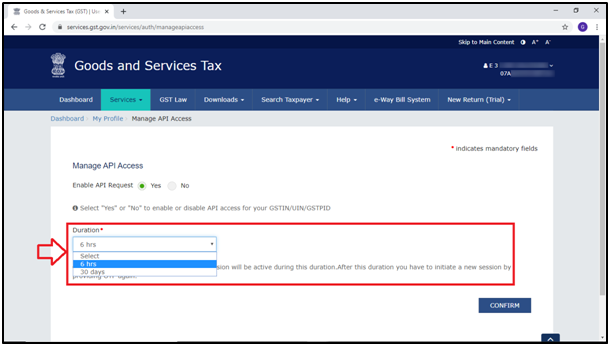
- For now, the user will select the duration (30 Days) as per the requirement and then click on ‘Confirm’.

- Now the user will come to the software. Then go to GST >> GSTR Settings.
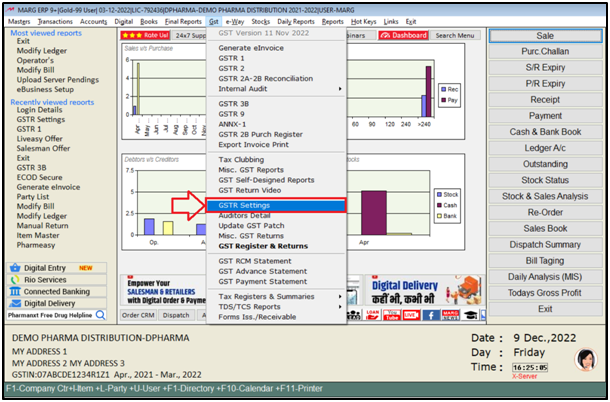
- A ‘GSTR Settings’ window will appear with different options.
- Select ‘A. Common GSTR Settings’ option.
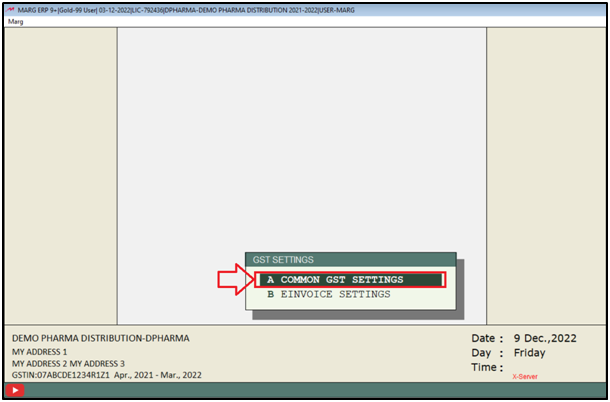
- A ‘GSTR Settings’ window will appear with different fields:
- GSTN User Name: Mention the same username which is being registered on the GST Portal. Then click on ‘Okay’.

OR
- Go to eWay >> Login Details.
- Then mention the GST Login Details i.e. ‘Username’.
Note: Here, mention that Login details through which the user logins to GST Portal.

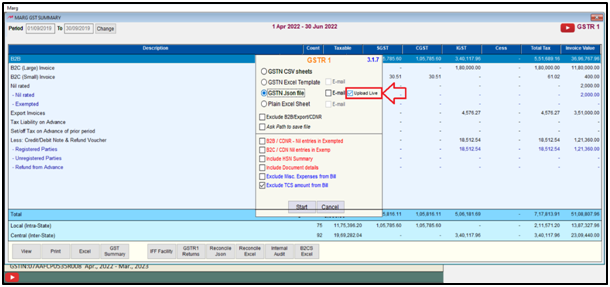
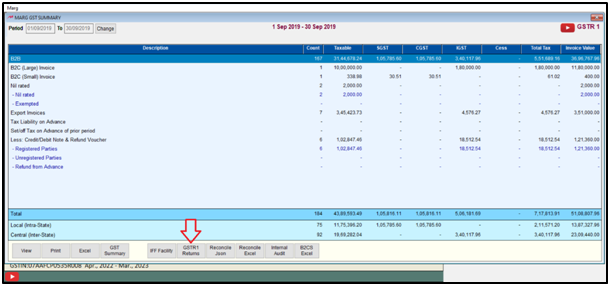
- Now go to GST >> GSTR 1.

- A ‘Marg GST Summary’ window will appear.
- Select the Period i.e. from which date till which date the user wants to upload the GSTR 1.
- Then click on ‘Show’.

- Click on ‘GSTR 1 Returns’ tab.

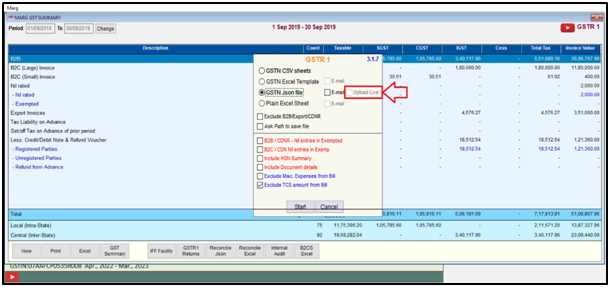
- A ‘GSTR 1’ window will appear.
- Then select ‘GSTN JSON File’ Format.
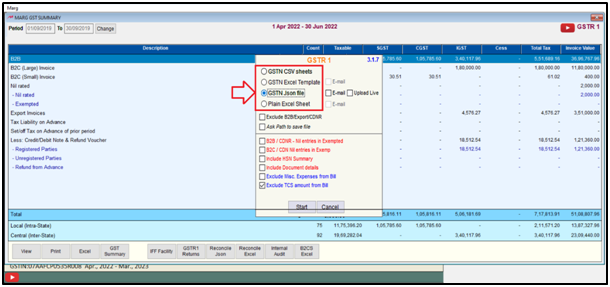
- Then click on the checkbox of ‘Upload Live’.
Note: This option will be shown if the user has mentioned the GST login details in the software.
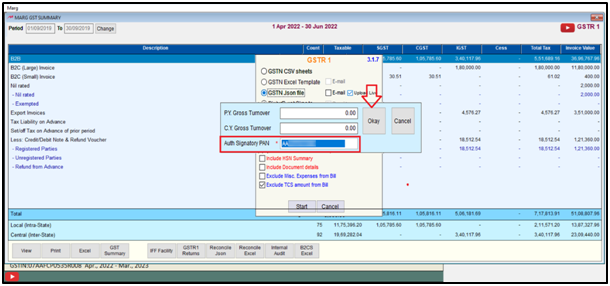
- Now in ‘Auth Signatory PAN’ field, mention the Authorized Signatory PAN and it is mandatory to be filled.
- Click on ‘Okay’.
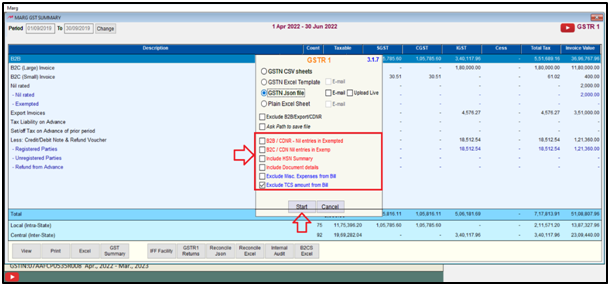
- Then if the user needs to select any option from here i.e. B2B/CDNR –Nil Entries in Exempted, B2C/CDN– Nil Entries in Exempted, Include HSN Summary, Include Document details, etc. or not; select these options as per the requirement.
- After that click on ‘Start’.
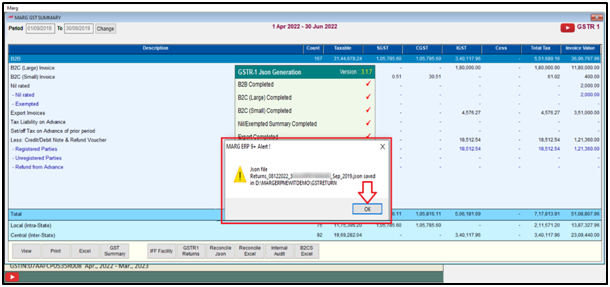
- The user can view that the path will be shown here on whichever location the JSON file is generated.
- Click on ‘Okay’.
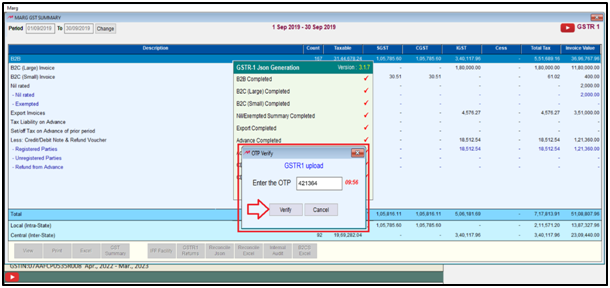
- An ‘OTP Verify’ window will appear.
- If the user has selected 6 hrs or 30 days on the GST Portal, then at the time of uploading the GSTR 1 for the first time, the software will ask for the OTP.
- Mention the ‘OTP’ and click on ‘Verify’ tab.
- Again the ‘OTP Verify’ window will appear.
- If the user is confirmed in order to upload the GSTR 1, then the OTP received which will be received (Alpha numeric) on the registered Email ID, mention that OTP in the ‘OTP Verify’ window.
- And then click on ‘Verify’ tab.
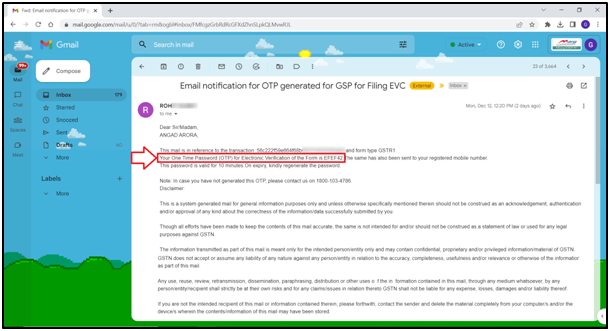
Fig 1: Process to Enter OTP Number on GSTR1 Upload window

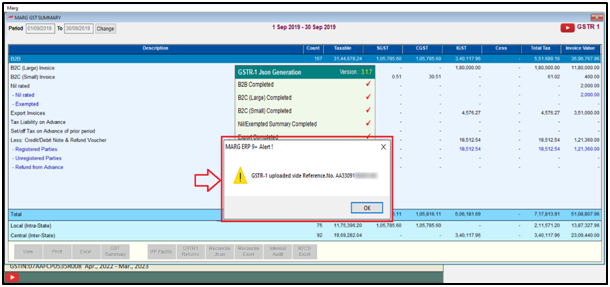
- As the user will click on ‘Verify’, the user can view that the GSTR 1 will get uploaded along with the Reference No.’.
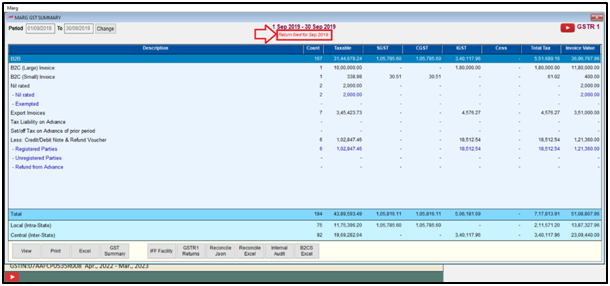
- The user can view that the ‘Return filed’ will be shown on the ‘Marg GST Summary’ window.
- Now again click on ‘GSTR 1 Returns’.
- The user will view that the ‘Upload Live’ button will get disabled.
After following the above steps, the user can directly upload GSTR 1 on the Portal through Marg Software.

In This Page


