

Welcome to  -
Marg ERP 9+
-
Marg ERP 9+
Home > Margerp > Gstr 1 > What is the process of GSTR 1 in Marg Software ?
What is the process of GSTR 1 in Marg Software ?

Process to Generate GSTR-1 Report in Marg ERP Software
Process to File GSTR1 Return on the GST Portal
OVERVIEW OF GSTR-1 REPORT
- Every Registered dealer is required to file GSTR-1 every month. The return contains details of all outward supplies made during the month.
- However, certain taxpayers having annual turnover upto Rs 1.5 crores can opt to file the GSTR-1 once in every quarter.
PROCESS TO GENERATE GSTR-1 REPORT IN MARG ERP SOFTWARE
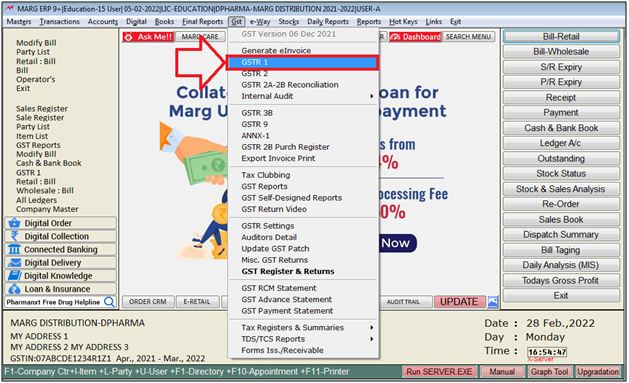
- Firstly, Go to GST > GSTR-1.
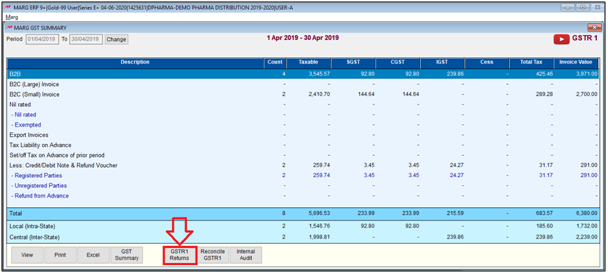
- A 'Marg GST Summary' window will appear.
- Select the Period i.e. from which month till which month the user needs to view GSTR 1.
- Then click on ‘Show’.

- Then Rows will be shown on the window according to GSTR-1 (GST Return form).

- B2B: B2B (Business to Business) : It means if the user is a registered dealer and to whom the goods are being sold is also a registered dealer so all the Local and Inter-state transactions will come under B2B.
- Count : Count means whatever the Inter-state and Local B2B transactions is done then it will be counted here. Here, 12 is shown for B2B in the Count column.
- Also, the user can view the Taxable Amount, SGST, CGST, IGST, CESS, Total Tax and Invoice Format.
- B2C (Large Invoice) & B2C (Small Invoice) : B2C means if the user does Inter-state sale to consumer or unregistered dealer and if the transaction value is above 2.5 Lakhs. So, it will come under B2C large invoice and if the transaction value is below 2.5 Lakhs then it will come under B2C small invoice.
Note: If the buyer is an unregistered dealer or a consumer and does sale within the state so whether the amount is above 2.5 Lakh or below 2.5 Lakh that will come under B2C small invoice only.
- Nil Rated : It means if any stock item is Nil Rated on which no tax is applicable then those transactions are shown here.
- Export Invoices : It means whatever sale which is being done outside India, those transactions are shown here.
- Tax Liability on Advance : The count of advance invoices is generated here. According to the government law if any party has done advance payment to the user and during that tax period if sales invoice has not been generated for that party then the user is liable to pay tax on that advance payment. So, GST will be calculated on advance amount received and that amount has to be payed to the government.
- Set off of Tax on Advance : It means the summary will be shown here for whatever advances that is being received by user and against which the bills has been raised.
** For further details, the user will press enter or double click on it.
- Suppose, if the user enter on B2B then a detailed version of the transactions can be viewed i.e. Name of the Supplier, GSTIN, Tax Type, Invoice date, Bill Amount, etc. Also, the user can view HSN wise details of every bill.

- Similarly, if the user needs to view other details as well then simply click on this dropdown and from here itself switch to any option. But if the user needs to switch back to the dashboard, so you will click on back.

- Click on 'GSTR1 Returns'.
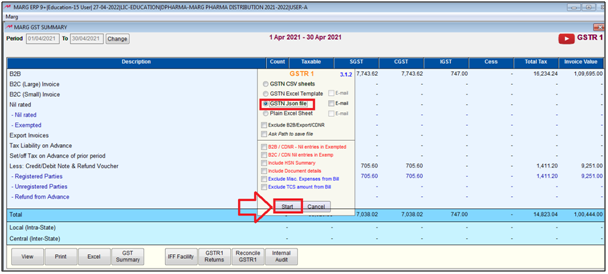
- Now, Click on 'GSTN Excel Template'.
a) B2B/B2C/CDN Nill entries in Exemp : Select, if the user needs to export separate details of nil rated entries in excel.
b) Include HSN Summary : Select, if the user needs to export HSN Summary in excel.
c) Include -ve figures in HSN Sheet : Select, if the user needs to include -ve value of HSN in HSN summary details.
d) Include Document details : Select, If the user needs to Export document details in excel.
e) Exclude Misc. Expenses from bill : Select, if the user needs to exclude misc. expenses from the bill in excel.
Then click on 'Start' button.
Thereafter, an errors found in GST Returns window will appear In this window if the user has found any errors in GSTR1 report then those errors will be shown here.
- Click on "Close".

- An alert window of "Are you sure to prepare eReturn file ?" will appear. Click on "Yes".

- So, software will start generating Json file.
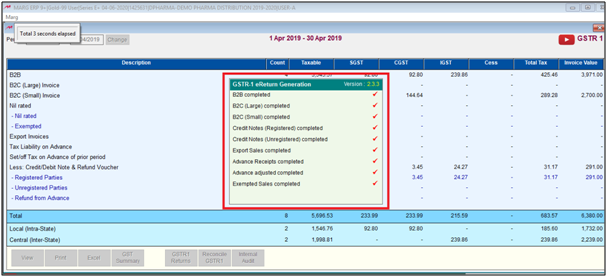
- Now, the user can view that Json File has been generated.
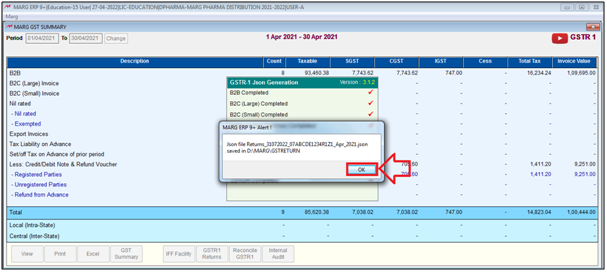
In order to view the Json File, open the Marg folder > Enter on 'GSR Return folder' to view generated Json file.

PROCESS TO FILE GSTR1 RETURN ON THE GST PORTAL
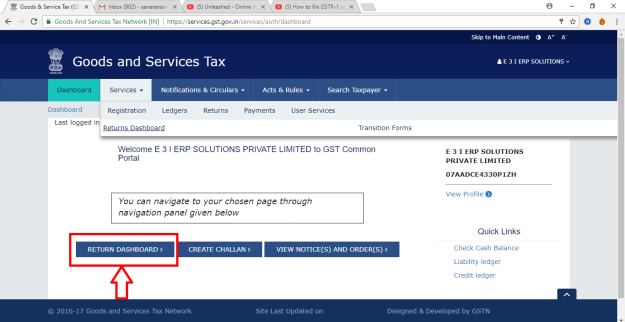
- Once the JSON file has been created then after that login to the GST Portal. Here, enter the username, password and whatever digit is shown here enter that here and simply click on login button.

- Then Go to Services > Click on “Returns Dashboard”.
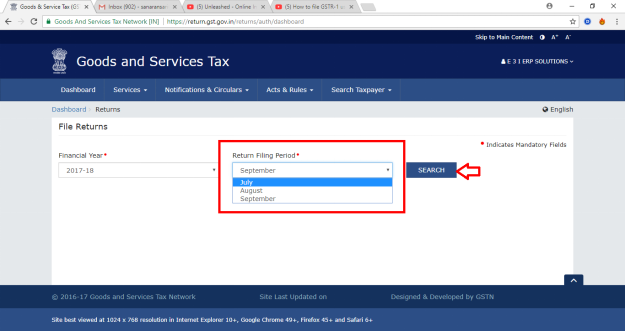
- Select the Return Filing period for now select the month July and then click on "Search".
Note:- If the user wants to ulpload Returns of multiple month then the user has to select the last month of the Return in 'Return Filling Period'.
- Now click on “Prepare Offline” under GSTR-1.

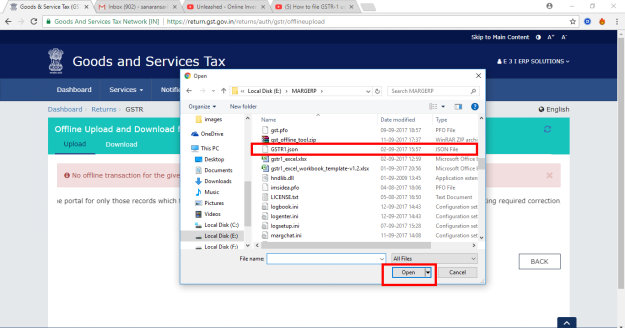
- Now click on choose file.
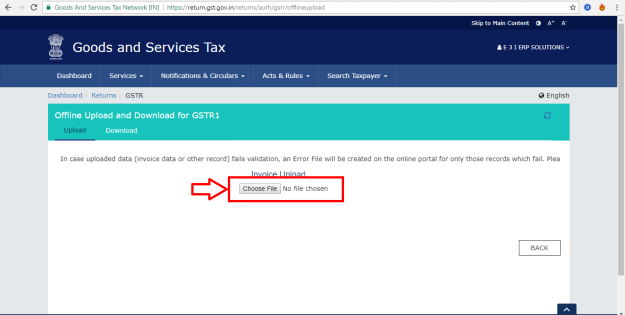
- Then select that JSON file which was created through offline tool and then click on Open.
- So, here the user can view in status software is showing processed and also which date and at which time and at with Reference id the invoices has been uploaded i.e. Now from here the invoices has been uploaded which means that the GSTR-1 has been filed.
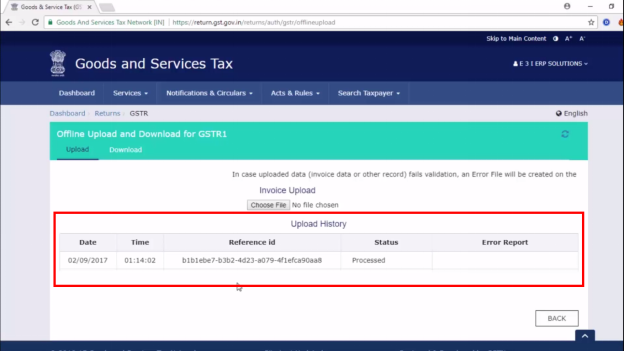
So in this way, the user can filed GSTR1 through Marg ERP Software.

In This Page


