

Welcome to  -
Marg ERP 9+
-
Marg ERP 9+
Home > Margerp > Gstr 2a 2b Reconciliation > What is the process of GSTR 2A Reconciliation in Marg Software ?
What is the process of GSTR 2A Reconciliation in Marg Software ?

Overview of GSTR 2 Reconciliation in Marg Software
Process to Enable API Access in GST Portal
Process of GSTR 2 Reconciliation through Marg Software
OVERVIEW OF GSTR 2 RECONCILIATION IN MARG SOFTWARE
- GSTR 2 is meant for inward supplies or purchases i.e. the summary would be generated or the user can view the tax details for whatever purchases that has been done.
- On the purchase of a product, it acts as a sale for the party which purchased it and that party is required to show data of sales and supplies made in GSTR 1.
- All those details will get auto-populated and displayed month wise on GST Portal and gets auto populated in GSTR 2.
- In Marg ERP Software, the user can easily reconcile GSTR 2 without logging in to GST portal frequently and download the purchase bills in order to match them in the software.
- The user can also check that the sales uploaded by the party and the purchases displayed to the user in GST Portal are matched or not.
PROCESS TO ENABLE API ACCESS IN GST PORTAL
- Firstly, the user needs to enable API Access in GST Portal.
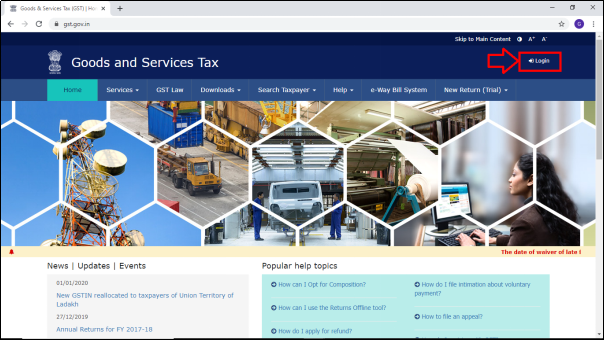
- Go to www.gst.gov.in and click on Login.
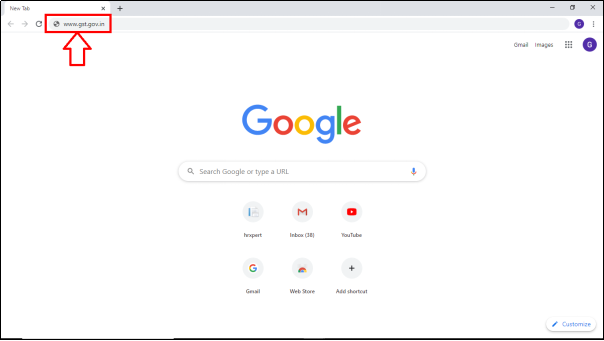
Fig. 1.1 Path to Visit GST Portal
- Mention the ‘Username’ and ‘Password’.
- Then type the characters as displayed in the image and then click on ‘Login’.

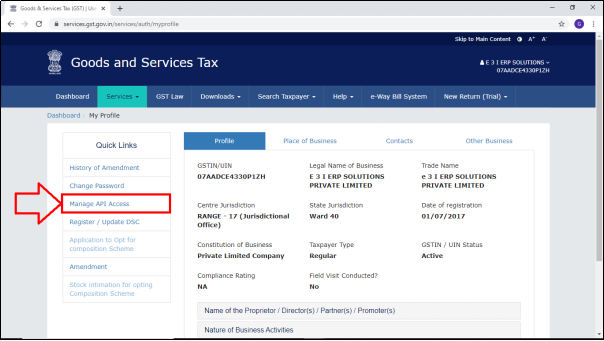
- Click on ‘My Profile’ by visiting on the top right side of GST Portal.

- A ‘My Profile’ window will appear in which the user will click on ‘Manage API Access’ from the ‘Quick Links’ Tab.
- A ‘Manage API Access’ window will appear. Select ‘Yes’ in ‘Enable API Request’ field.
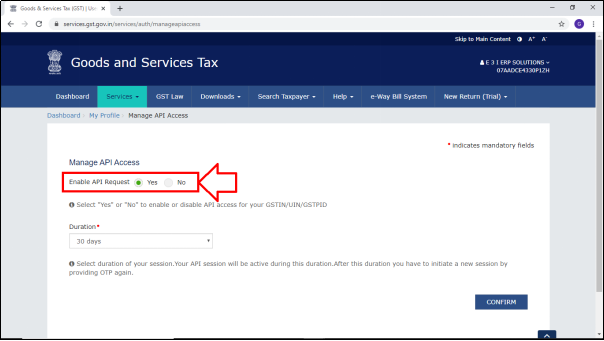
- Then select ‘Duration’.
- Suppose, if the user select 6 hours and click on ‘Confirm’. Then while reconciling GSTR 2, an OTP will be received on the registered mobile number which will be valid for only 6 hours i.e. the user can download as many JSON files in 6 hours.
- And after 6 hours, when the user visits again to reconcile then OTP needs to be provided again in order to download JSON file.
- Similarly if the user select 30 days then the user can download as many JSON files in 30 days. And again after 30 days, the user needs to provide an OTP again in order to download JSON file.
- For now, the user will select the duration (30 Days) as per the requirement and then click on ‘Confirm’.

PROCESS OF GSTR 2 RECONCILIATION THROUGH MARG SOFTWARE
- Go to GST > GSTR Settings.

- In 'GSTR User Name', the user will mention the same username which is being registered in GST Portal.
- Click on ‘Okay’.

- Again go to GST > GSTR Settings.

- The user will select 'E Invoice Settings'.

- Click on 'Edit' button.

- In 'Select your GSP' option the user will select 'Pinnacle Finserv'.

- Click on 'Save' button.

- Now, go to GST > GSTR 2A-2B Reconciliation.

- A window will appear the user will click on 'GSTR-2A'.

- A ‘GSTR -2 Reconciliation’ window will appear.
- Select the Period i.e. from which month till which month the user wants to reconcile GSTR 2.
- Then click on ‘Show’.
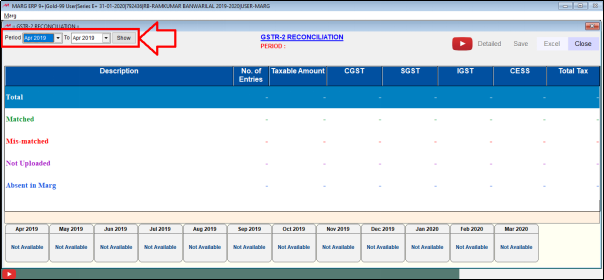
- If the user wants to change the period, then can click on ‘Change’.
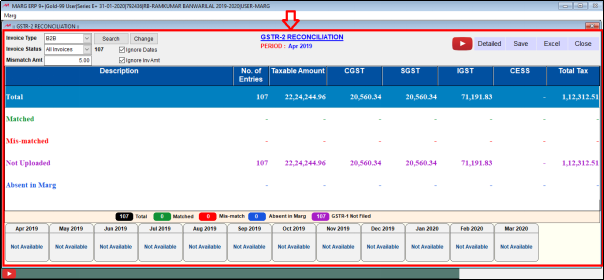
- The user can view that in this way GSTR-2 Reconciliation window will appear.
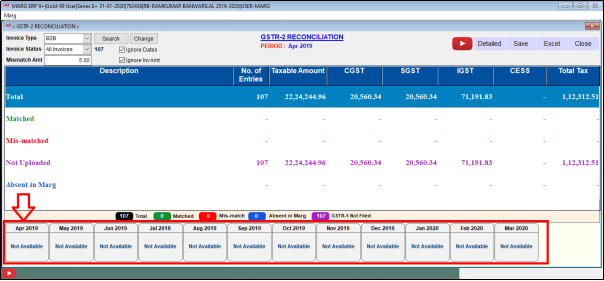
- Now, the user will click on that particular month of which GSTR-2 needs to be reconciled.
- Suppose, click on ‘April’.
- If the user will click on ‘Download’ and internet connectivity is there in the system, then JSON will automatically get downloaded from GST Portal and then reconciliation can be done.
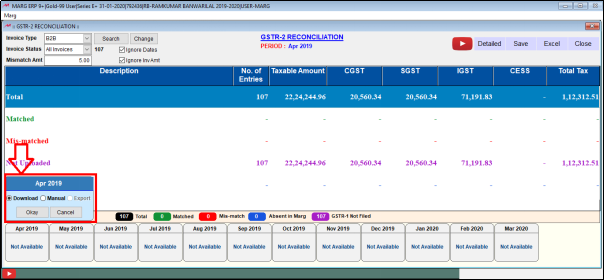
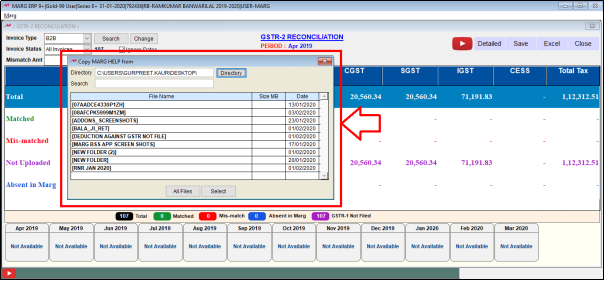
- Now, if the user already have JSON File, then select ‘Manual’ and click on ‘Okay’.
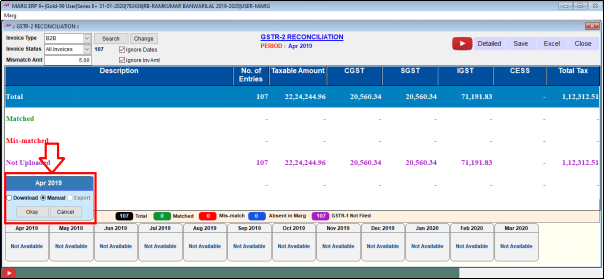
- Then the user will select the JSON File to reconcile it.
- So, for now select ‘Download’ and then click on ‘Okay’.
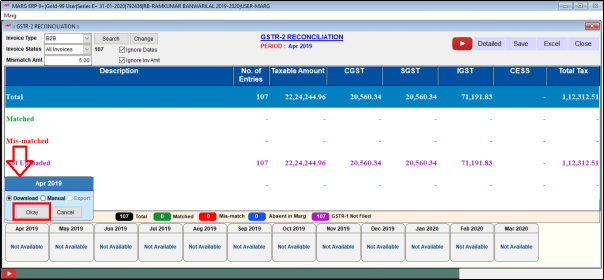
- If 6 hours or 30 days is been selected on GST Portal, then whenever the user will click on ‘Download’ for the first time the software will ask for an OTP.
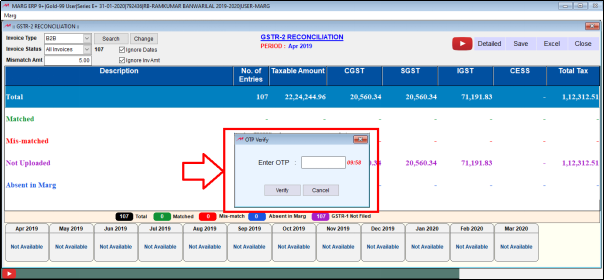
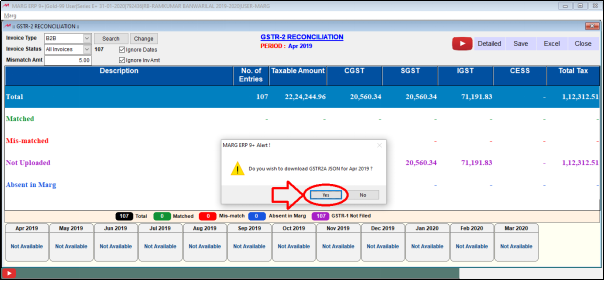
- After entering the OTP, the software will ask to download GSTR2A JSON file for the month of April.
- Click on ‘Yes.
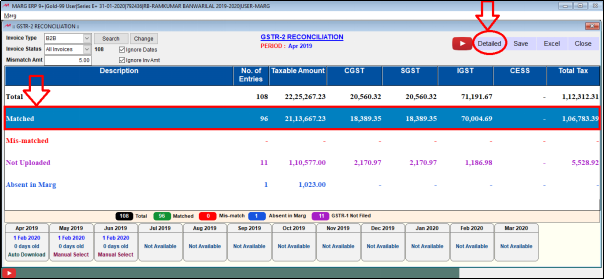
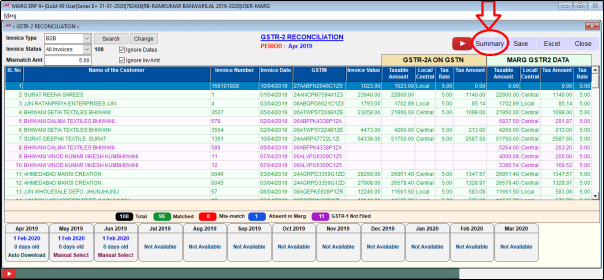
- As the user will click on ‘Yes’, all the data in the JSON File will be displayed to the user i.e. the user can view ‘Total number of entries, Taxable amount, CGST, SGST, IGST, CESS and Total Tax’.
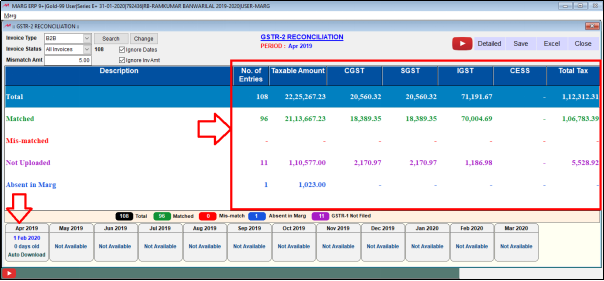
- The entries which are displayed in Black indicates the Total Entries.
- The entries in Green indicates that the invoices are matched.
- Similarly, the entries in Red indicates that those invoices are mis-matched i.e. that the invoice value on the GST Portal is different and the value in the invoice created in Marg Software is different.
- And the entries in Purple indicates that those invoices are not been uploaded on GST Portal.
- And the entries in Blue indicates that those invoices are not been created in Marg Software.
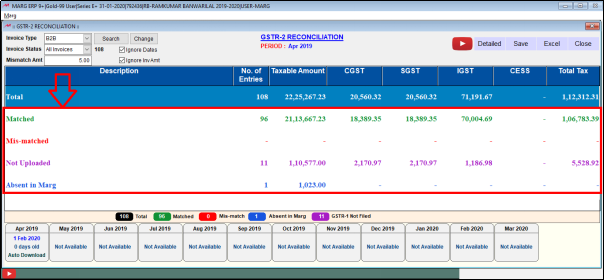
- If the user wants to see the detail of any entry like to view the details of matched invoices, then the user will either double click on Matched or click on ‘Detailed’ from here.
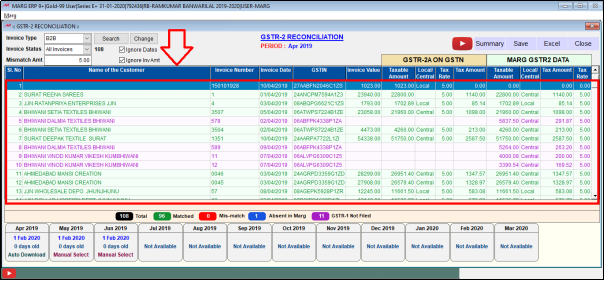
- So, in this way the details of all the matched invoices will be displayed to the user i.e. the user can view Name of the Customer, Invoice Number, Invoice Date, GSTIN, Invoice Value.
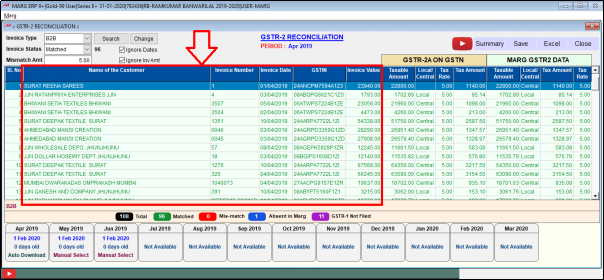
- After this the Taxable Amount, Tax Rate and Tax Amount that is displayed to the user under Auto Populated are those amounts which the seller has uploaded on GST Portal while filling GSTR 1.
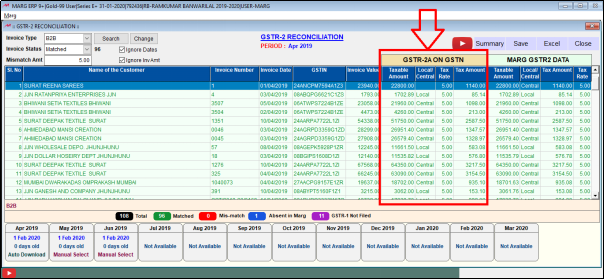
- And the Taxable Amount, Tax Rate and Tax Amount displayed under ‘Marg GSTR2 Data’ are those amount of the invoices which the user has created in Marg Software.

- Now if the user wants to save the status of the reconciled entries then click on ‘Save’.
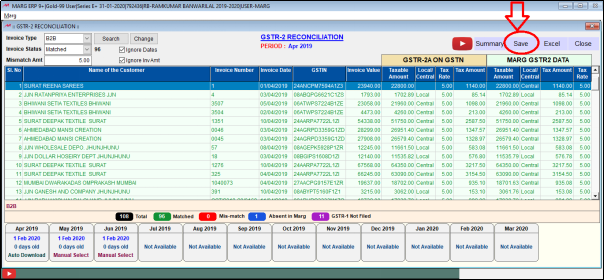
Note: In GSTR 3B, there is an option in which the user can get the figures of GSTR-2 from the reconciled entries otherwise the software will pick those figures from the Accounting Books.
- After this, if the user wants to export it in excel then click on ‘Excel’.
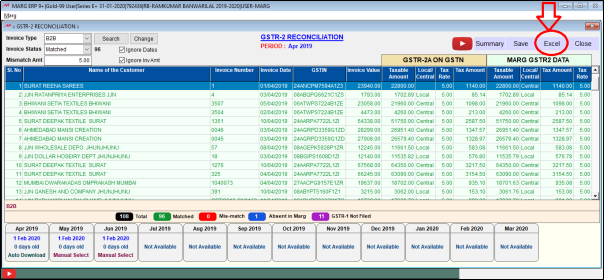
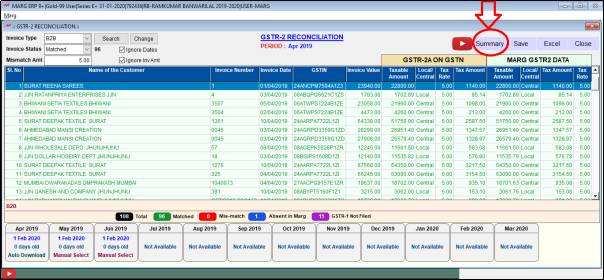
- Also, if the user wants to view its summary, then click on ‘Summary’ from here.
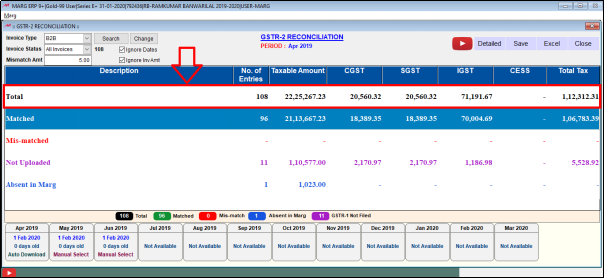
- Now, if the user wants to view total invoices then simply click on ‘Total’ invoices and then click on ‘Detailed’.
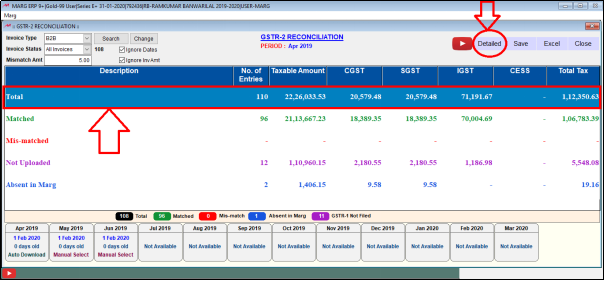
- So, in this way the details of all the matched, mismatched, not uploaded and absent in Marg will be displayed.
- Suppose, click on ‘Summary’.
- Then the user can select from the ‘Invoice Type’ that whether the user wants to view B2B invoice or Debit/Credit Notes.

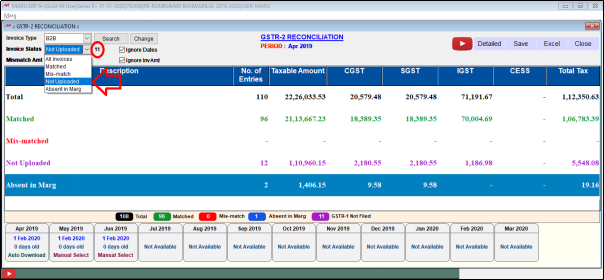
- Then from the ‘Invoice Status’, the user can view that how many invoices are matched along with the total number of matched invoices.
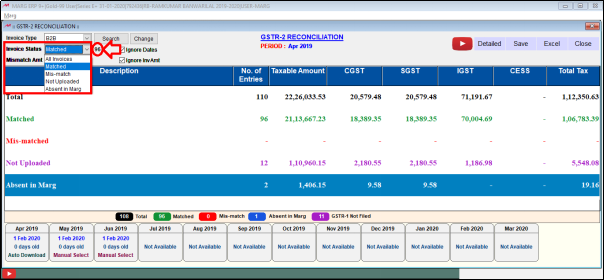
- Similarly, the total number of invoices which are not been uploaded will be displayed to the user.
- So, in this way the user can view the invoice status.

In This Page


