

Welcome to  -
Marg ERP 9+
-
Marg ERP 9+
Home > Margerp > Jewellery > What is the Process for Girvi or Mortgage in Jewellery Setup of Marg ERP Software ?
What is the Process for Girvi or Mortgage in Jewellery Setup of Marg ERP Software ?

Introduction of Girvi or Mortage Process in Marg ERP Software
Process to Enable Girvi or Mortage Option in Marg ERP Software
Introduction of Girvi or Mortage Process in Marg ERP Software
- Girvi/Mortgage module has been made for users who are engaged in the business of mortgage (Girvi).
- The users can define terms and conditions for the mortgage which he/she deal with.
- Basically, a user takes goods from a person on mortgage and gives him/her a certain amount of money on interest for a specified duration.
Process to Enable Girvi or Mortage Option in Marg ERP Software
- Go to Master > Marg Setup > Control Room.

- The user will select the 'Search in All' option.

- The user will search 'Girvi' and click on 'Accept’ button.

- In 'Girvi / Mortage / Loan' option, the user will select 'Y'.

- Press 'Esc' key.

- Click on 'Yes' button.

After following the above steps, the user can view that the Girvi option gets enabled in the transaction menu of Marg ERP Software.
- Now, Go to Transaction > Girvi/ Mortgage.

- A 'Mortgage/Girvi' window will appear with different options:

- The user will select 'General Setup' option.

- Click on 'Edit' button.

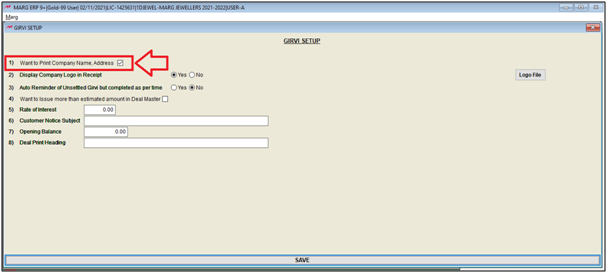
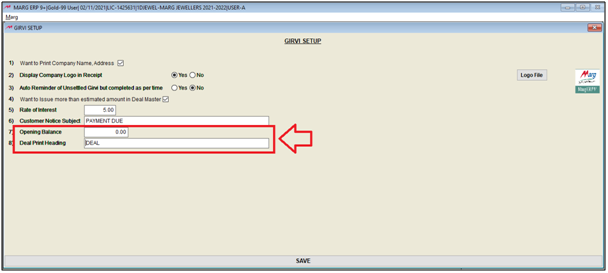
1. Want to Print Company Name, Address: Select this option, If the user needs to print company name and address in Receipt.
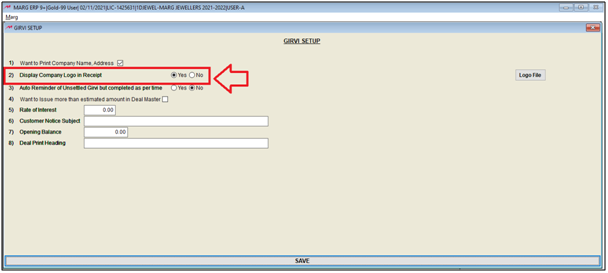
2. Display Company logo in Receipt: If the user needs to display company logo in Receipt select 'Yes', otherwise select 'No'.
Suppose select 'Yes'.
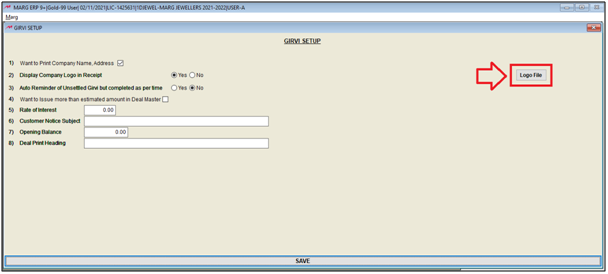
- Click here to select 'Logo file'.
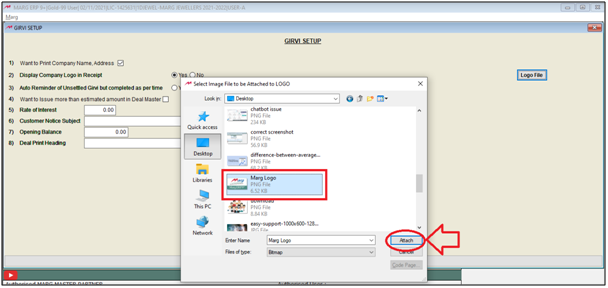
- A 'Select Image' window will appear, from which the user will select the logo file and click on 'Attach' button.
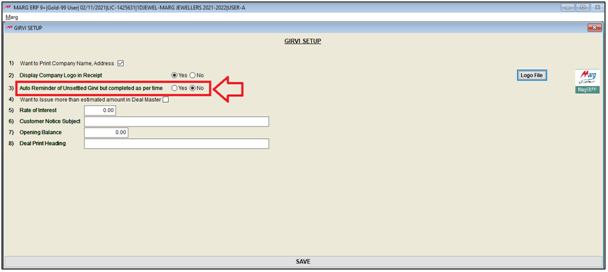
3. Auto Reminder of Unsettled Girvi but completed as per time: If the user needs to set up a reminder for their Unsettled Girvi then select 'Yes', otherwise select 'No'.
Suppose select 'No'.
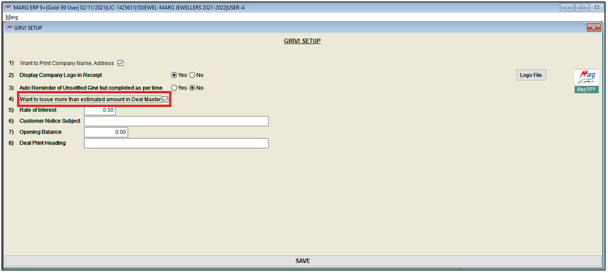
4. Want to Issue more than estimated amount in Deal Master: Select this option if the user needs to issue amount more than the estimated amount of the item to the customer.
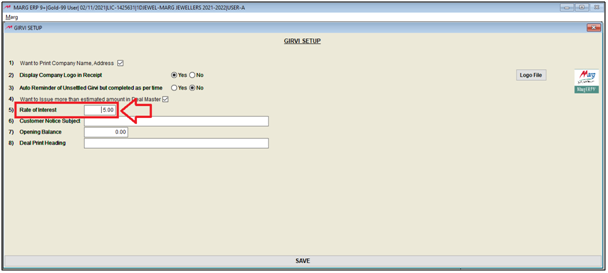
5. Rate of Interest: The user will mention the Rate of interest as per the requirement.
Suppose mention '5%'.
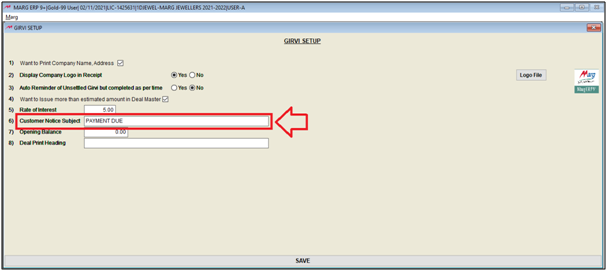
6. Customer Notice Subject: Here, the user will mention the subject of the customer notice as per the requirement.
Suppose mention 'Payment Due'.
7. Opening Balance: Here, the user will mention the opening balance of Girvi. (If Remaining)
8. Deal Print Heading: Here, the user will mention the heading which needs to be printed at the time of printing deal.
Suppose mention 'Deal'.
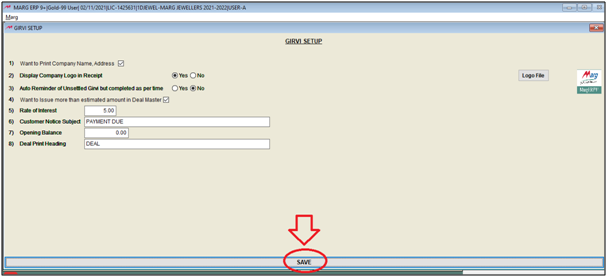
- Then click on 'Save' to save the details.

In This Page


