

Welcome to  -
Marg ERP 9+
-
Marg ERP 9+
Home > Margerp > Management Reports > What is the process of Data Migration in Marg Software ?
What is the process of Data Migration in Marg Software ?

Data Migration in Marg ERP Software
Overview of Data Migration in Marg ERP Software
Process of Data Migration in Marg ERP Software
OVERVIEW OF DATA MIGRATION IN MARG ERP SOFTWARE
Data Migration Tool enables the user to easily import the data of other softwares into Marg ERP Software i.e. it helps to efficiently move/transfer the data resulting in minimizing the human efforts.
In Marg ERP Software, earlier Data Migration was done externally through Microsoft Visual Fox Pro; but now a new facility is being provided to the users that they can now migrate changes within Marg ERP Software instead of requiring any external link
In simple words, the user can import the data of other softwares in Marg ERPSoftware
PROCESS OF DATA MIGRATION IN MARG ERP SOFTWARE
Run/Execute PRG in Marg ERP Software Marg Software must be of Trial Version only
The user will analyse which type of client it is i.e. whether the client is a Pharma Wholesaler, Retailer, FMCG, etc. at the time of Company Creation.
The user needs to create a new company for migrating the data of their specified trade in Marg ERP Software.
The user must open the setup (enable options) from the Control Room i.e. Double Discount, Volume Discount, etc. according to the software.
Case 1: Convert MDB Access Data File with Password Protected into DBF & Import in Marg ERP Software
Go to Reports>>Management Report>>Data Transfer Utility>>DataTransfer

Fig. 1.1 Menu View to Data Transfer in Marg ERP Software
An Alert Message will appear where the user will click on“Ok”.

Fig. 1.2 View of Alert Message in Marg ERP Software
A “Data Transfer Utility” window will appear where the user will select “B” option i.e. Download Latest Transfer Commands”.
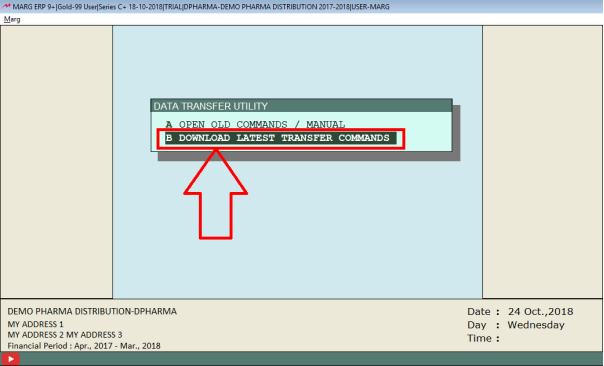
Fig. 1.3 View of Data Transfer Utility Window in Marg ERP Software
Then a “Software Company” window will appear where the user will enter any name of the software (Logic, Medi, etc.) of any area which needs to be converted into DBF and imported in Marg ERP Software. Suppose, enter “LOGIC”.>>Press“Enter”.
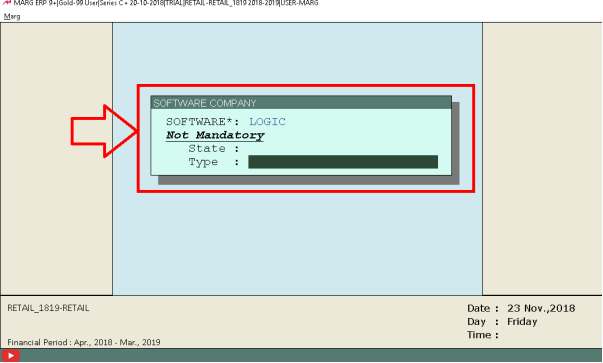
Fig. 1.4 View of Software Company Window in Marg ERP Software
A “Select Transfer Program” window will appear with the details i.e. Software Company, State, Type of Trade, etc. where the user will click on“Enter”.

Fig. 1.5 View of Select Transfer Program Window in Marg ERP Software
Now, a program command window will appear where the user will click “CTRL+W”.

Fig. 1.6 View of Program Command Window in Marg ERP Software
Then a “Data Transfer Utility” window will appear. Select the option “B. Start Importing Data”.

Fig. 1.7 View of Data Transfer Utility Window in Marg ERP Software
Now, select the following options:
Select Access/SQL: The user will specify whether the data which needs to be imported is of Access (Dot MDB), SQL or DBF file. As the data of the client is in MDB then Select“Access”.
Convert DBF from MDB: The database is in Fox Pro i.e. extension of DBF which needs to be converted. So, Select“Yes”.

Fig. 1.8 Process to Convert data from MDB to DBF in Marg ERP Software
An“Open”window will get displayed.Here,the user will define the path of the data i.e. MDB file of Logic of that particular client.>>Click on“Ok”.
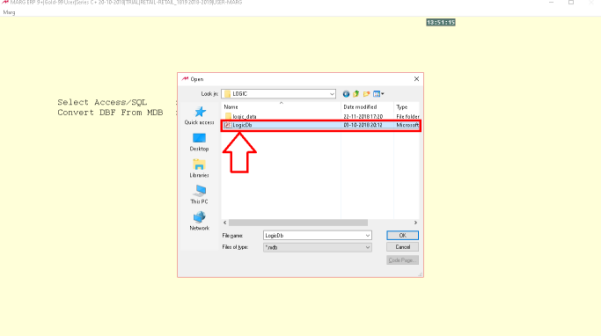
Fig. 1.9 Process to Convert data from MDB to DBF in Marg ERP Software
A “Login” window will appear. The MDB File Data is either Password Protected or not. So, there is a need to break the Password through Access InputTool.
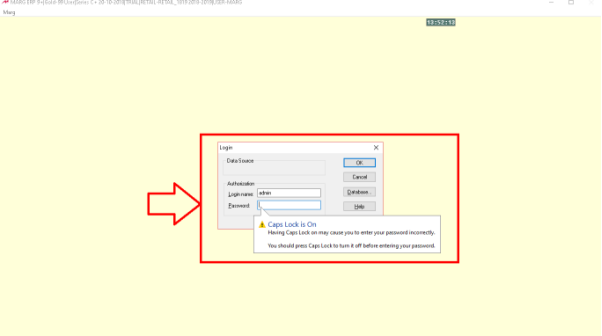
Fig. 1.10 Process to Convert data from MDB to DBF in Marg ERP Software Process to Break Password through Access Import
Save the “Test Logic” Folder Name without leaving any space between them.
Firstly, install Marg’s “Access Import” Software Utility. Open the Access Import
Folder>>Select “Inputil” exe and Run it.
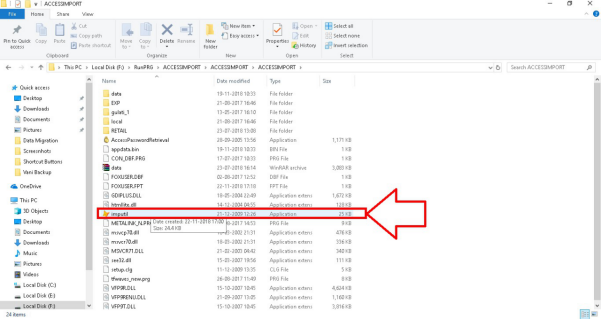
Fig. 1.11 Process to Break Password through Access Import
Click on“Start”.
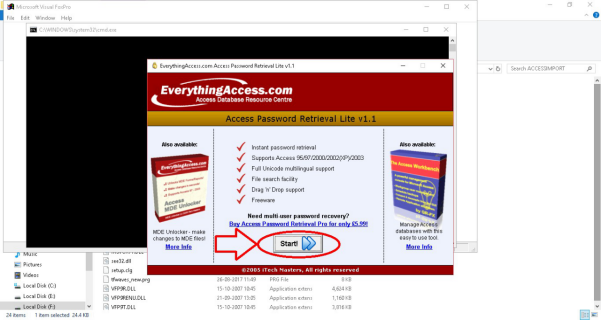
Fig. 1.12 Process to Break Password through Access Import
Click on “Browse” & Select the Access Database”>>Click on“Open”.

Fig. 1.13 Process to Break Password through Access Import
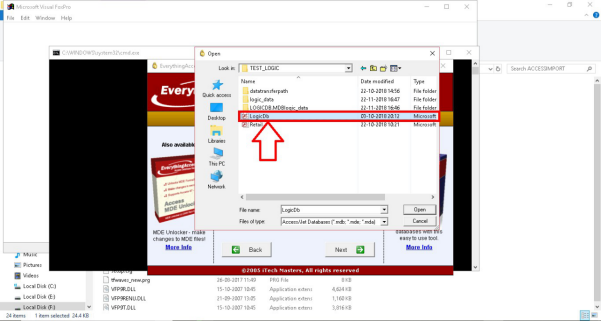
Fig. 1.13 Process to Break Password through Access Import
Click on“Next”.
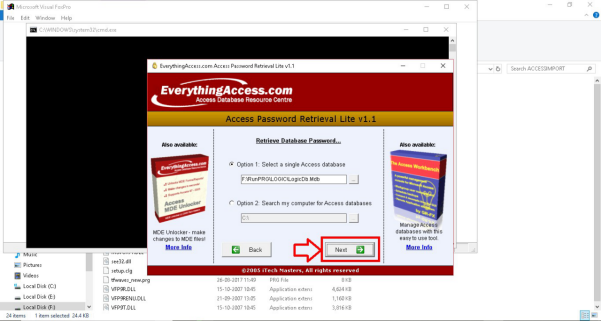
Fig. 1.14 Process to Break Password through Access Import
The user can view that the password which was in MDB is being displayedhere>>Then
Click on “Copy Password to Clipboard”. Then “Close” it.
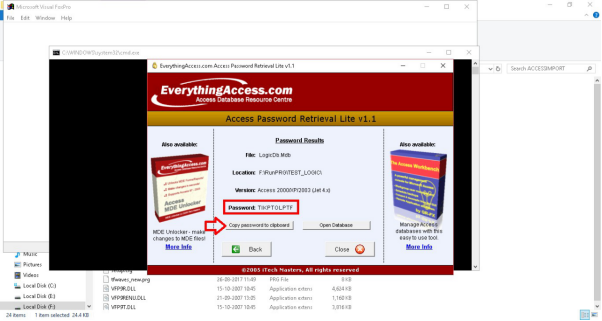
Fig. 1.15 View of Password through Access Import
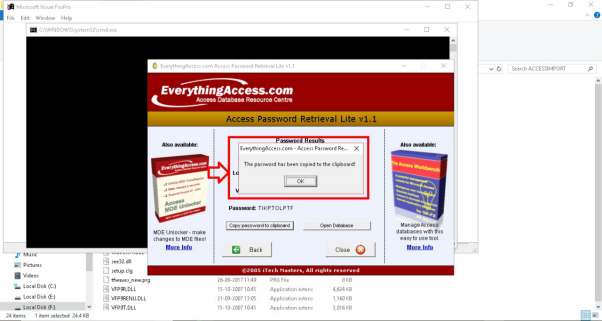
Fig. 1.16 Copying the Password through Access Import
Now, the user will paste the Password as copied through Access Import>>Click on“Ok”.
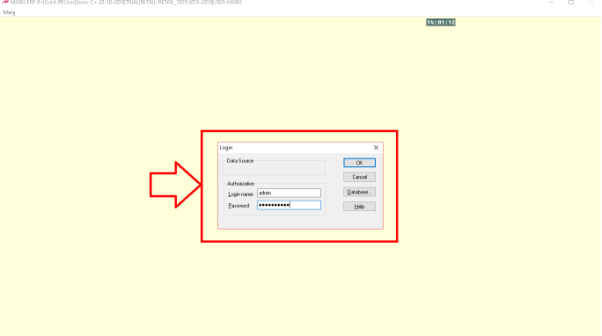
Fig. 1.17 Pasting the Password through Access Import
Now, the user can view that the Access File is getting converted into DBF from MDB.
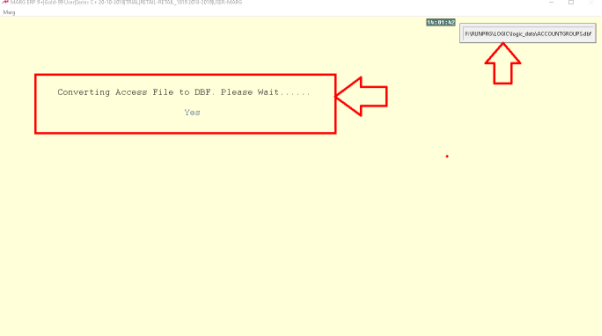
Fig. 1.18 View of Access File Converting into DBF
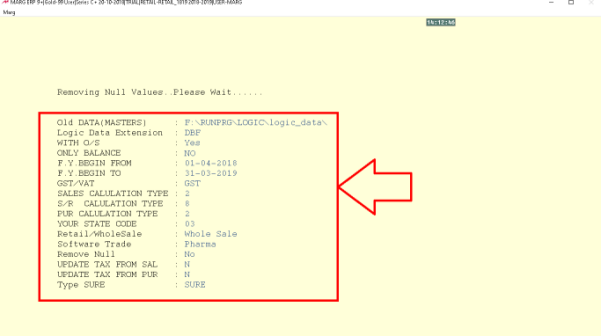
Fig. 1.19 View of Access File Converting into DBF
The data has now been converted into DBF and is shown in folder named “Logic_Data”.

Fig. 1.20 Path to View the Converted Data in DBF Format
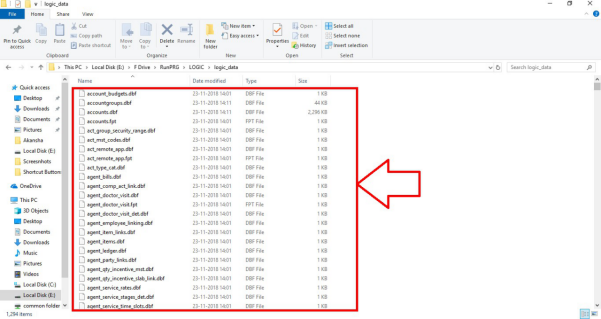
Fig. 1.21 View of the Converted Data in DBF Format
Once the user has defined/selected the path then the user will select the following options keeping the other options as itis:
Logic Data Extension: The use can view the extension of the converted Logic Data
i.e. DBF.
With O/S: Select whether the ledgers need to be transferred with Outstanding’s or not as per therequirement.
Only Balance: Select whether the Balance needs to be transferred or not as per the requirement. For Masters “Yes” & for Bill by Bill“No”.
F.Y. Begin From & F.Y. Begin To: Enter the Start and End date of the FinancialYear.
GST/VAT: Set “VAT” if the data is being transferred from 1st April 2017 to 30th June 2018 & Set “GST” if the data is being transferred from 1st July 2017 to 31st March 2018. For now, set“GST”.
Sales Calculation Type, S/R Calculation Type & PUR Calculation Type: Enter these as per the Requirement.
Your State Code: Enter the desired State Code.
Retail/Wholesale: Select the type for doing the setup as per the requirement depending upon the type of client (Retailer or Wholesaler).
Software Trade: Select the Trade as per the requirement.
All the Above fields/variables are standard.
Remove Null: Set as“Y”.
Update Tax from Sal & Update Tax From Pur: These variables are not standard and depend upon the software of the client and it changes according to the program. Set “Y” to these both fields.
Type Sure: Type “SURE” to Accept it.
Then the user can view that the program will start running i.e. the data has now started getting imported.

Fig. 1.22 Process of Importing Access Data to Marg
Then an alert message will appear “You are trying to disturb our database” i.e. the software will ask that whether there is a requirement to run error checking and resaving of the data/bills>> Click on“Ok”.

Fig. 1.23 View of Alert Message in Marg ERP Software
As the user will click on “Ok” the “File Maintenance & Indexing” and then an “Error Checking” will automatically start running.

Fig. 1.24 Process of Running File Maintenance & Indexing in Marg ERP Software
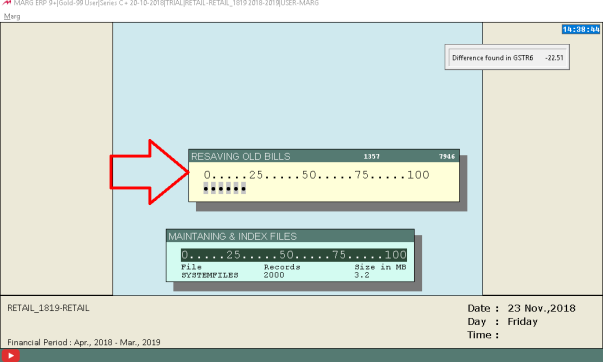
Fig. 1.25 Process of Running File Maintenance & Indexing in Marg ERP Software
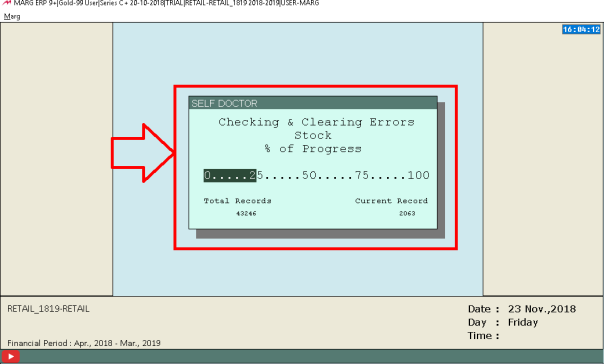
Fig. 1.26 Process of Error Checking in Marg ERP Software

Fig. 1.27 View of Outstanding Adjustments in Marg ERP Software
Once completed then a pop-up window will get displayed asking to save the text file (Differences) in the desired location.

Fig. 1.28 Process to Save the Text File
Now, the user can view the differences in the bills.
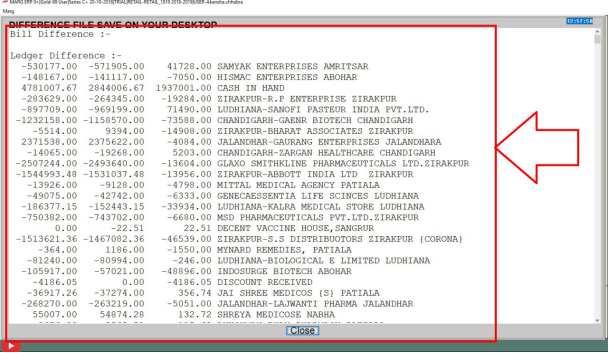
Fig. 1.29 View of the Text File of Bill Differences in Marg ERP Software
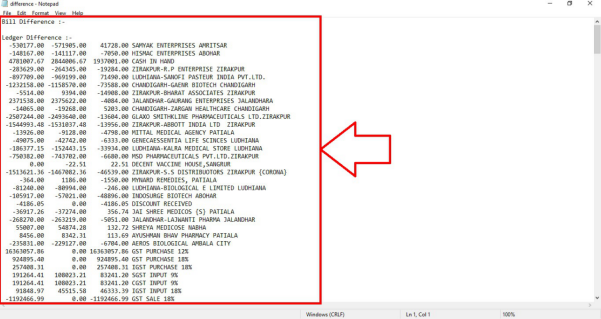
Fig. 1.30 View of the Text File of Bill Differences in System
For this watch the video, How to convert SQL & MDB Data into DBF: https://youtu.be/OWq35CLQiQ0
Case 2: Process to Import DBF Data in Marg ERP Software
Go to Reports>>Management Report>>Data Transfer Utility>>DataTransfer
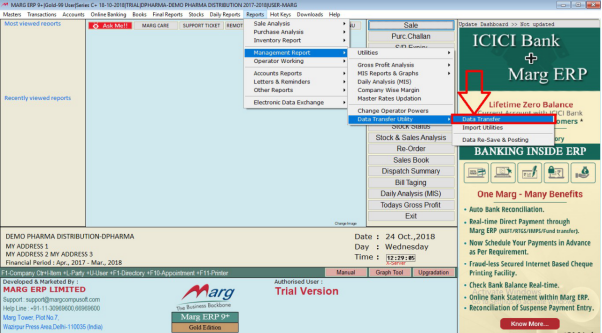
Fig. 1.31 Menu View to Data Transfer in Marg ERP Software
An Alert Message will appear where the user will click on “Ok”

Fig. 1.32 View of Alert Message in Marg ERP Software
A “Data Transfer Utility” window will appear where the user will select “B” option i.e.
Download Latest Transfer Commands”

Fig. 1.33 View of Data Transfer Utility Window in Marg ERP Software
Then a “Software Company” window will appear where the user will enter any name of the software (Logic, Medi, etc.) which needs to be imported in Marg ERP Software. Suppose, enter “MEDI”.>>Press“Enter”.

Fig. 1.34 View of Software Company Window in Marg ERP Software
A “Select Transfer Program” window will appear with the details i.e. Software Company, State, Type of Trade, etc. where the user will click on “Enter”
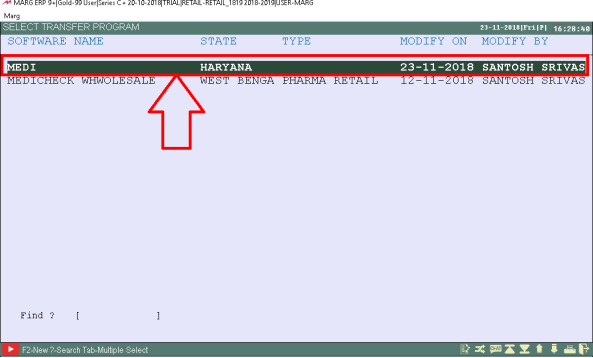
Fig. 1.35 View of Select Transfer Program Window in Marg ERP Software
Now, a program command window will appear where the user will click “CTRL+ W”
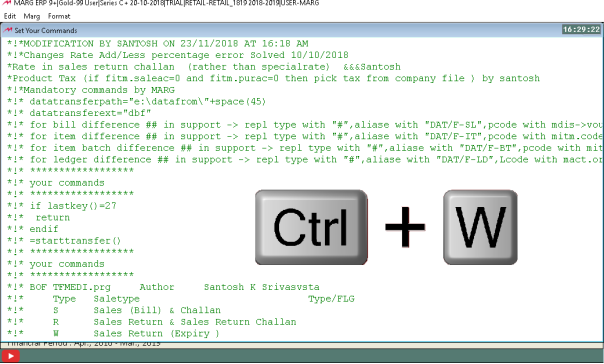
Fig. 1.36 View of Program Command Window in Marg ERP Software
Then a “Data Transfer Utility” window will appear. Select the option “B. Start Importing Data”.
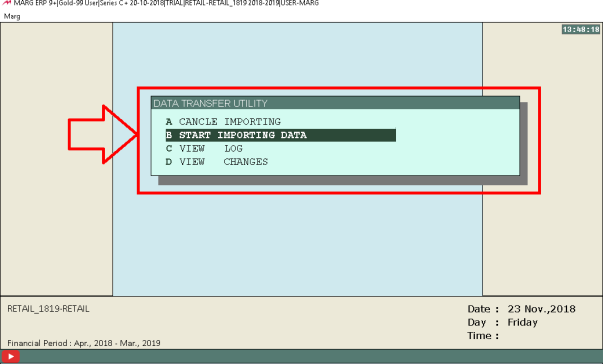
Fig. 1.37 View of Data Transfer Utility Window in Marg ERP Software
Enter the Required details:
Media Data Path: Here, Specify the path of Media Data.
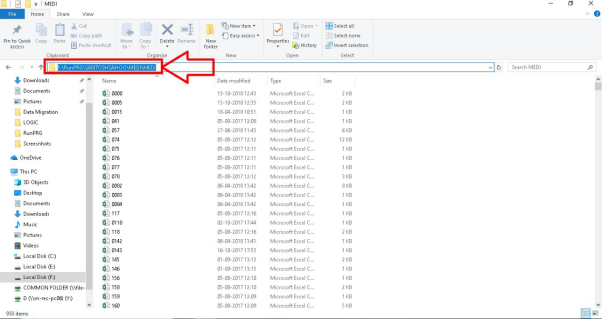
Fig. 1.38 Process to Select the Medi Data Path

Fig. 1.39 Pasting the Media Data Path
Media Data Extension: Here, specify the extension i.e. DBF of Media Data.
For History: Mention the financial year data path here if the history of the previous year data needs to be transferred.
With O/S: Select whether the ledgers need to be transferred with Outstanding’s or
not as per the requirement.
N-Full Y-Masters: Select whether the Masters needs to be imported or not as per the requirement. Set “Yes” for Masters & “No” for Full.
F.Y. Begin Date & F.Y Last Date: Enter the Start and End date of the Financial Year.
GST/VAT: Set “VAT” if the data is being transferred from 1st April 2017 to 30th June 2018 & Set “GST” if the data is being transferred from 1st July 2017 to 31st March 2018. For now, set“GST”.
State Code: Enter the desired State Code.
Business Type: Select the desired “Business Type”here.
Retail/Wholesale: Select the type for doing the setup as per the requirement depending upon the type of client (Retailer or Wholesaler).
Sure: Type “SURE
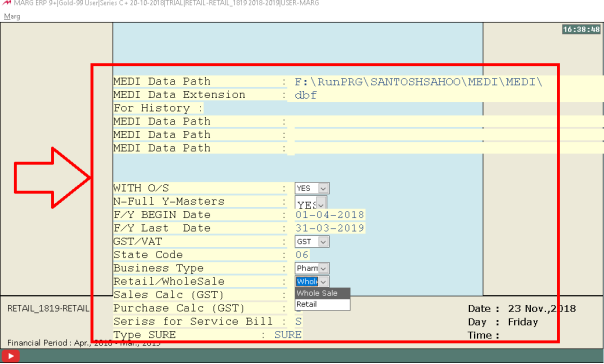
Fig. 1.40 Entering the Required Details for Importing Data
Now, the user can view that the data is getting imported in Marg ERP Software
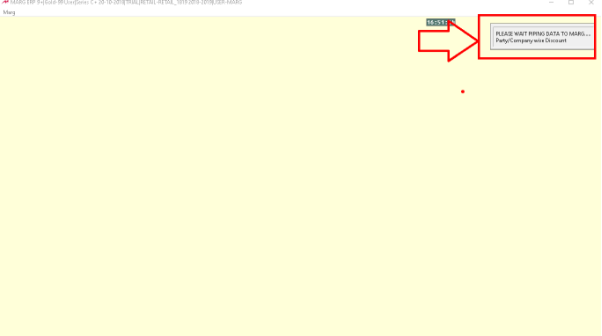
Fig. 1.41 View of Data Importing in Marg ERP Software
Then the software will automatically start the file maintenance and Error checking & resave the bills along with the importing of the data
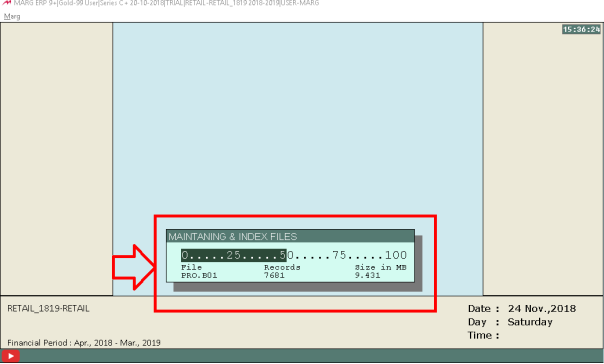
Fig. 1.42 Process of Running File Maintenance & Indexing in Marg ERP Software

Fig. 1.43 Process of Running File Maintenance & Indexing in Marg ERP Software
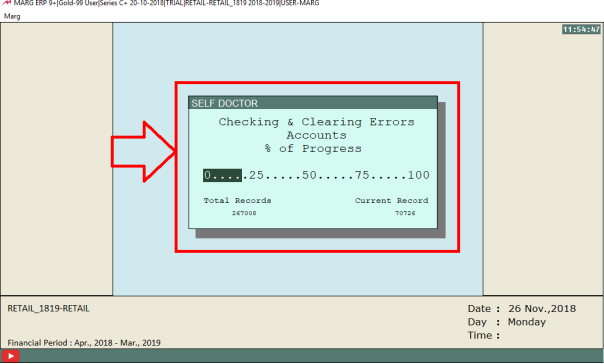
Fig. 1.44 Process of Error Checking in Marg ERP Software
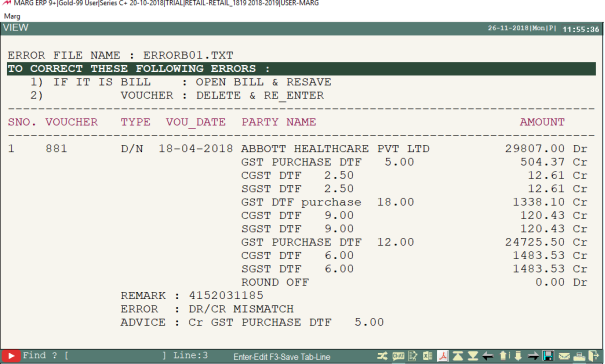
Fig. 1.45 Process of Correct Errors in Marg ERP Software
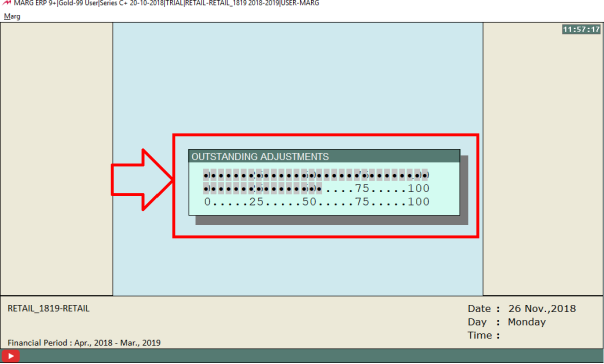
Fig. 1.46 View of Outstanding Adjustments in Marg ERP Software
Once completed then a pop-up window will get displayed asking to save the text file (Differences) in the desired location
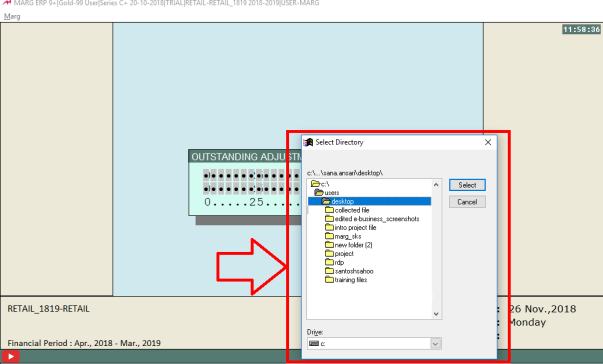
Fig. 1.47 Process to Save the Text File
Now, the user can view the differences in the bills
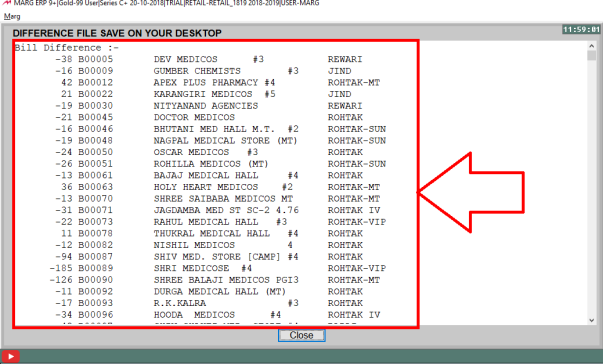
Fig. 1.48 View of the Text File of Bill Differences in Marg ERP Software

Fig. 1.49 View of the Text File of Bill Differences in System

In This Page


