

Welcome to  -
Marg ERP 9+
-
Marg ERP 9+
Home > Margerp > Marg Setup > How to print Digital Signature on PDF Document in Marg Software ?
How to print Digital Signature on PDF Document in Marg Software ?

Overview of Digital Signature in Marg ERP Software
Process to Print Digital Signature in Bill in Marg ERP Software
OVERVIEW OF DIGITAL SIGNATURE IN MARG ERP SOFTWARE
- Digital Signature is an e-signature (electronic signature) that is used to check the authenticity of the invoices, i.e. if the digitally signed invoice is reliable or not. Digital Signature can be used in the Invoices and Documents and is similar to a handwritten signature.
- The user can embed the digital signature on the invoices so that the digitally signed invoices can be sent immediately to the customers instead of manually signing the invoices every time and the Digital Signature is printed only in PDF format.
PROCESS TO PRINT DIGITAL SIGNATURE ON BILL IN MARG ERP SOFTWARE
Note: It is mandatory to have a valid Digital Signature Certificate (DSC) dongle, and on the system on which the work is being done, the user must insert a DSC Dongle.
To know the process for connecting the device to the system, the user will follow the below mentioned steps:
- For this, firstly the user needs to connect this dongle with the System/Laptop.
- Now the user can view the External Device Connecting to the system i.e. CD Drive.
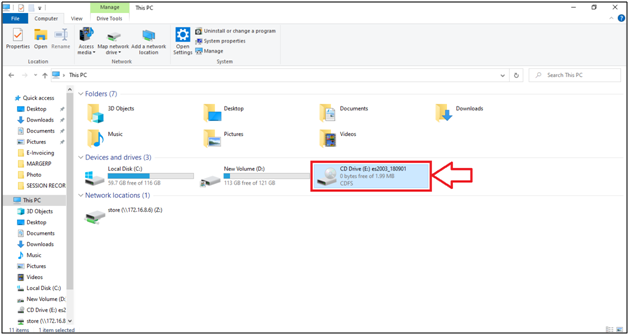
- Now the user can view the setup installed in the Connected Drive where the user needs to double- click on it.

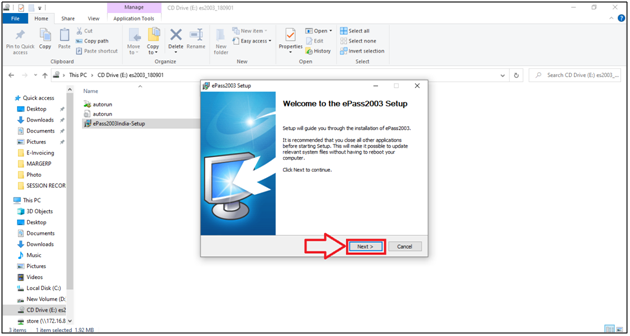
- A 'Please Select Language' window will appear.
- The user will select the language as per the requirement.
- Suppose select 'English'.

- Then the user will click on 'Ok'.

- Then the user will click on 'Next'.
- Again, click on 'Next'.
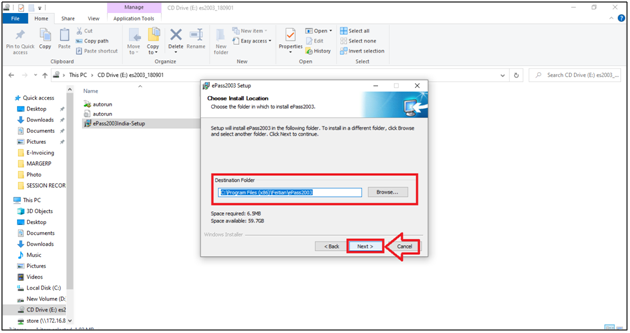
- Then click on 'Install'.

- Then click on 'Finish'.

After doing the DSC Dongle settings, the user will configure the Digital Signature Settings in the software.
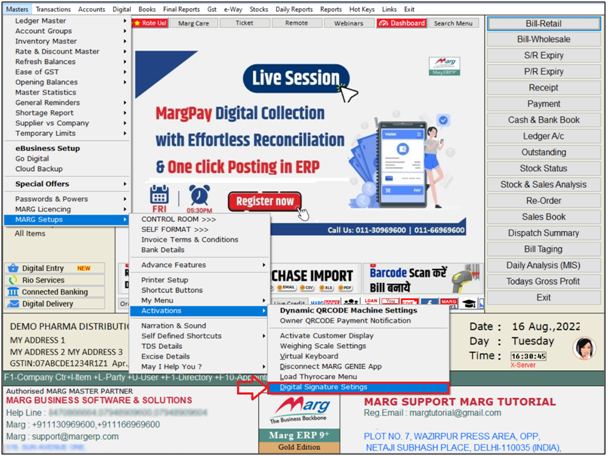
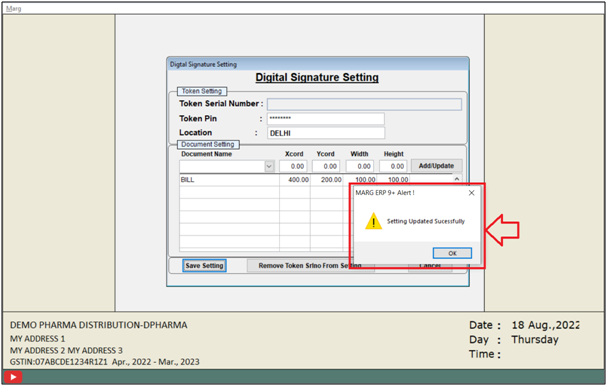
- Go to Masters >> Marg Setups >> Activations >> Digital Signature Settings.
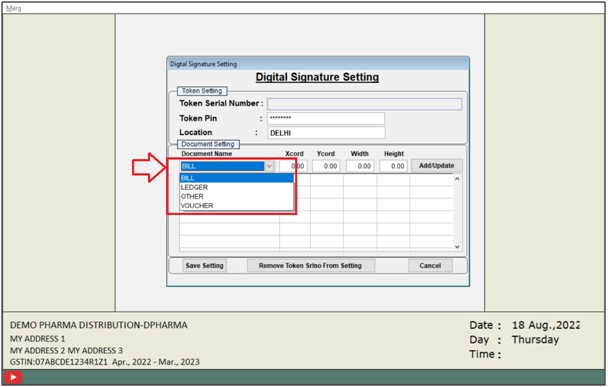
- A ‘Digital Signature Setting’ window will appear.
- In ‘Token Pin & ‘Location’ fields, the user will mention the password registered with the DSC dongle.

- From the ‘Document Settings’ tab, select for whom the settings are to be done in the ‘Document Name' field.
- Suppose select ‘Bill’.
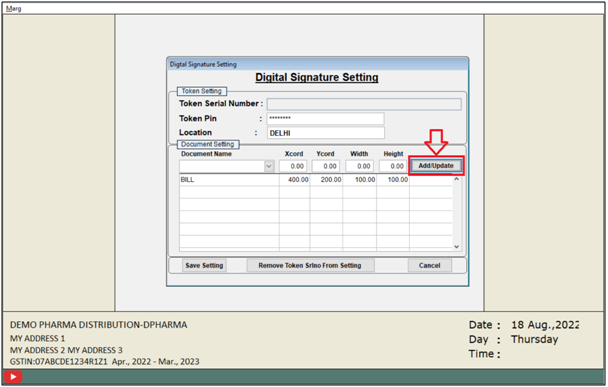
Then mention the ‘Xcord’, ‘Ycord’, ‘Width’ & ‘Height’ of the Digital Signature as per the requirement.
- Xcord : The user will define the pixel from Left to right.
- Ycord : The user will define the pixel from Bottom to Top.
- Width : The user will define the width of the Signature.
- Height :The user will define the height of the signature.

- Click on ‘Add/Update’ button.
- Then click on ‘Save Settings’ button.
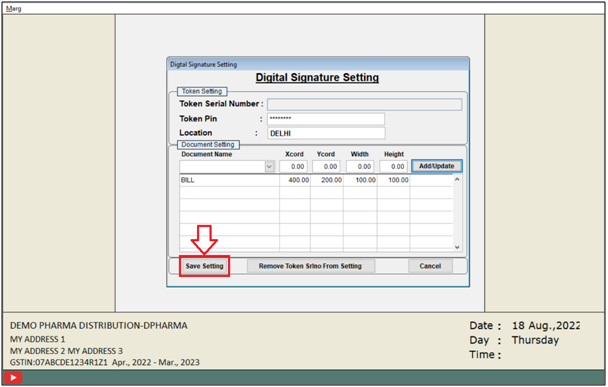
- An alert message of ‘Setting Updated Successfully’ message will appear.
- Click on ‘OK’.
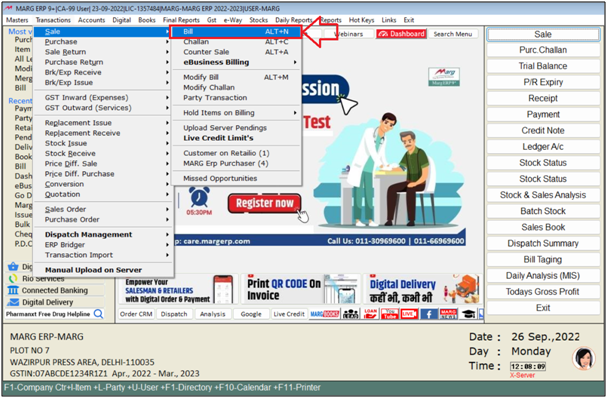
After doing the Digital Signature Settings, the user will generate the Sale Bill.
- Go to Transactions >> Sale >> Bill.
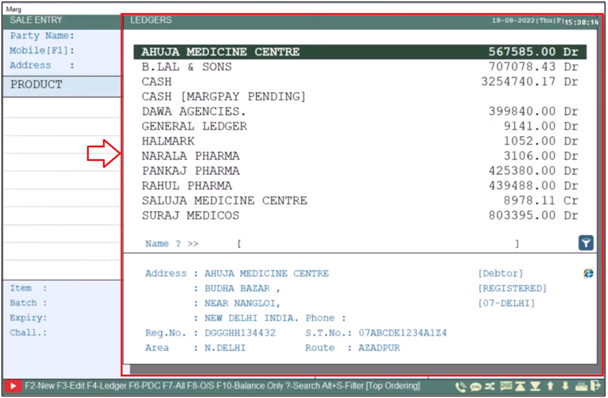
- A 'Ledgers' window will appear.
- The user will select the ledger as per the requirement.
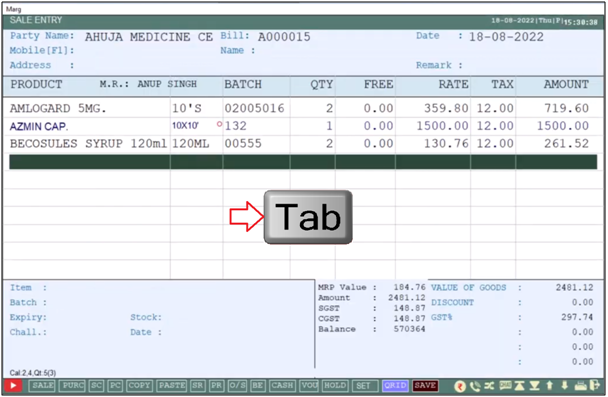
- Now load the items in the bill as per the requirement.
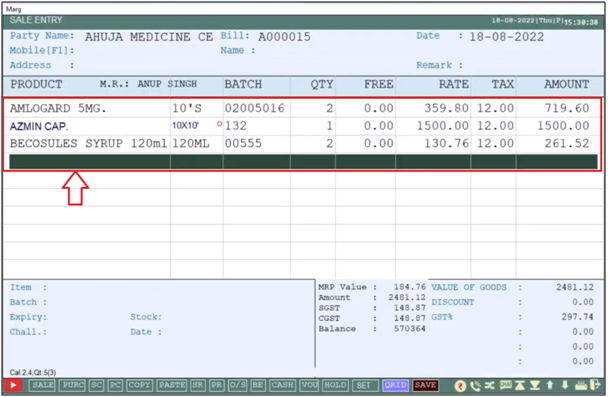
- Now the user will Click on ‘Tab’ key and will save the bill.
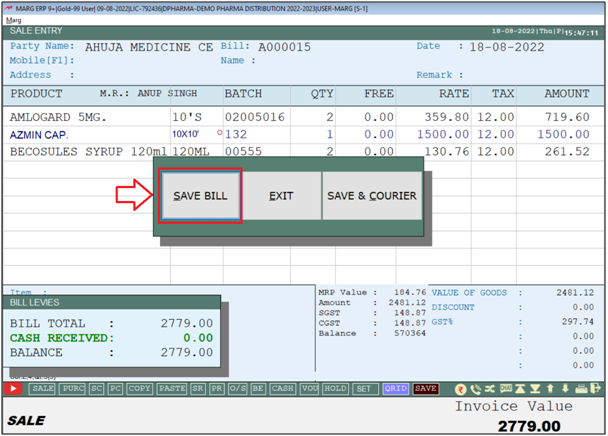
- Now the user will click on 'Save Bill'.
In order to generate the PDF file from the software, the user will press the letter ‘O’.
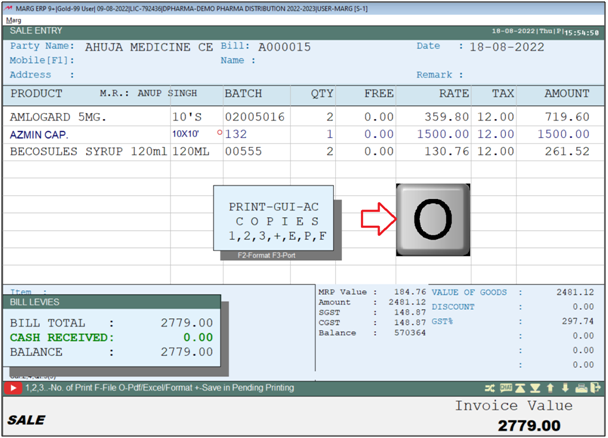
- A ‘Report in Format’ window will appear.
- Click on ‘PDF’ button.
 .
.
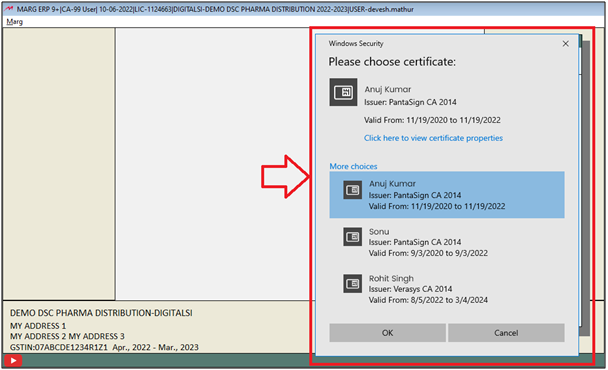
If the digital signature is there of more than 1 person, then the software will ask whose digital signature needs to be printed on the bill.
The user will select the person whose Digital Signature needs to be printed on the bill.
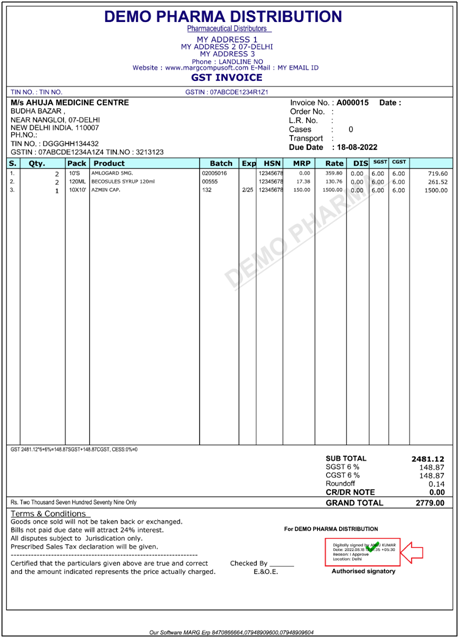
The user can view that the Digital Signature is displayed on the bill.

In This Page


