

Welcome to  -
Marg ERP 9+
-
Marg ERP 9+
Home > Margerp > Serverexe > How to send Backup on Mail through Server in Marg Software ?
How to send Backup on Mail through Server in Marg Software ?

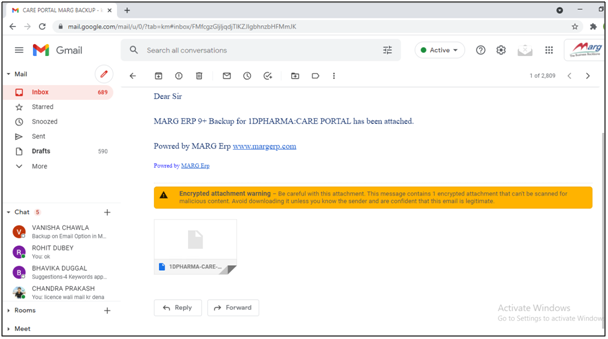
Backup on Email Option in Marg ERP enables the user to save the backup of the software on their email ID for future reference.
In order send Backup on mail, the user will follow the below steps:
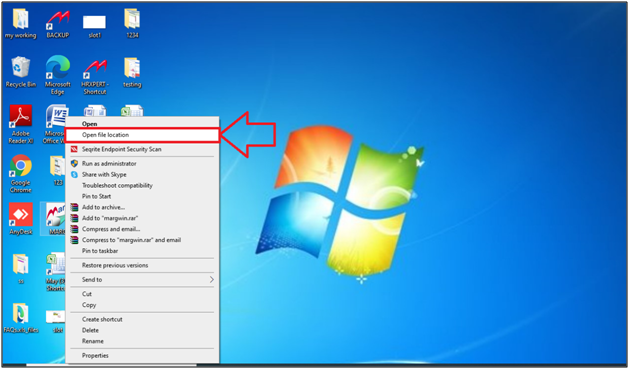
- Firstly, Right Click on Marg Icon >> Select Open file location.
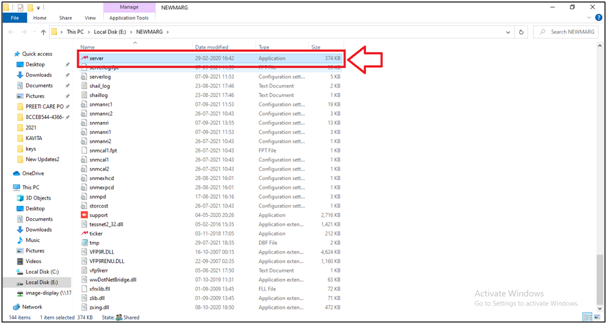
- A Marg folder will open in which the user will select 'Server' file.
- Then press 'Enter' key on it.
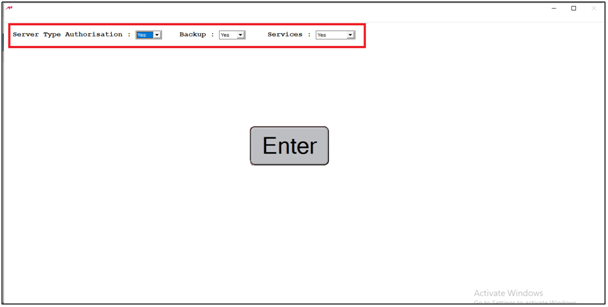
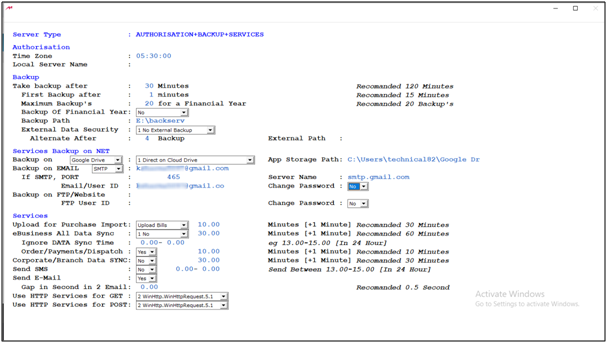
- Now the server file will open in which the user will select:
- In 'Server Type Authorisation' option, the user will select 'Yes'.
- In 'Backup' option, the user will select 'Yes'.
- In 'Services' option, the user will select 'Yes'.
- Press 'Enter' key.
- Now, the all the options of server file will display.
- In 'Backup on E-Mail' option, the user will mention the mail id on which the user needs to send the backup.
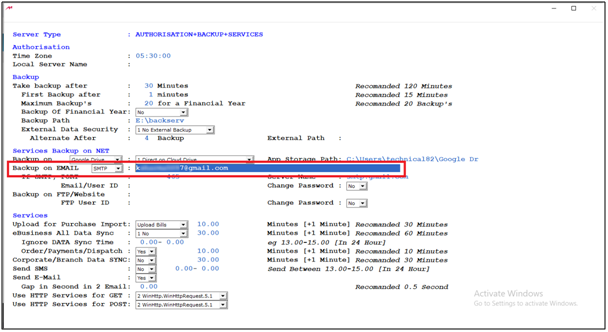
- Select SMTP or Outlook as per the requirement. i.e. SMTP for gmail id and Outlook for outlook mail id.
- Suppose select 'SMTP'.
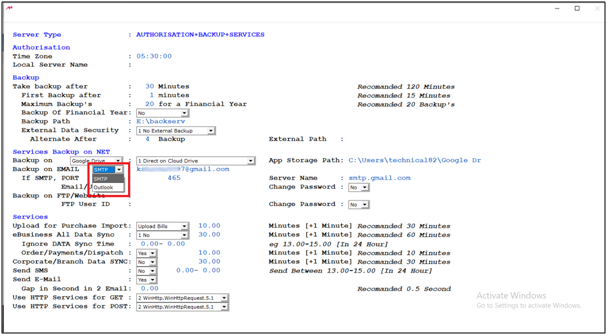
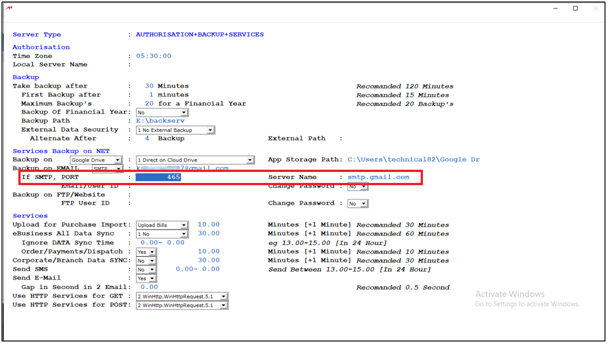
The SMTP Port and Server name should be same as mentioned below:
1. SMTP Port : 465
2. Server Name: smtp.gmail.com
- In 'Email/User ID' option, the user will mention the mail id from which the user needs to send the backup.

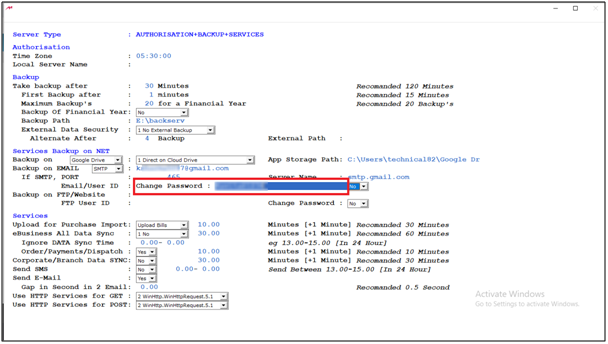
- In 'Change Password' option, the user select 'Yes'.

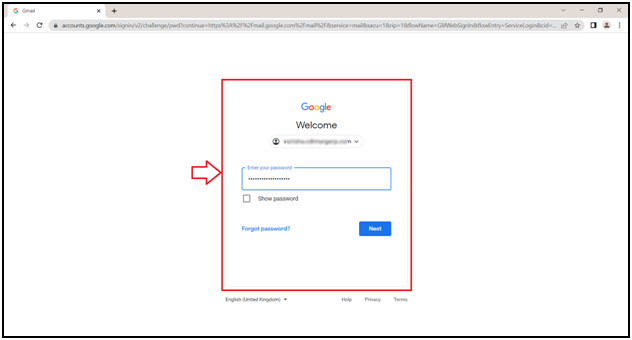
- Now to generate App password, the user will login to Gmail Account by mentioning ‘Email ID’ and ‘Password’.
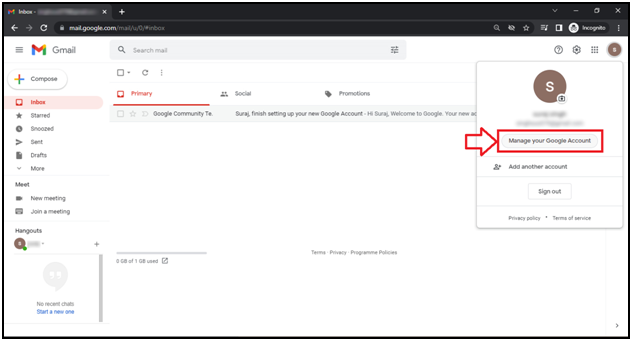
- A ‘Gmail Account’ window will appear.
- From the right side of the Gmail Account, click on the ‘alphabet’ icon.
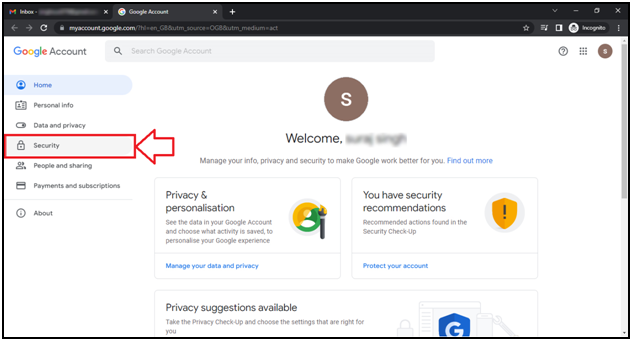
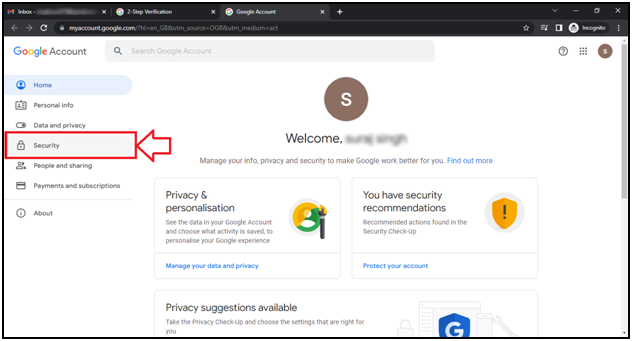
- Click on ‘Manage your Google Account’.
- Then from the left side, click on the ‘Security’ tab.
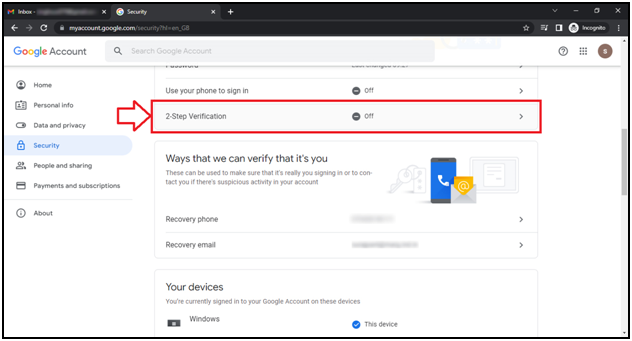
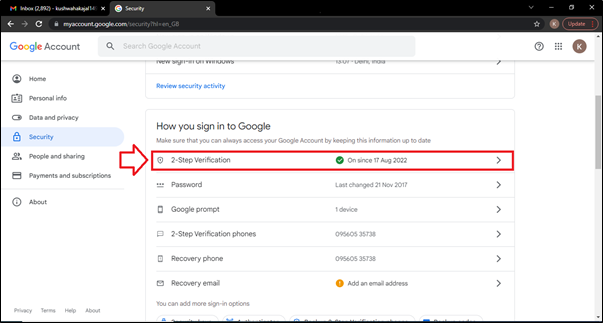
- Now click on ‘2-Step Verification’ option.
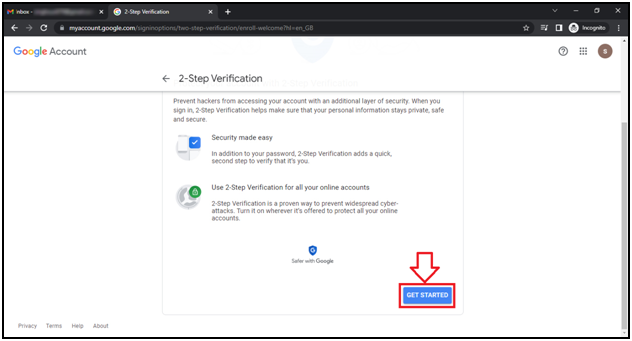
- A ‘2-Step Verification’ window will appear.
- Click on ‘Get Started’ tab.
- Then enter the Gmail ‘Password’ and click on ‘Next’ tab.

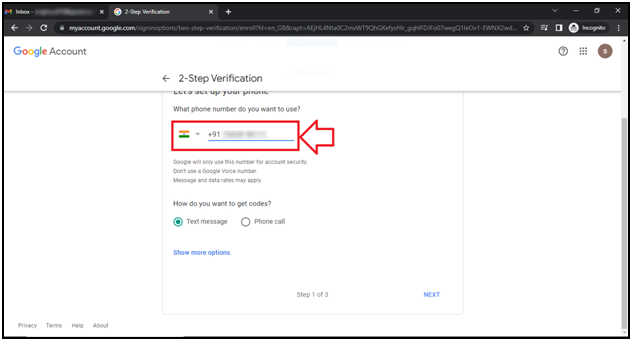
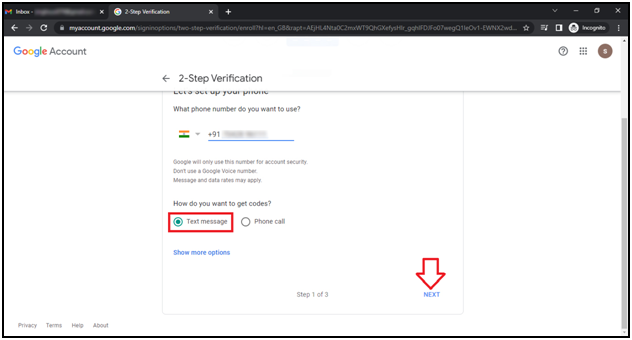
- The user will mention the mobile number which is linked with the Gmail account.
- Then select the ‘medium’ through which the Code needs to be received i.e. Text Message or Call.
- Suppose tick the circle of ‘Text message’.
- Then click on ‘Next’ tab.
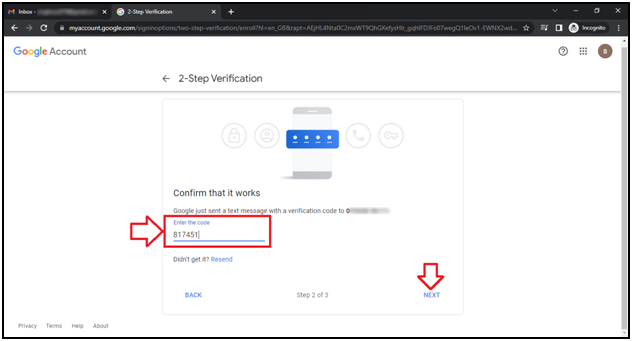
- The user will enter the code (OTP) here which is received via text message.
- Then click on ‘Next’ tab.
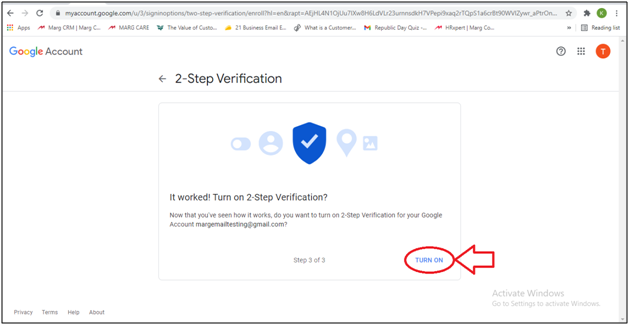
- A ‘2-Step Verification’ window will appear.
- Now the user will turn on the option of 2-Step Verification.
- The user will again click on ‘Manage your Account’ tab.
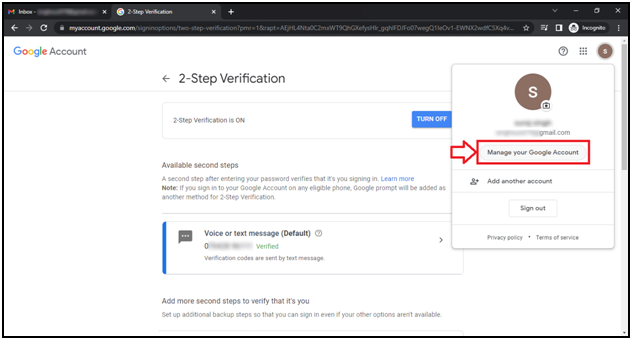
- Click on ‘Security’ tab.
- The user will click on ‘2- Step Verification’ option.
- A ‘2- Step Verification’ window will appear.
- Click on ‘App Passwords’.
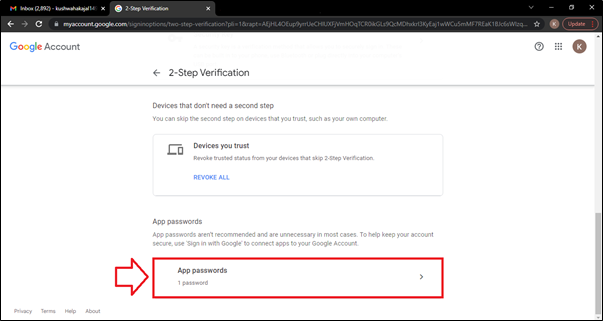
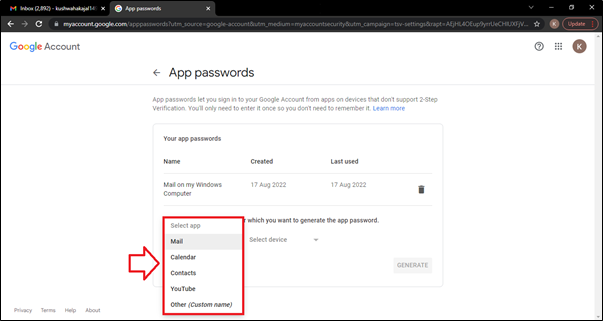
- An ‘App Passwords’ window will appear.
- In this window, the Gmail is asking that for which App the user is activating the password i.e. Mail, Calendar, Contacts, YouTube, etc.
- The user will select the App from the dropdown as per the requirement.
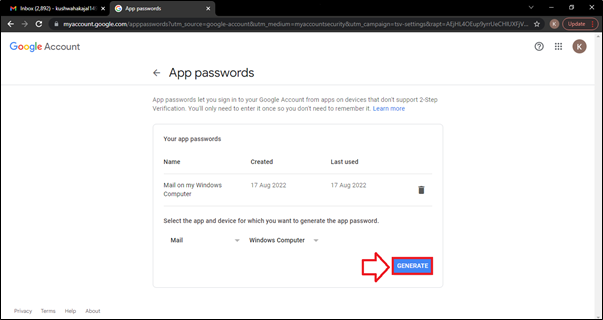
- Suppose select ‘Mail’.
- Then the user will select the device i.e. for which device the App password needs to be generated (Iphone, iPad, Blackberry, Mac, Windows Computer etc.)
- Suppose select ‘Windows Computer’.
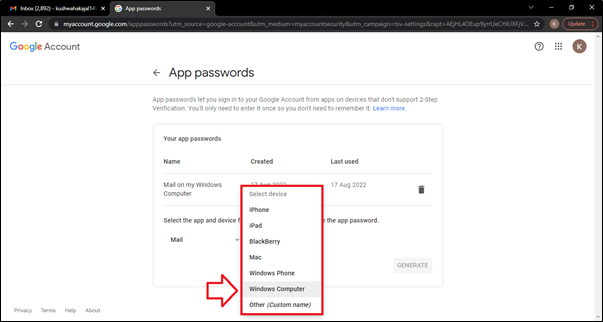
- Click on ‘Generate’ tab.
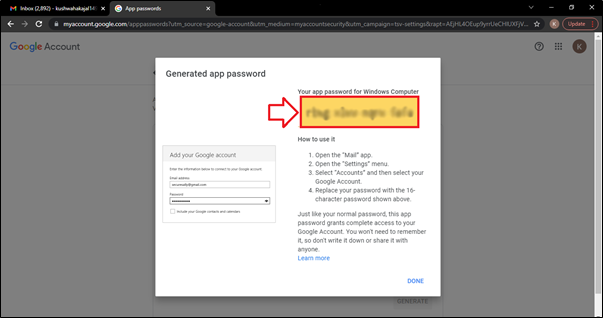
- After that the Gmail will generate the App Password which will be shown only ONCE. The user will copy this password & save it for future use.
-
Now type the password (Without Space) here which the user has generated instead of entering the Gmail Password.
- Again press 'Enter'.
- Then press 'Page Down' key.

In This Page


