


Welcome to  -
Marg ERP 9+
-
Marg ERP 9+
Home > Margerp > Transaction Import > What is the process of Purchase Import through Excel / DBF / CSV in Marg Software ?
What is the process of Purchase Import through Excel / DBF / CSV in Marg Software ?

Overview/Introduction to Purchase Import in Marg ERP Software
Process of Import Purchase from XLS/DBF/CSV
OVERVIEW/INTRODUCTION TO PURCHASE IMPORT IN MARG ERP SOFTWARE
- Transaction Import option is basically used to Import the Purchase list from any outer source like Excel file, CSV file, etc.
- With the help of Marg ERP Software, the user can Import the received file of the invoice in Marg ERP Software without doing any manual entry.
- ‘XLS/DBF/CSV’ feature of Transaction Import requires method to import the purchase entry.
PROCESS OF IMPORT PURCHASE FROM XLS/DBF/CSV
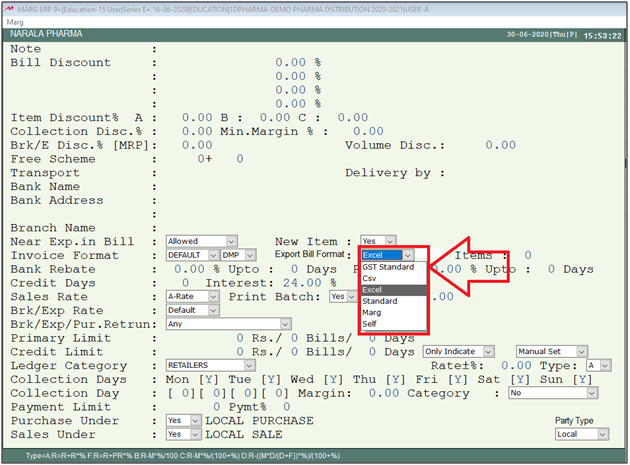
- Firstly, the user will select the format in other details of the party from whom the transaction is been made.
- In order to import the purchase transaction through ‘XLS/DBF/CSV/PDF Bill Import’ feature, the user will select the ‘Excel/CSV/DBF as per the requirement in Other Details window of the party.
- Suppose, select ‘Excel’.
Additional Tip: To Import transaction in Excel/CSV format, the user needs to create the method for purchase import.
- Go to Transactions > Transaction Import > XLS/DBF/CSV/PDF Bill Import. Press Enter.
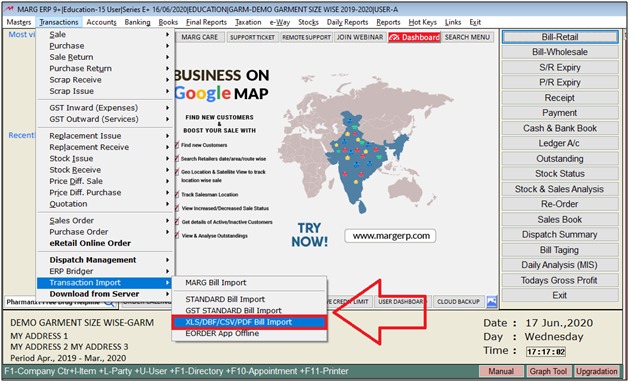
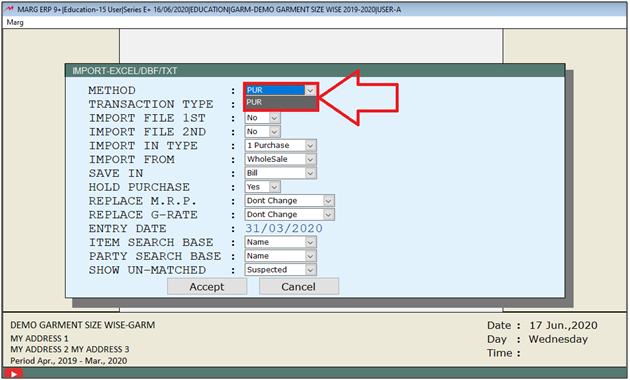
- An Import-Excel/DBF/TXT window will appear.
- In 'Method' field, the user will select the required method to import the inventory.
Note 1: If in case, the user has multiple methods to import the inventory then can easily choose the required method at the time of import.
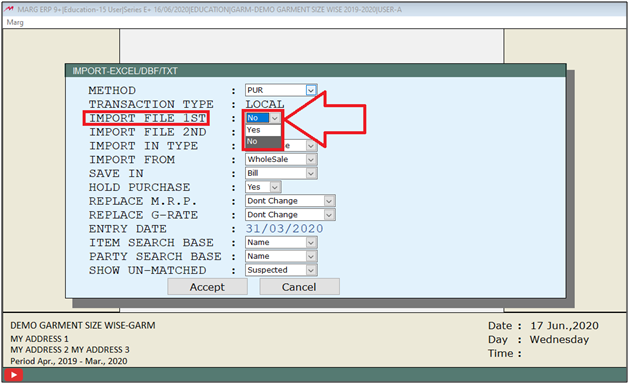
- In 'Import File 1st' field, the user will select 'No' from the dropdown.
Note 2: If the user has data in two different files then select other file in 'Import File 2nd field otherwise keep this field as 'No'.
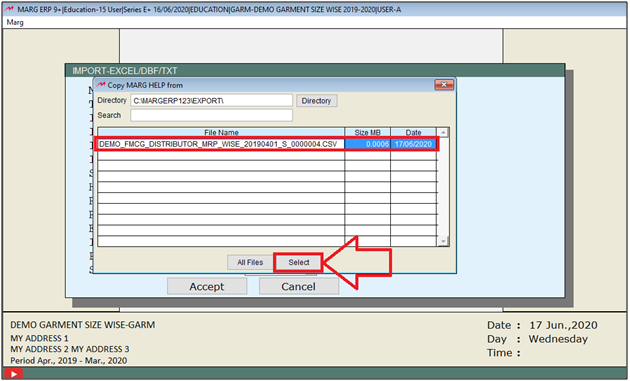
- A 'Copy Marg Help From' window will appear.
- The user will select the location i.e, from where the transaction needs to be imported.
- Click on 'Select'.
- Then the selected path will automatically get picked in this field.

- In ‘Import From’ field, the user will select that whether the import needs to be done from wholesale or Retail.
- Suppose, select ‘Wholesale’.

- In ‘Save In ’ field, the user will select whether to save in Bill or in Challan.
- Suppose, select ‘Bill’.

- In 'Replace A-Rate/Replace G-Rate' field, the user will select with which rate the user needs to replace A/G- Rate.
- If the user needs to replace rates then select 'Don’t change' from the dropdown.

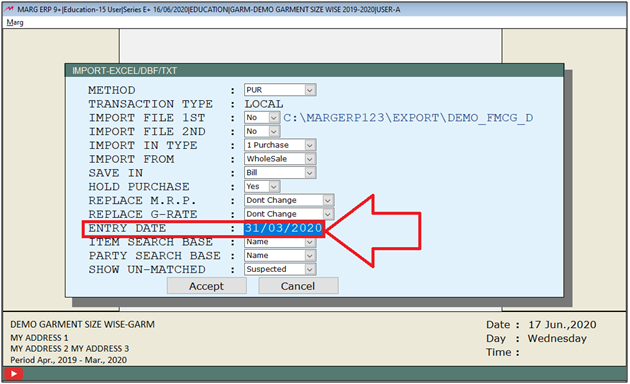
- Next in ‘Entry Date’ field, the user will specify the entry date.
- Suppose, enter ’31-03-20’.
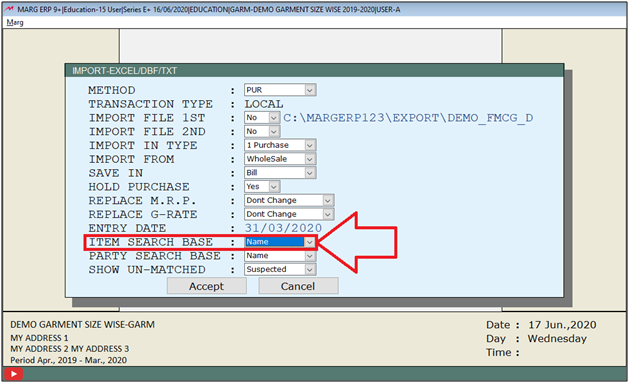
- In ‘Item Search Base’ field, the user will select the base to search the item from the drop down.
- Suppose, select ‘Name.
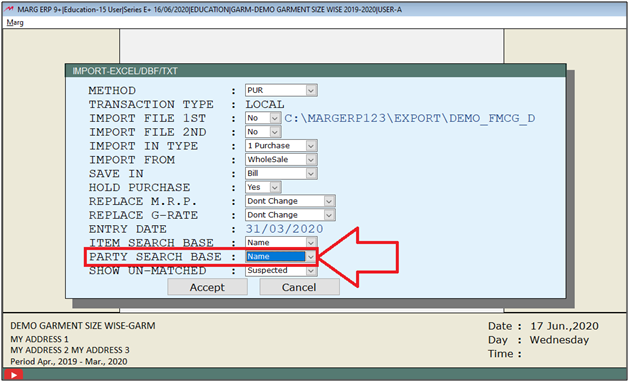
- In ‘Party Search Base’ field, the user will select the base to search the party from the drop down.
- Suppose, select ‘Name’.
- In ‘Show un-matched’ field, the user will select whether unmatched items must be displayed or all items that are mapped must be displayed along with the un-matched items.
- Suppose, select ‘Un-matched’.

- Then click on ‘Accept’.

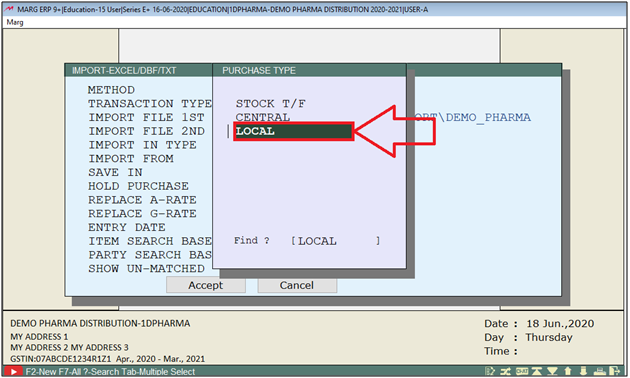
- A ‘Purchase Type’ window will appear.
- The user will select the Purchase type.
- Suppose, select ‘Local’.
- A Ledgers window will appear.
- The user will now select the ledger to map.
- Suppose, select ‘Narala Pharma’.

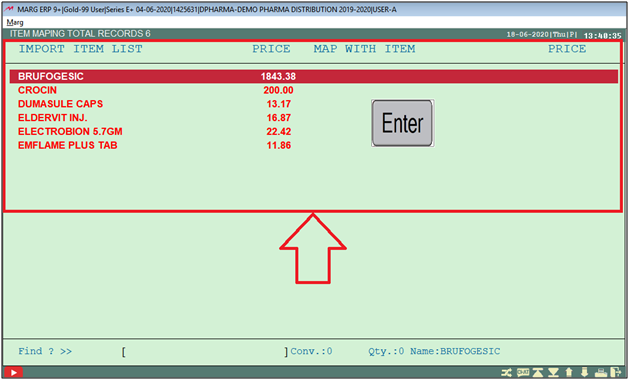
- Then an ‘Item Mapping Total Records’ window will appear.
- Here, all the items of that bill will get displayed which needs to be imported in the software.
- If an item is not been created in the software then the user will create it first by pressing (+) on this window.
- If an item has already been created in the software, then the software will automatically map the existing items.
- But if user needs to map it with other items then can map it by pressing 'Enter' key on it.
- Suppose, the user has already created the item. So, the software has automatically mapped those items.
- Now press 'Enter' key.
- A Map Item window will appear.
- The user will select the item for mapping. Press Enter.
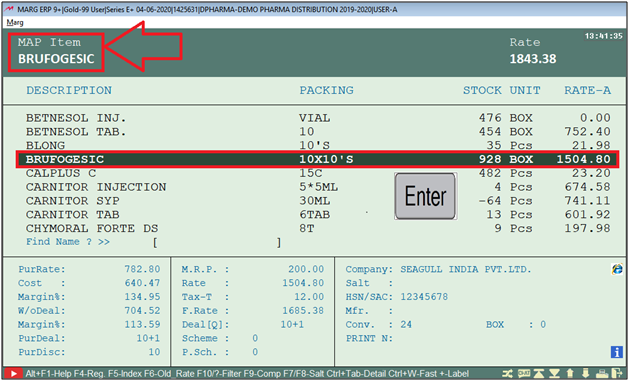
- Similarly, the user can map all the items by pressing the 'Enter' key on it.
- The user will press ESC key to exit from this window.
- Now a ‘Save Changes’ window will appear in which the user will select ‘Yes’.

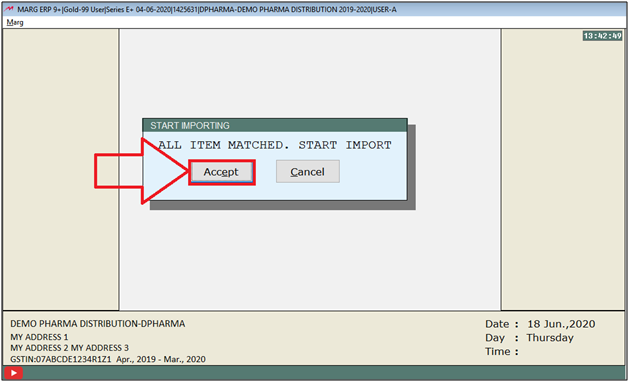
- A ‘Start Importing’ window will appear.
- The user will select ‘Accept’.
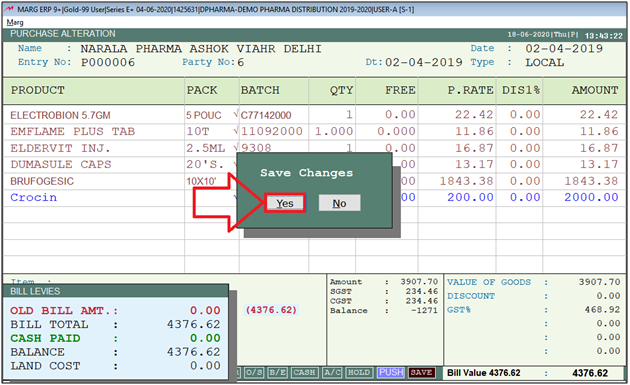
- Now the purchase bill will get imported where the user will save the transaction by pressing CTRL+W key.

- Then a Save Changes window will appear.
- The user will select ‘Yes’ to save the transaction.

In This Page


